Funtap Publisher Integration Guide
Overview
The Funtap publisher Software Development Kit (SDK) integration guide explains how to apply this SDK to your app after completing a publishing contract with Funtap, and how to configure an Appraisal Build for Vietnam publishing license review and a Service Build for live service. Depending on the build type, Hive SDK uses different Funtap modules and settings to integrate the User Interface (UI) and Application Programming Interface (API) required for the login screen and user info update feature. Applying this configuration allows you to prepare builds that comply with Vietnam service policies and government regulations.
How to apply Appraisal Build
An Appraisal Build is a build that an Android app submits for Vietnam publishing license review. In this build, the Funtap login feature must function properly.
Preparation
Before you start the Appraisal Build process, you must obtain the appraisal appKey from Funtap. In Native, enter this value in hive_config.xml; in Unity, enter it in the Funtap appKey field under [Top toolbar > Hive > HiveConfig > Optional]. If this value is not ready, you cannot complete Step 3.
Step 1. Set up the Funtap-Appraisal library
In Native, add the dependency for Appraisal to the module-level build.gradle file.
// Funtap Appraisal module
implementation "com.com2us.android.hive:hive-authv4-provider-funtap-appraisal"
In Unity, click ExternalDependency in [Top toolbar > Hive], then select the Funtap-Appraisal item.
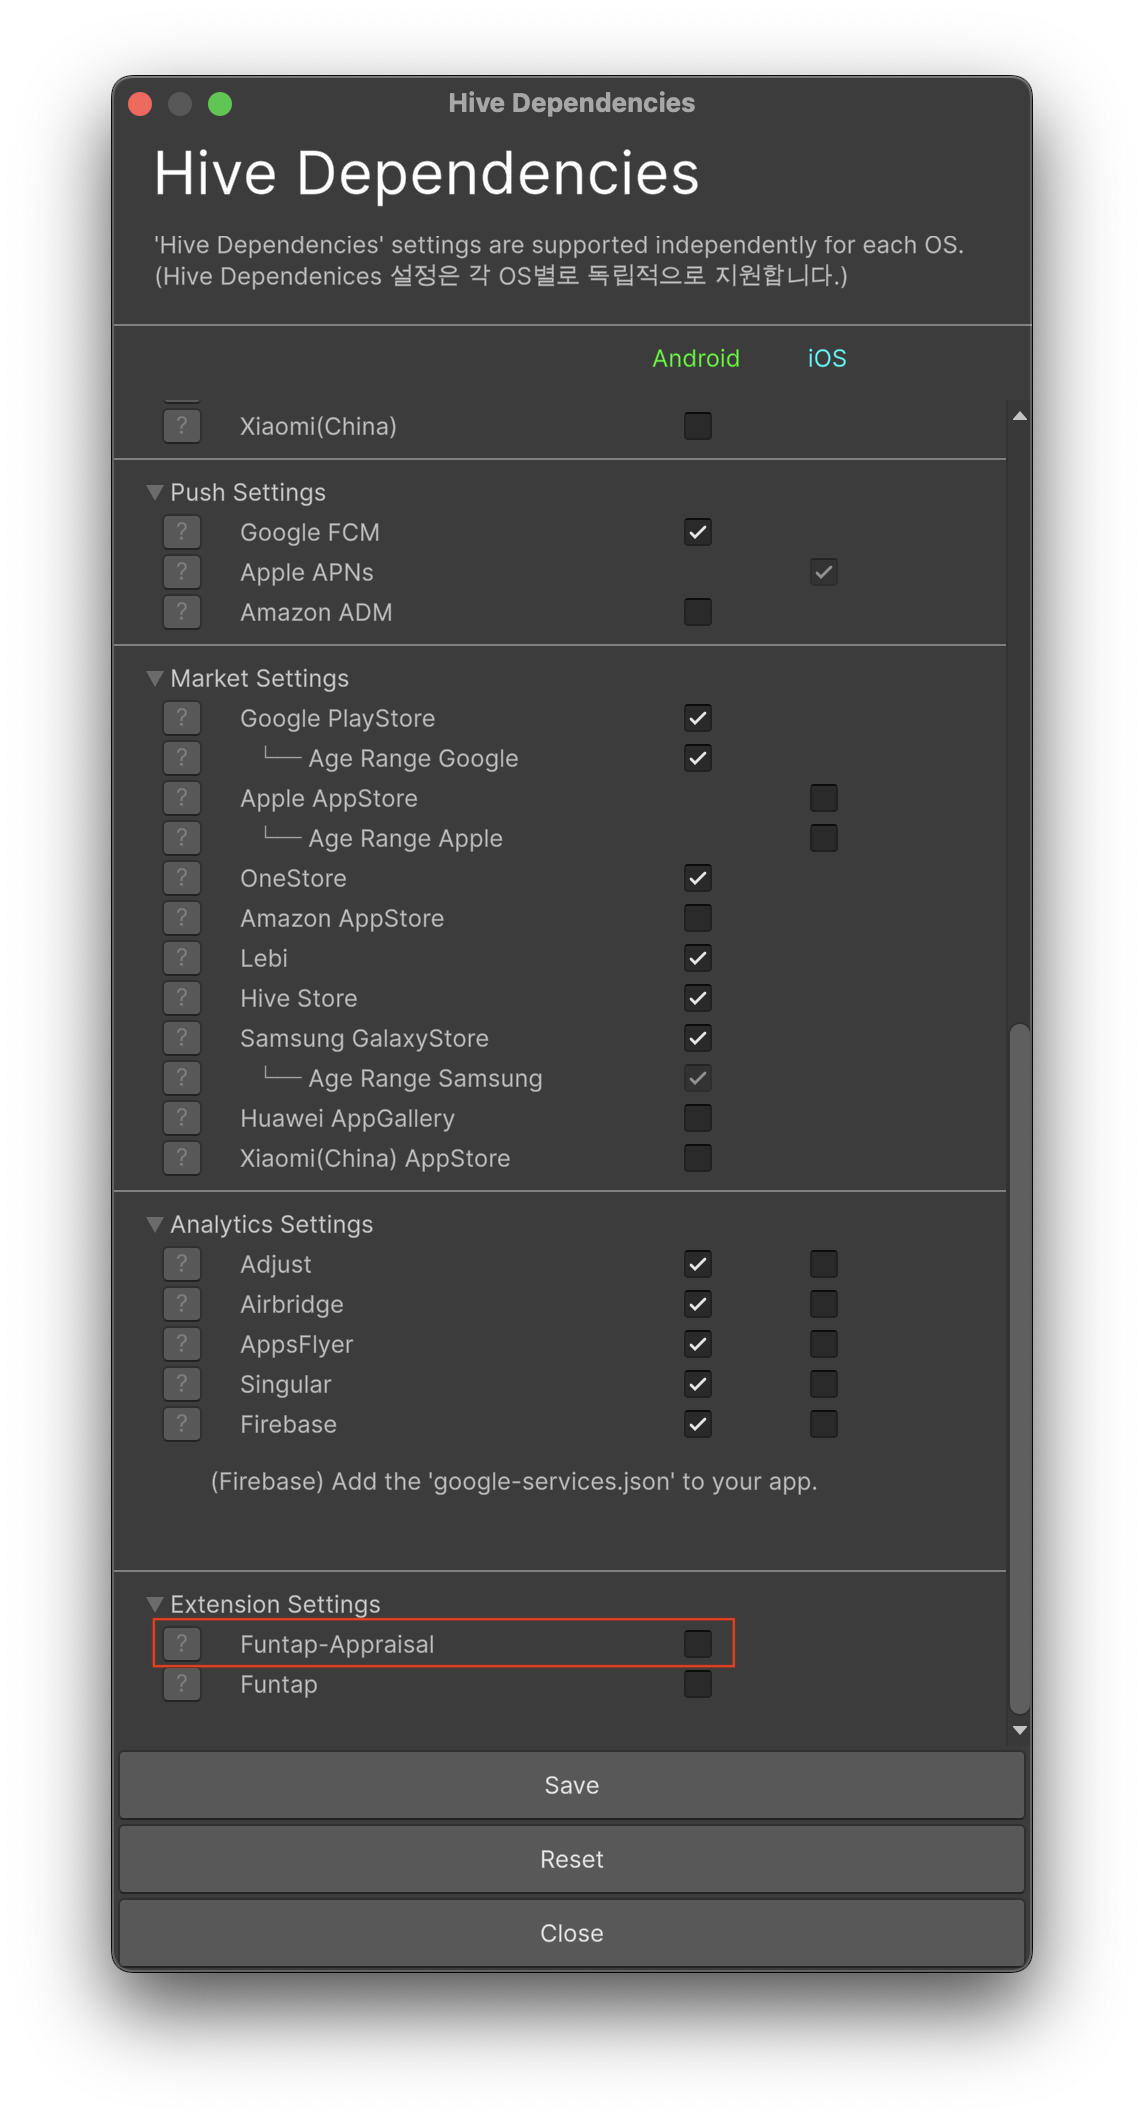
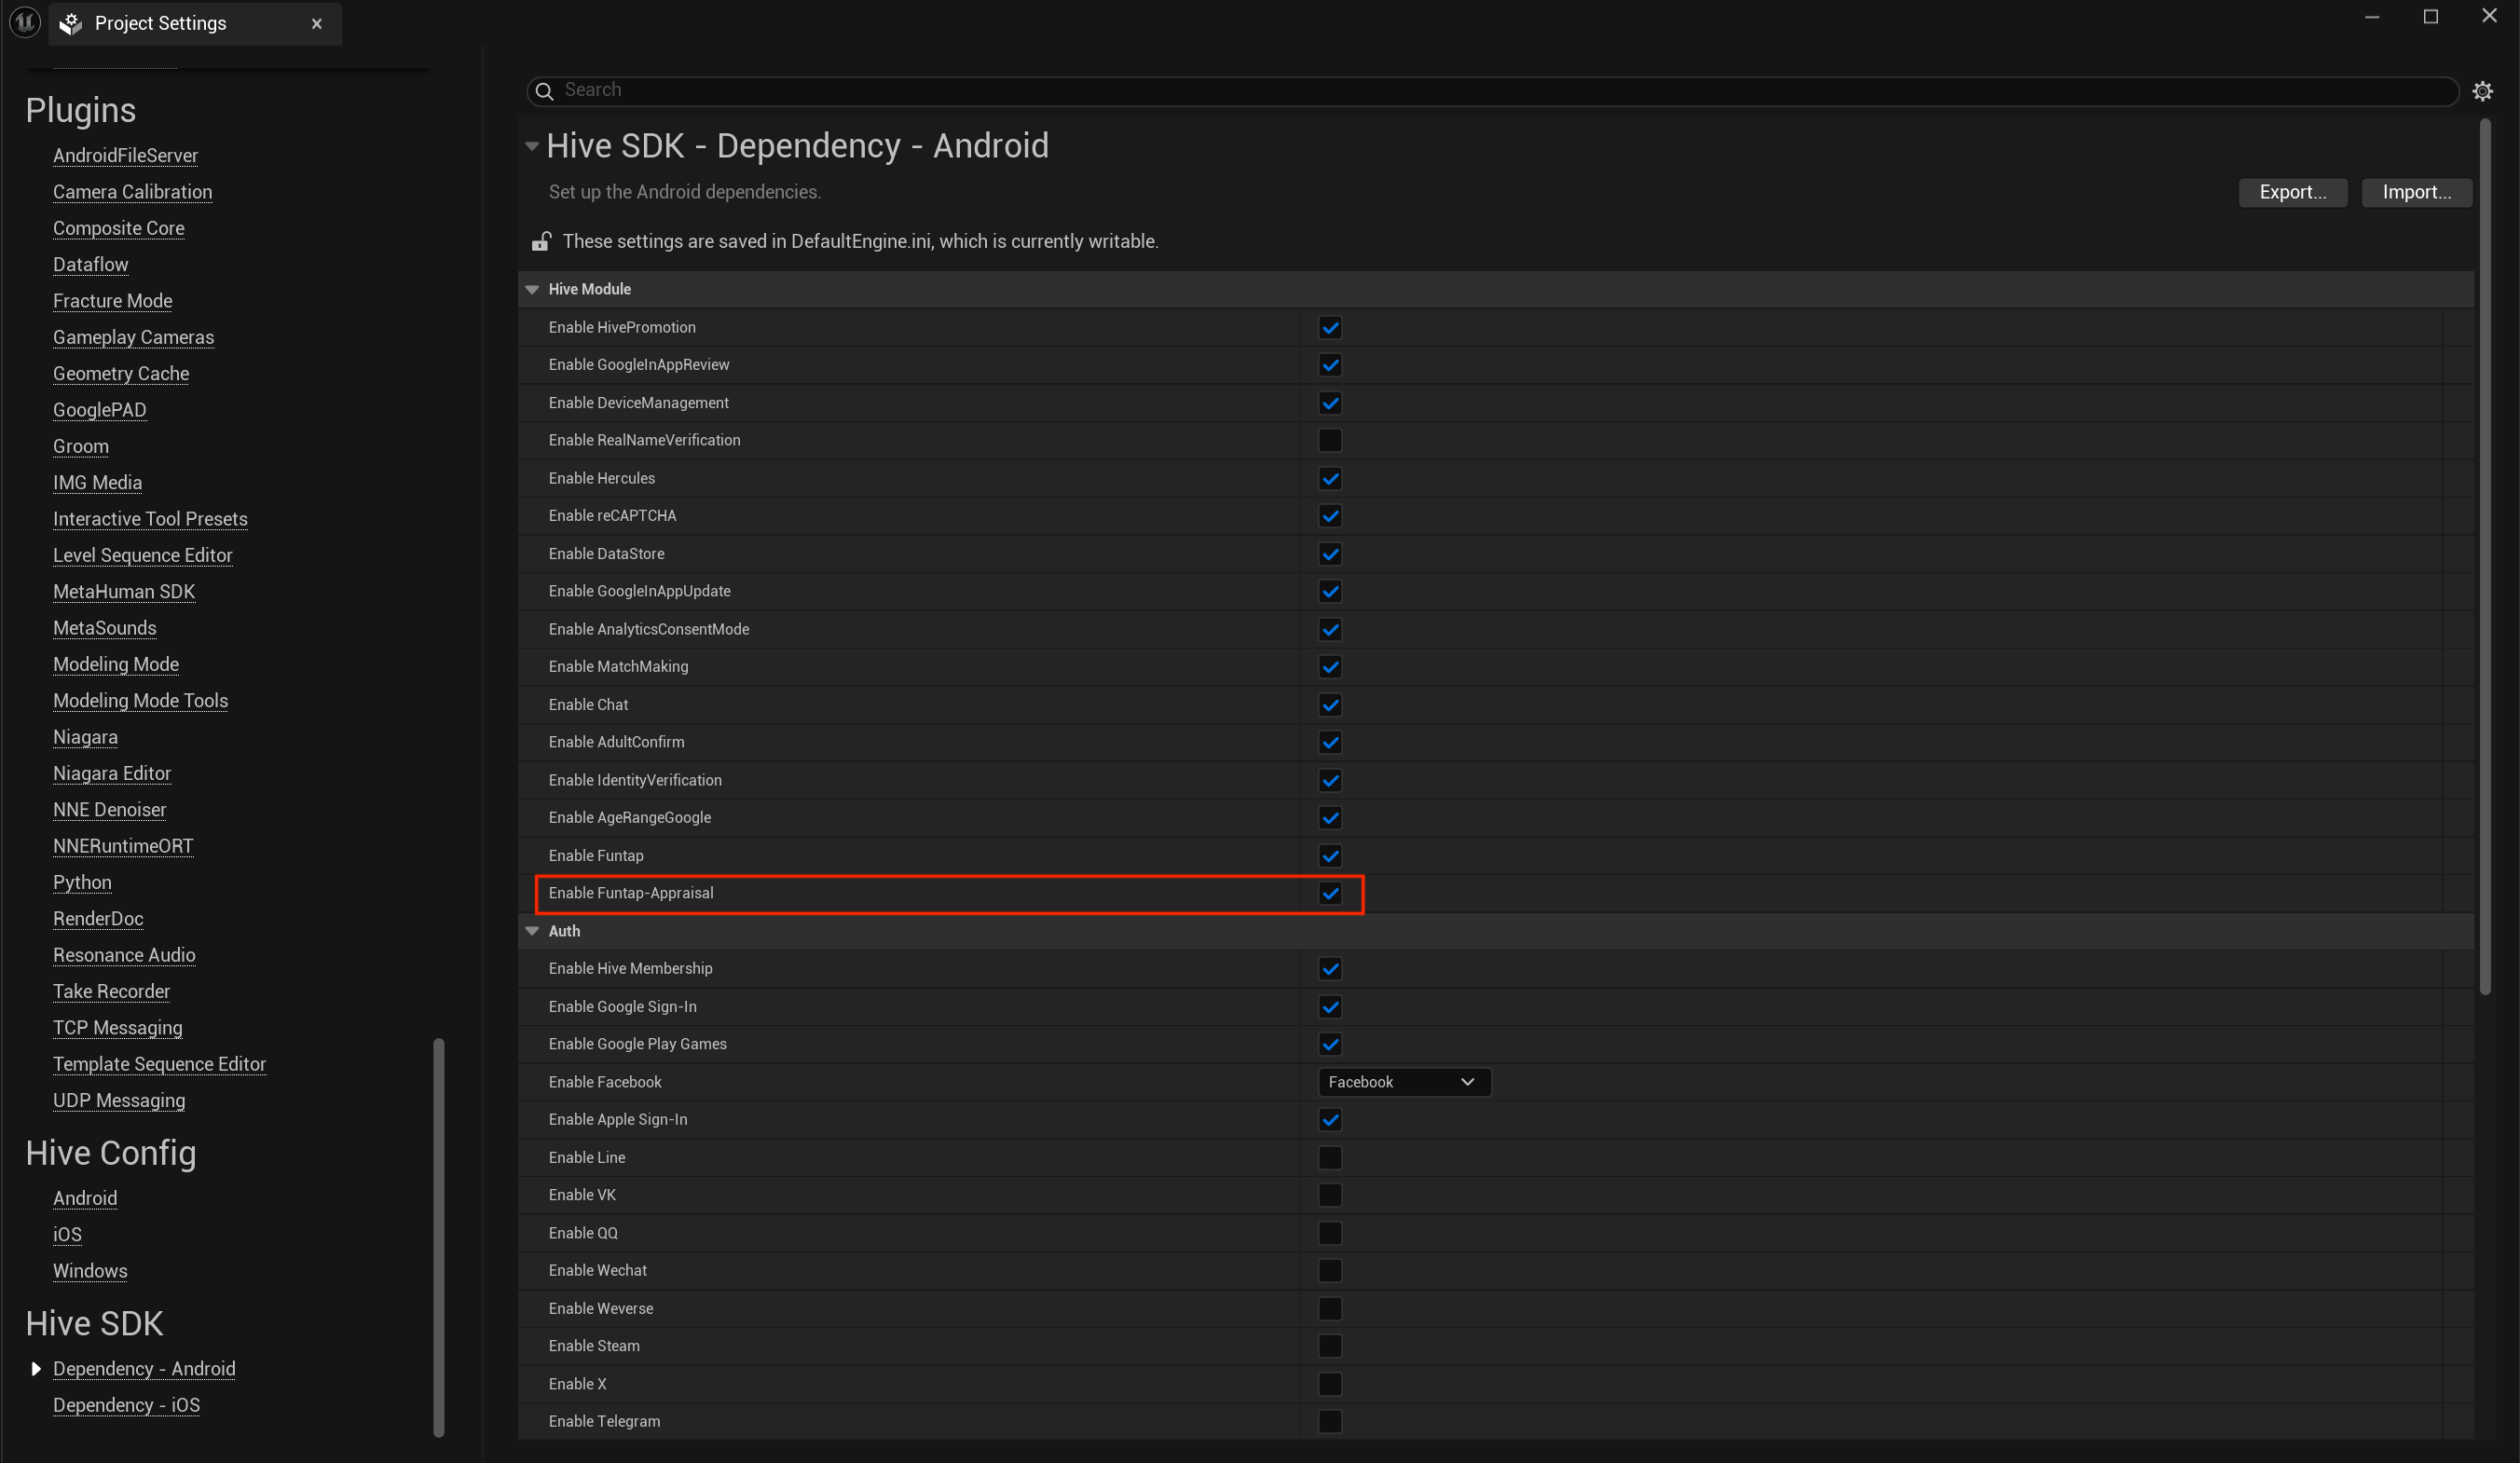
In Unreal Engine, select the Funtap-Appraisal item in [Edit > Project Settings > Hive SDK > Dependency - Android].
Step 2. Set permissions for the Funtap-Appraisal library
To integrate the Funtap-Appraisal library, add the following permission settings to the AndroidManifest.xml file.
In Native, add the permissions to the module-level AndroidManifest.xml file.
- <project>/app/src/main/AndroidManifest.xml
In Unity, add the permissions to the AndroidManifest.xml file in Plugins/Android.
- <project>/Assets/Plugins/Android/AndroidManifest.xml
In Unreal Engine, add the permissions to HiveSDKAndroid_UPL.xml in Plugins/HIVESDK/Source/HiveSDKAndroid.
- <project>/Assets/Plugins/HIVESDK/Source/HiveSDKAndroid/HiveSDKAndroid_UPL.xml
Add the following permissions.
<uses-permission android:name="android.permission.WRITE_EXTERNAL_STORAGE" />
<uses-permission android:name="android.permission.ACCESS_NETWORK_STATE" />
<uses-permission android:name="android.permission.ACCESS_WIFI_STATE" />
<uses-permission android:name="android.permission.INTERNET" />
<uses-permission android:name="android.permission.READ_EXTERNAL_STORAGE" />
<uses-permission android:name="android.permission.SYSTEM_ALERT_WINDOW" />
<uses-permission android:name="android.permission.WAKE_LOCK" />
<uses-permission android:name="android.permission.VIBRATE" />
<uses-permission android:name="com.google.android.c2dm.permission.RECEIVE" />
Step 3. Apply the Funtap publisher setting value (appKey)
In Native, add the appKey received from the Funtap publisher to the hive_config.xml file.
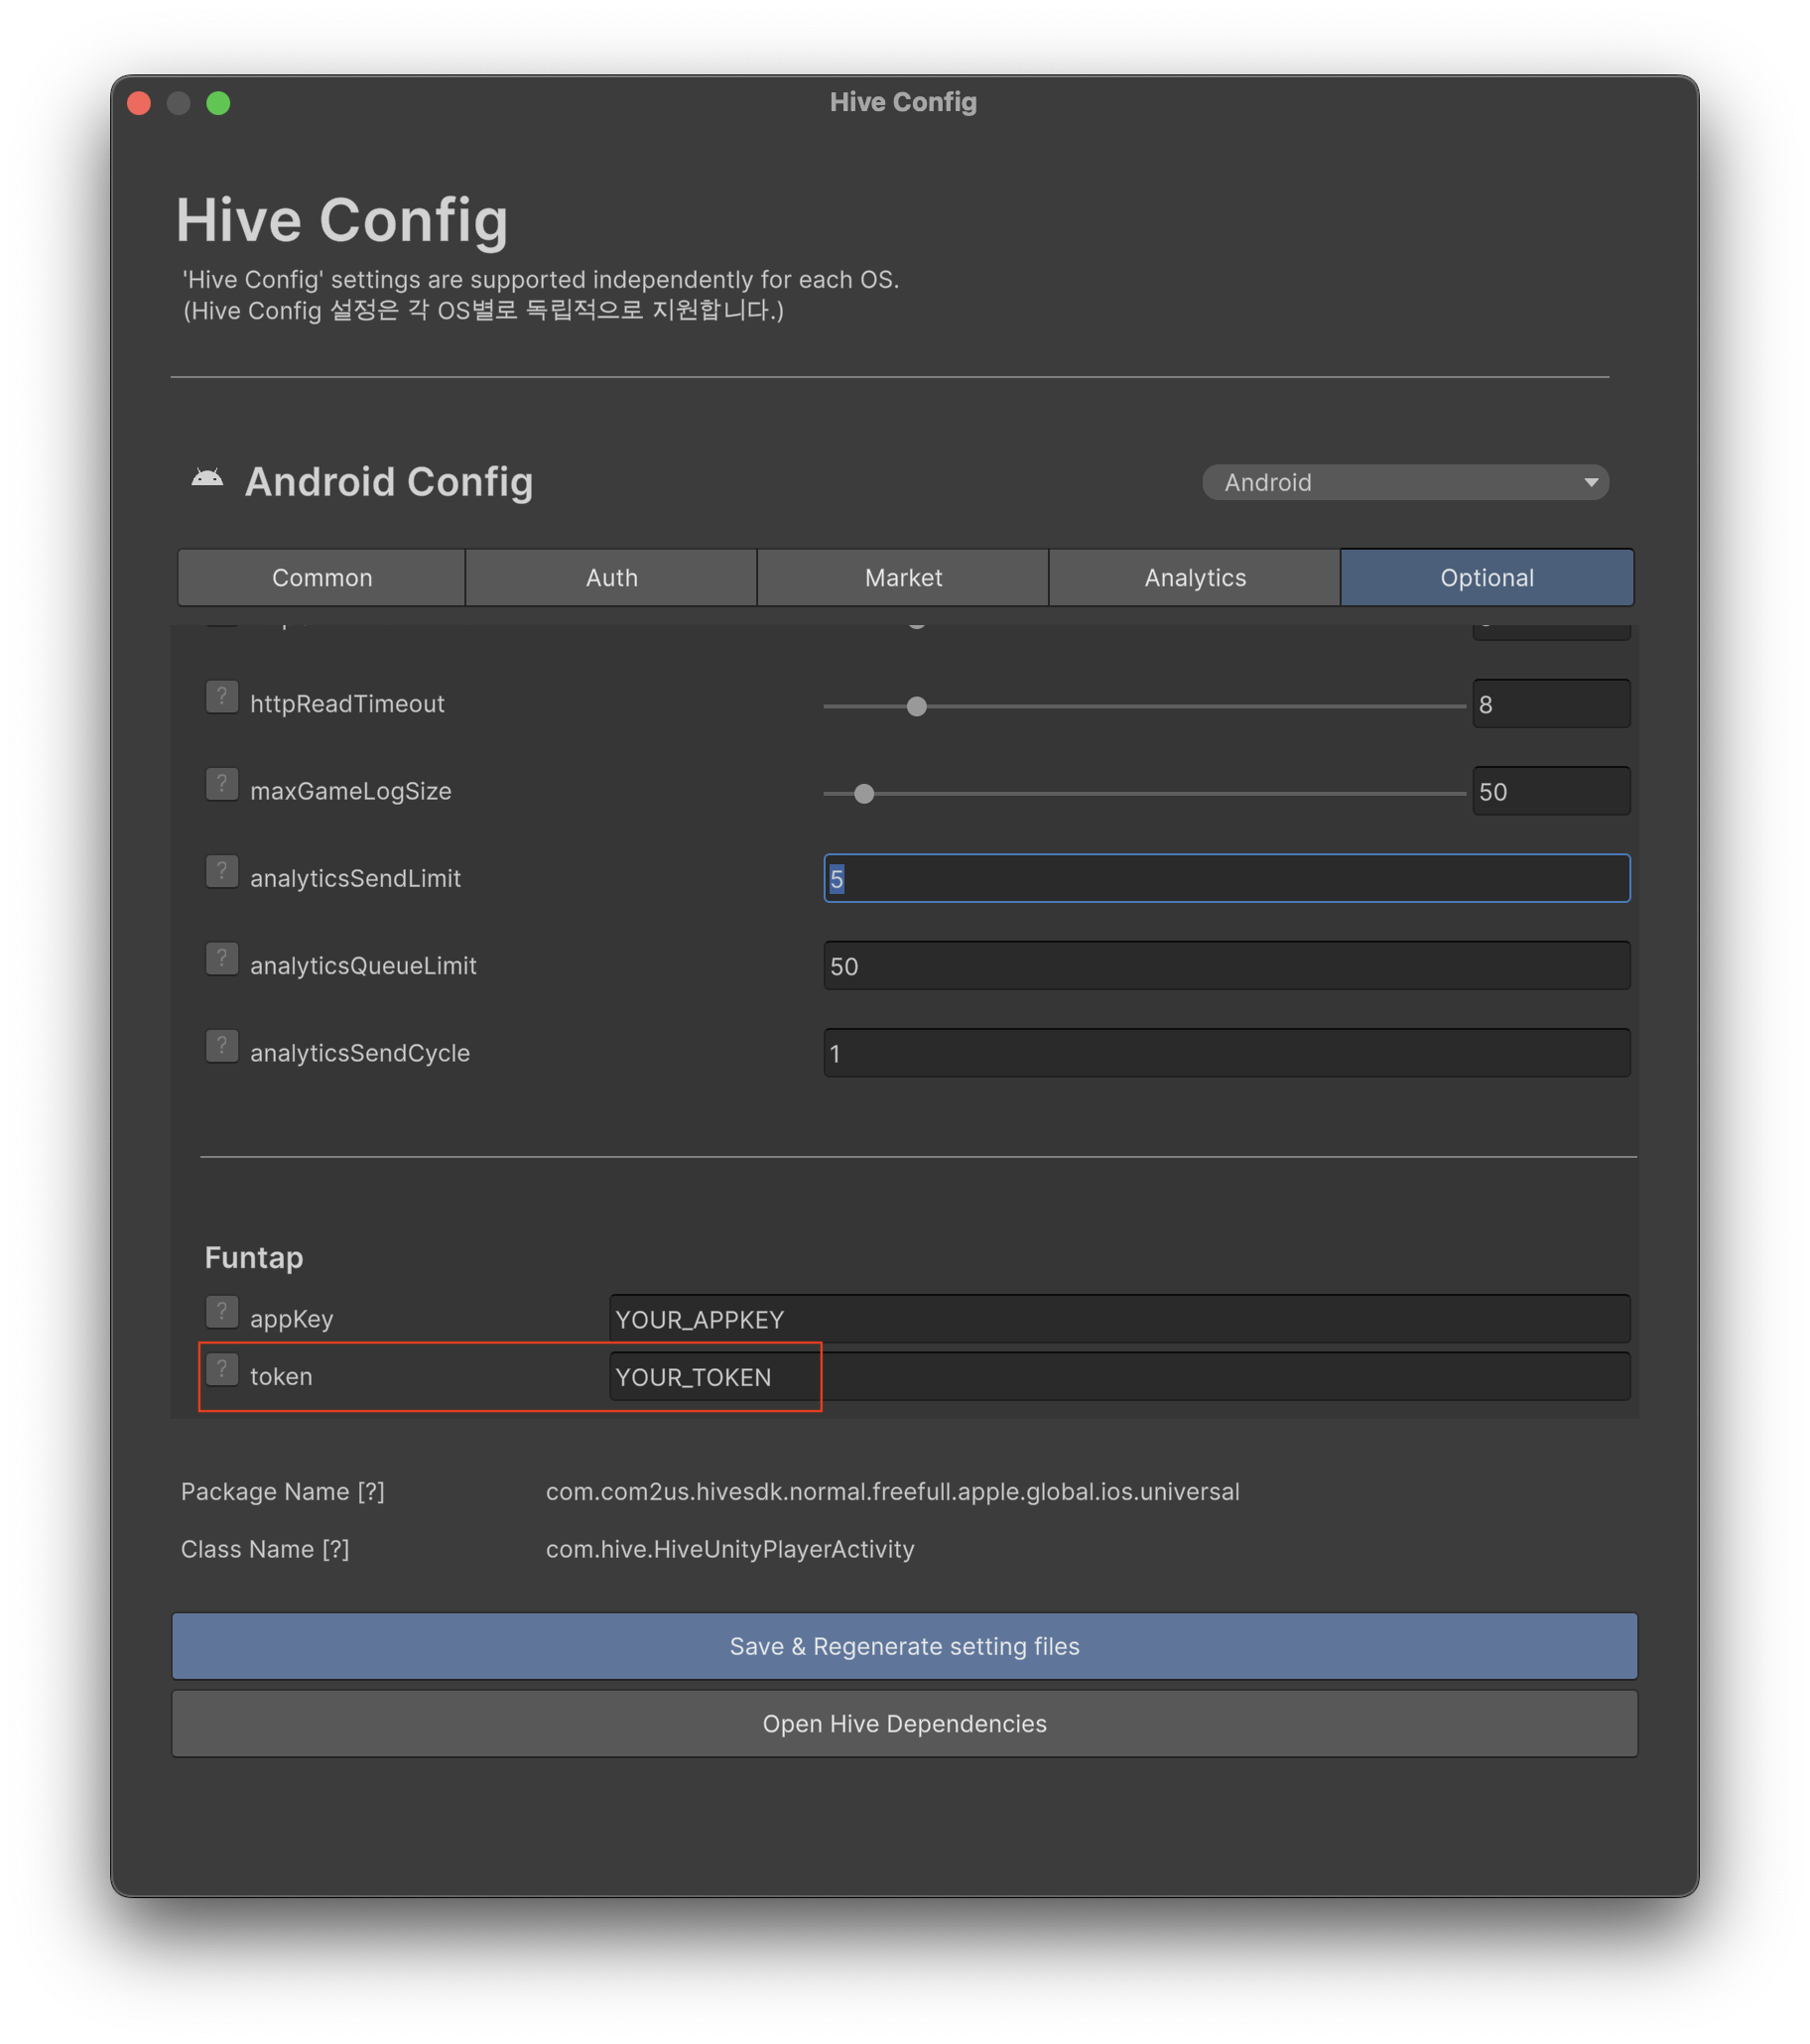
In Unity, click Optional in [Top toolbar > Hive > HiveConfig], then enter the issued key in Funtap's appKey field.
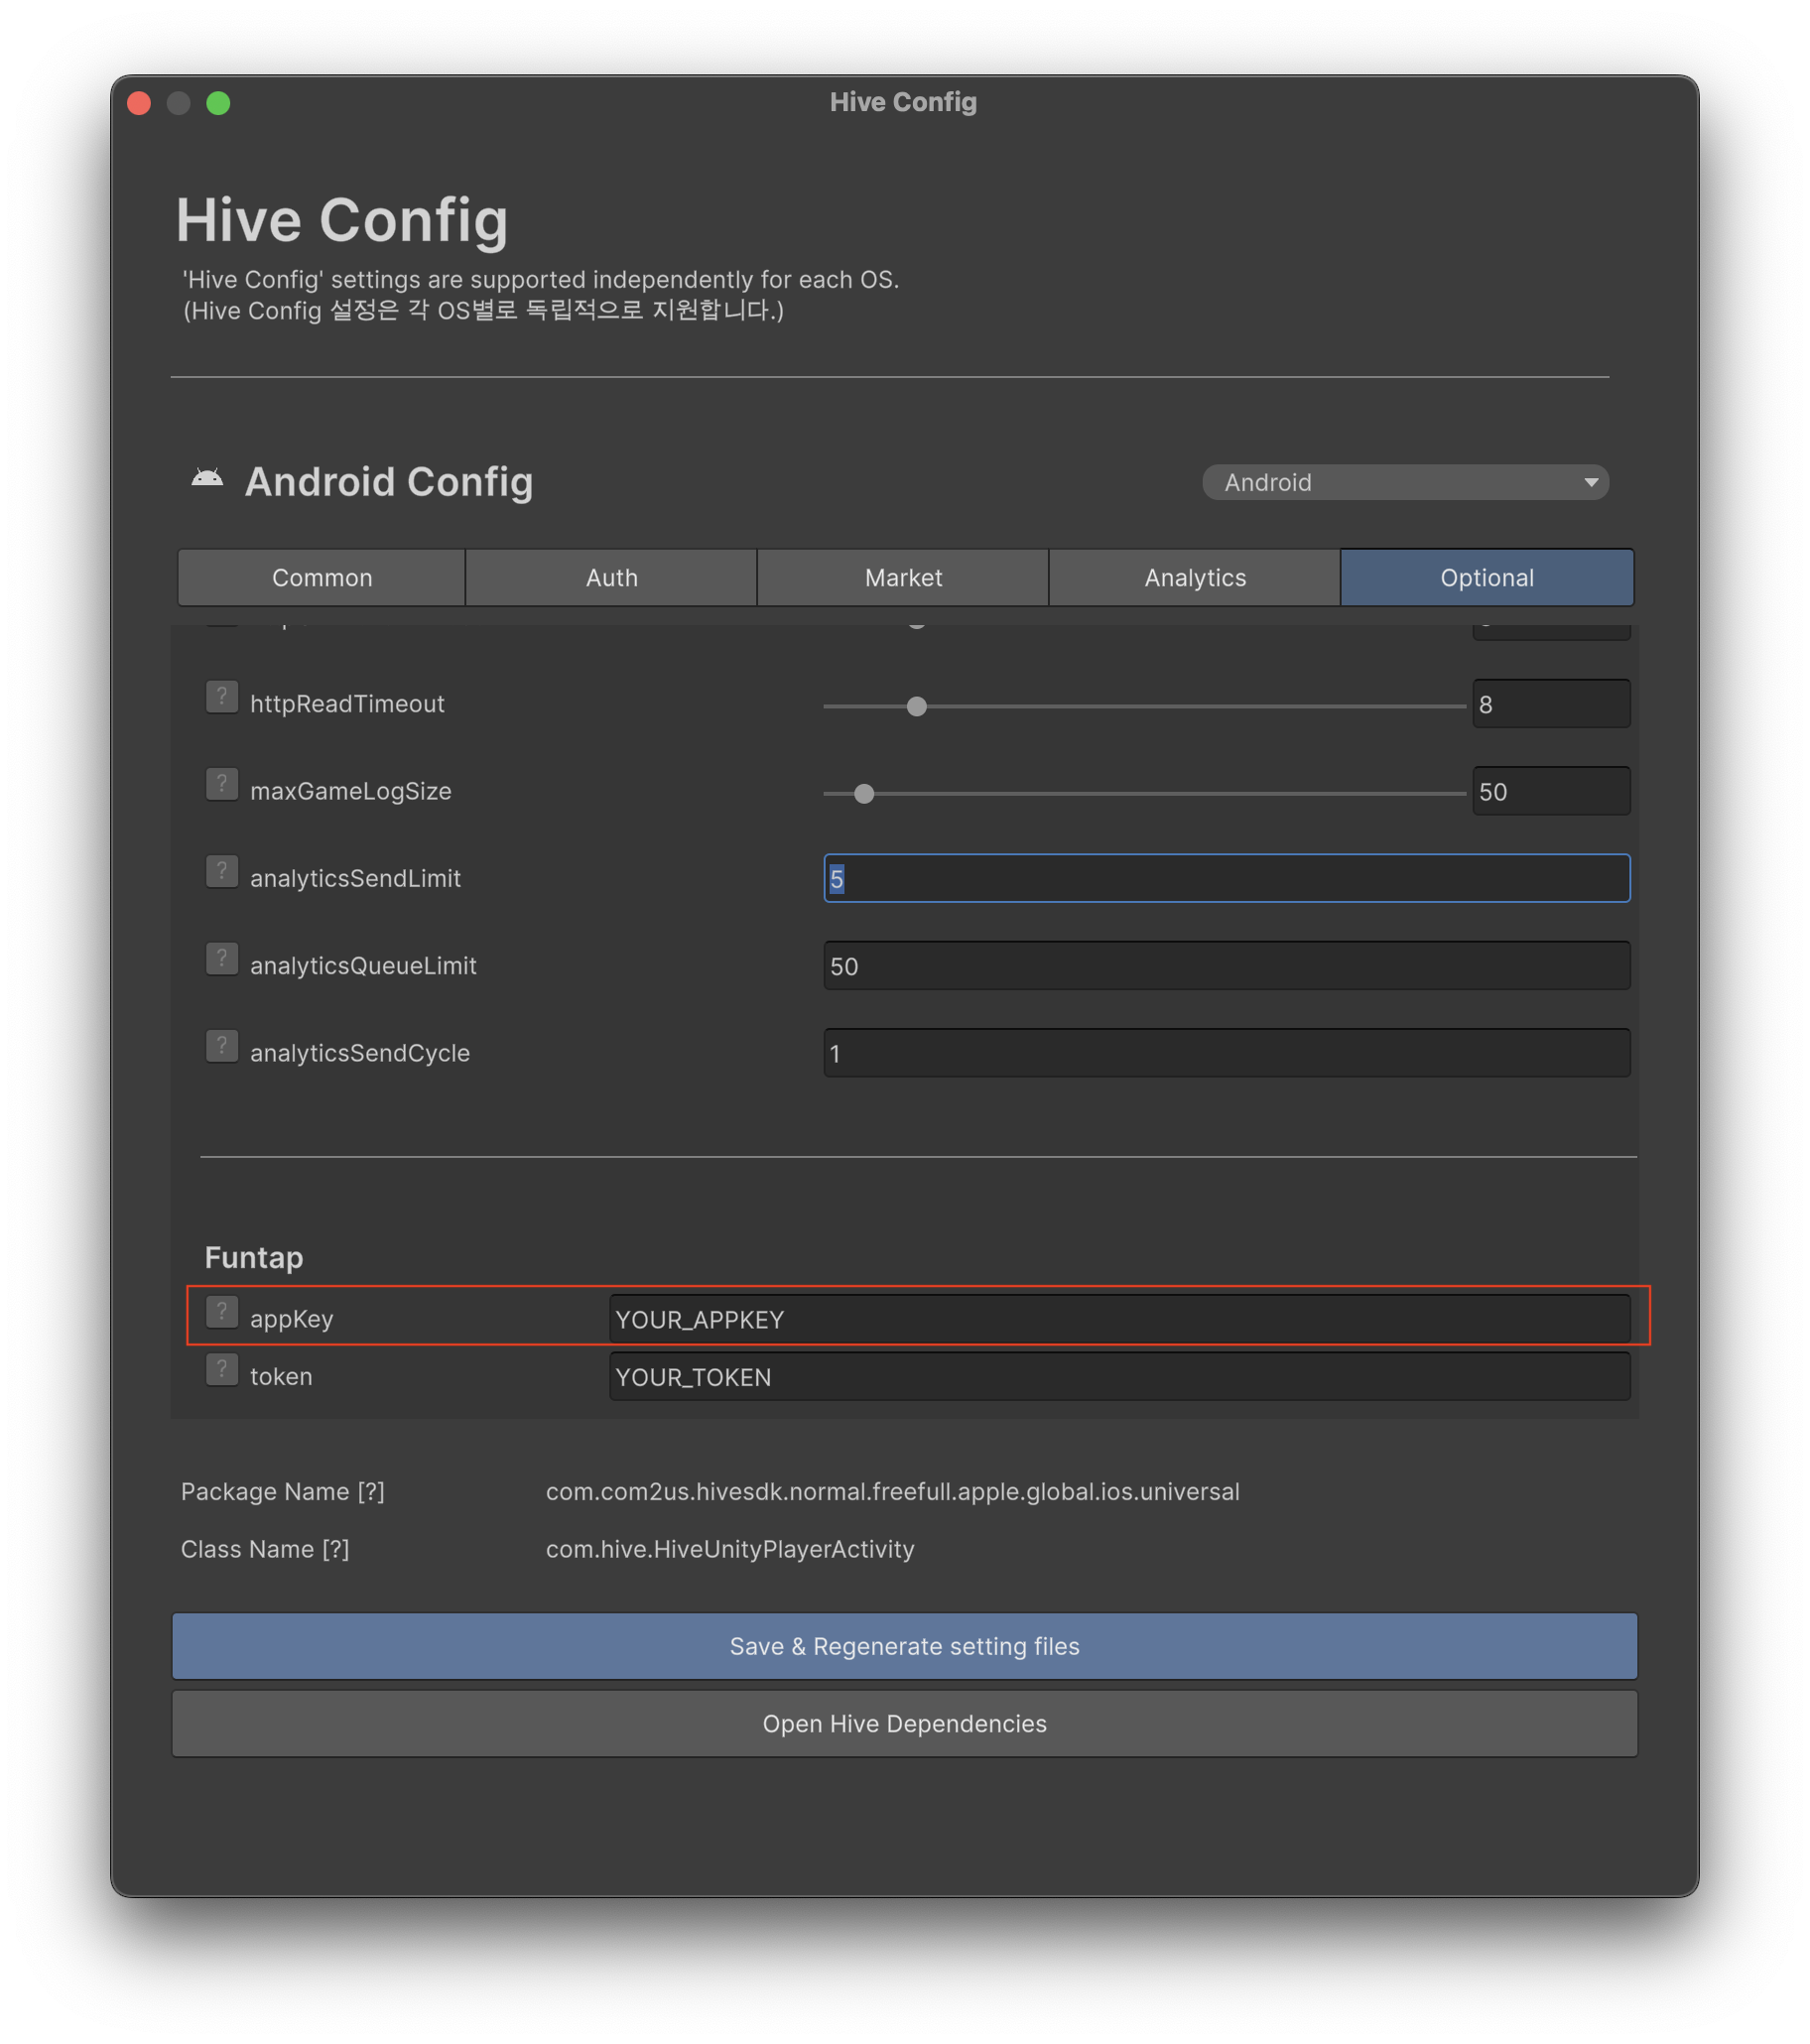
In Unreal Engine, expand the FuntapAppraisal item in [Edit > Project Settings > Hive Config > Android], then enter the issued key in the appKey field.

Step 4. Verify Funtap sign-in behavior
In Appraisal Build, call Funtap sign-in and verify that the sign-in screen is displayed correctly and that sign-in succeeds. Hive SDK includes the Funtap SDK internally and uses ProviderType.FUNTAP when calling AuthV4.signIn(). After sign-in succeeds, the follow-up processing required for publisher integration proceeds automatically inside the Funtap SDK.
Caution
Use ProviderType.FUNTAP sign-in only in Appraisal Build. Do not use this sign-in type in Service Build.
How to apply Service Build
A Service Build is a build where an Android or iOS app runs the live service after obtaining a Vietnam publishing license. This build uses the service Funtap module and the token setting.
Preparation
Before you start the Service Build process, you must obtain the service token from Funtap. In Native, enter this value in hive_config.xml; in Unity, enter it in the Funtap token field under [Top toolbar > Hive > HiveConfig > Optional]. If this value is not ready, you cannot complete Step 2.
Note
Hive Console > Provisioning > SDK Settings lets you control whether Funtap identity verification is shown after login.
Use the Service Build features only after completing the login flow already implemented in the game. After sign-in succeeds, use the PlayerID received in the PlayerInfo response as the userId for subsequent Funtap APIs.
Step 1. Set up the Funtap library
In Native, add the dependency for service use to the module-level build.gradle file.
In Unity, click ExternalDependency in [Top toolbar > Hive], then select the Funtap item.
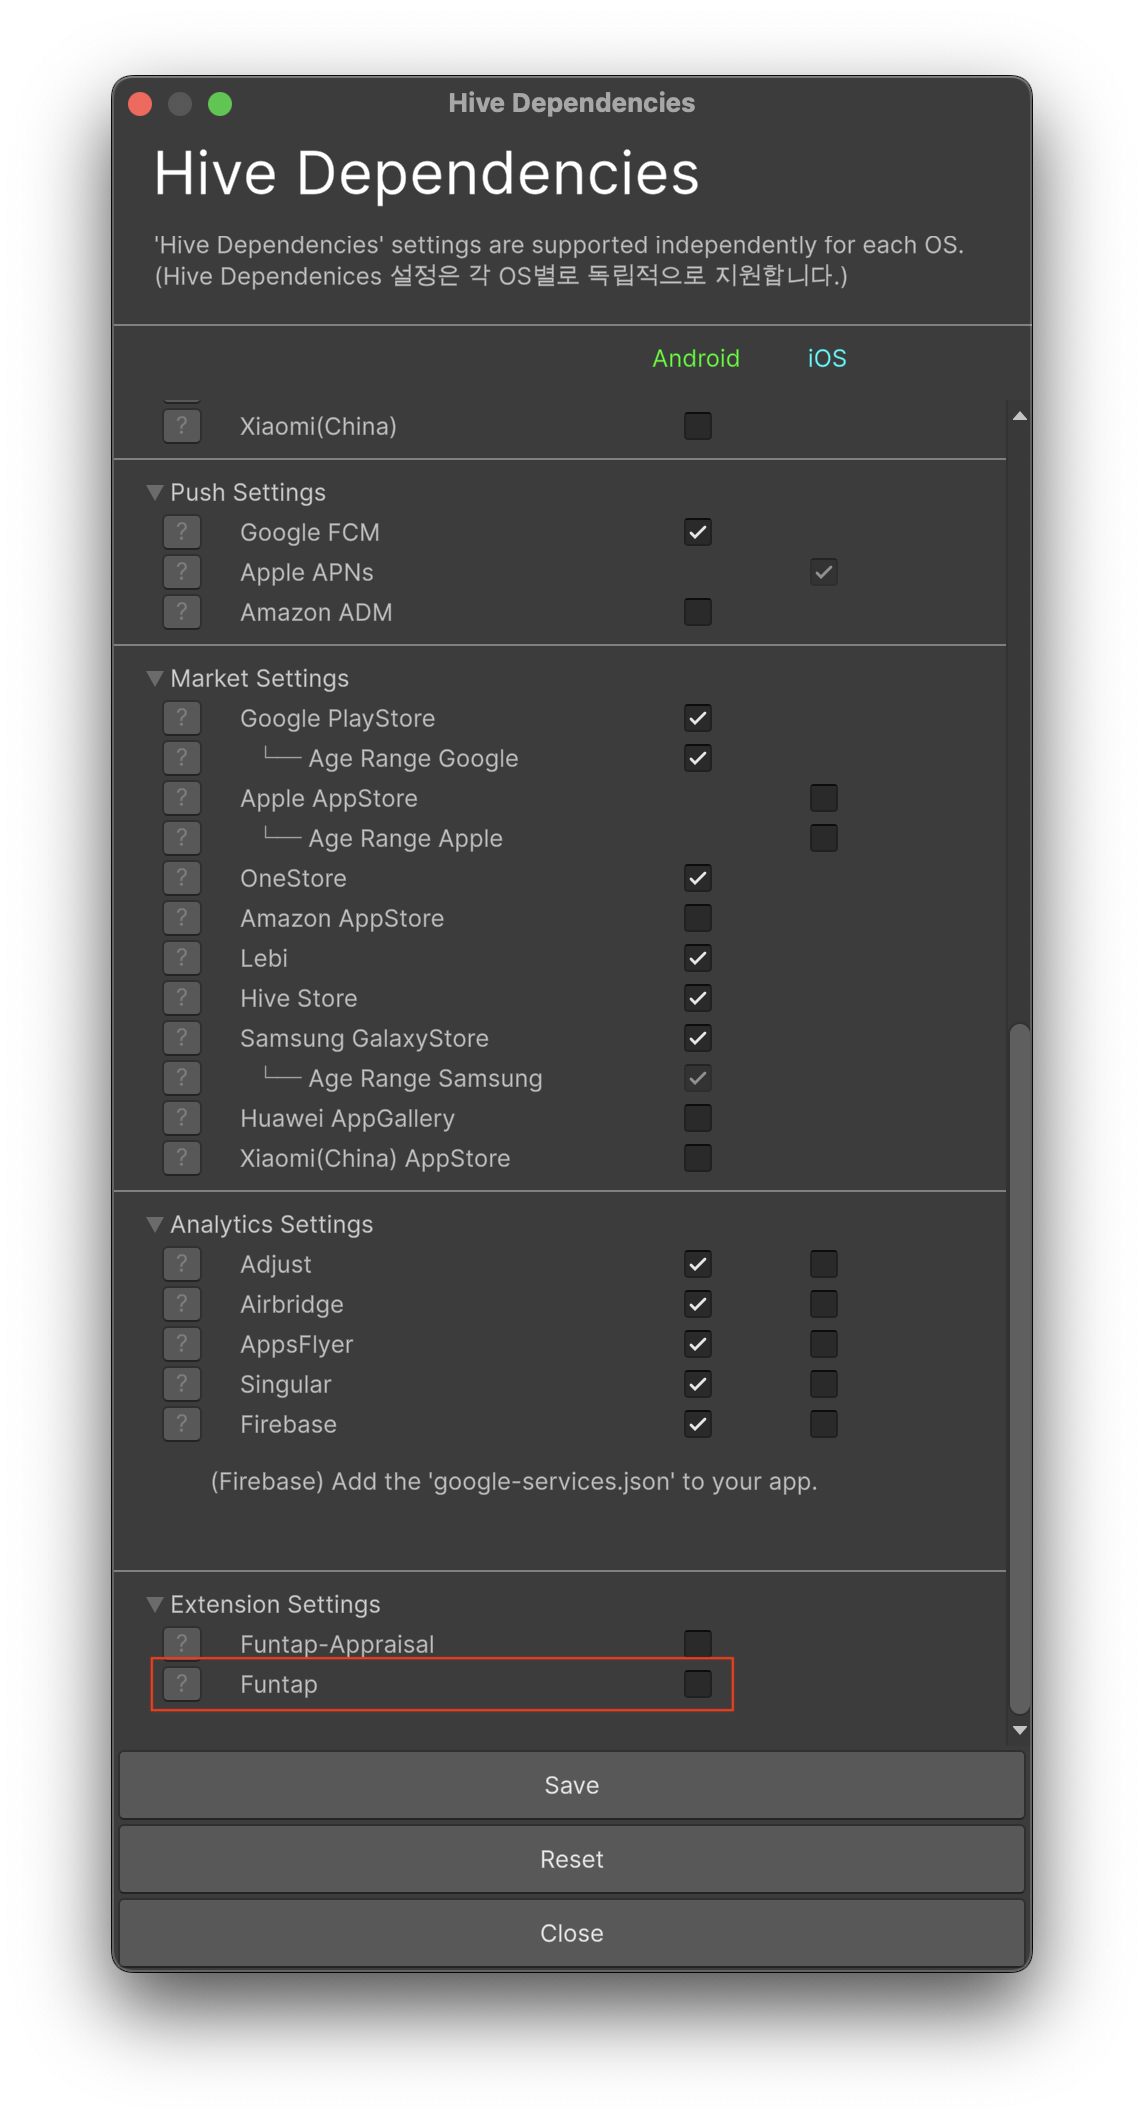
In Unreal Engine, check the Funtap item in [Edit > Project Settings > Hive SDK > Dependency - Android or Dependency - iOS].

Step 2. Apply the Funtap publisher setting value (token)
In Native, add the token received from the Funtap publisher to the hive_config.xml file.
In Unity, click Optional in [Top toolbar > Hive > HiveConfig], then enter the issued key in Funtap's token field.
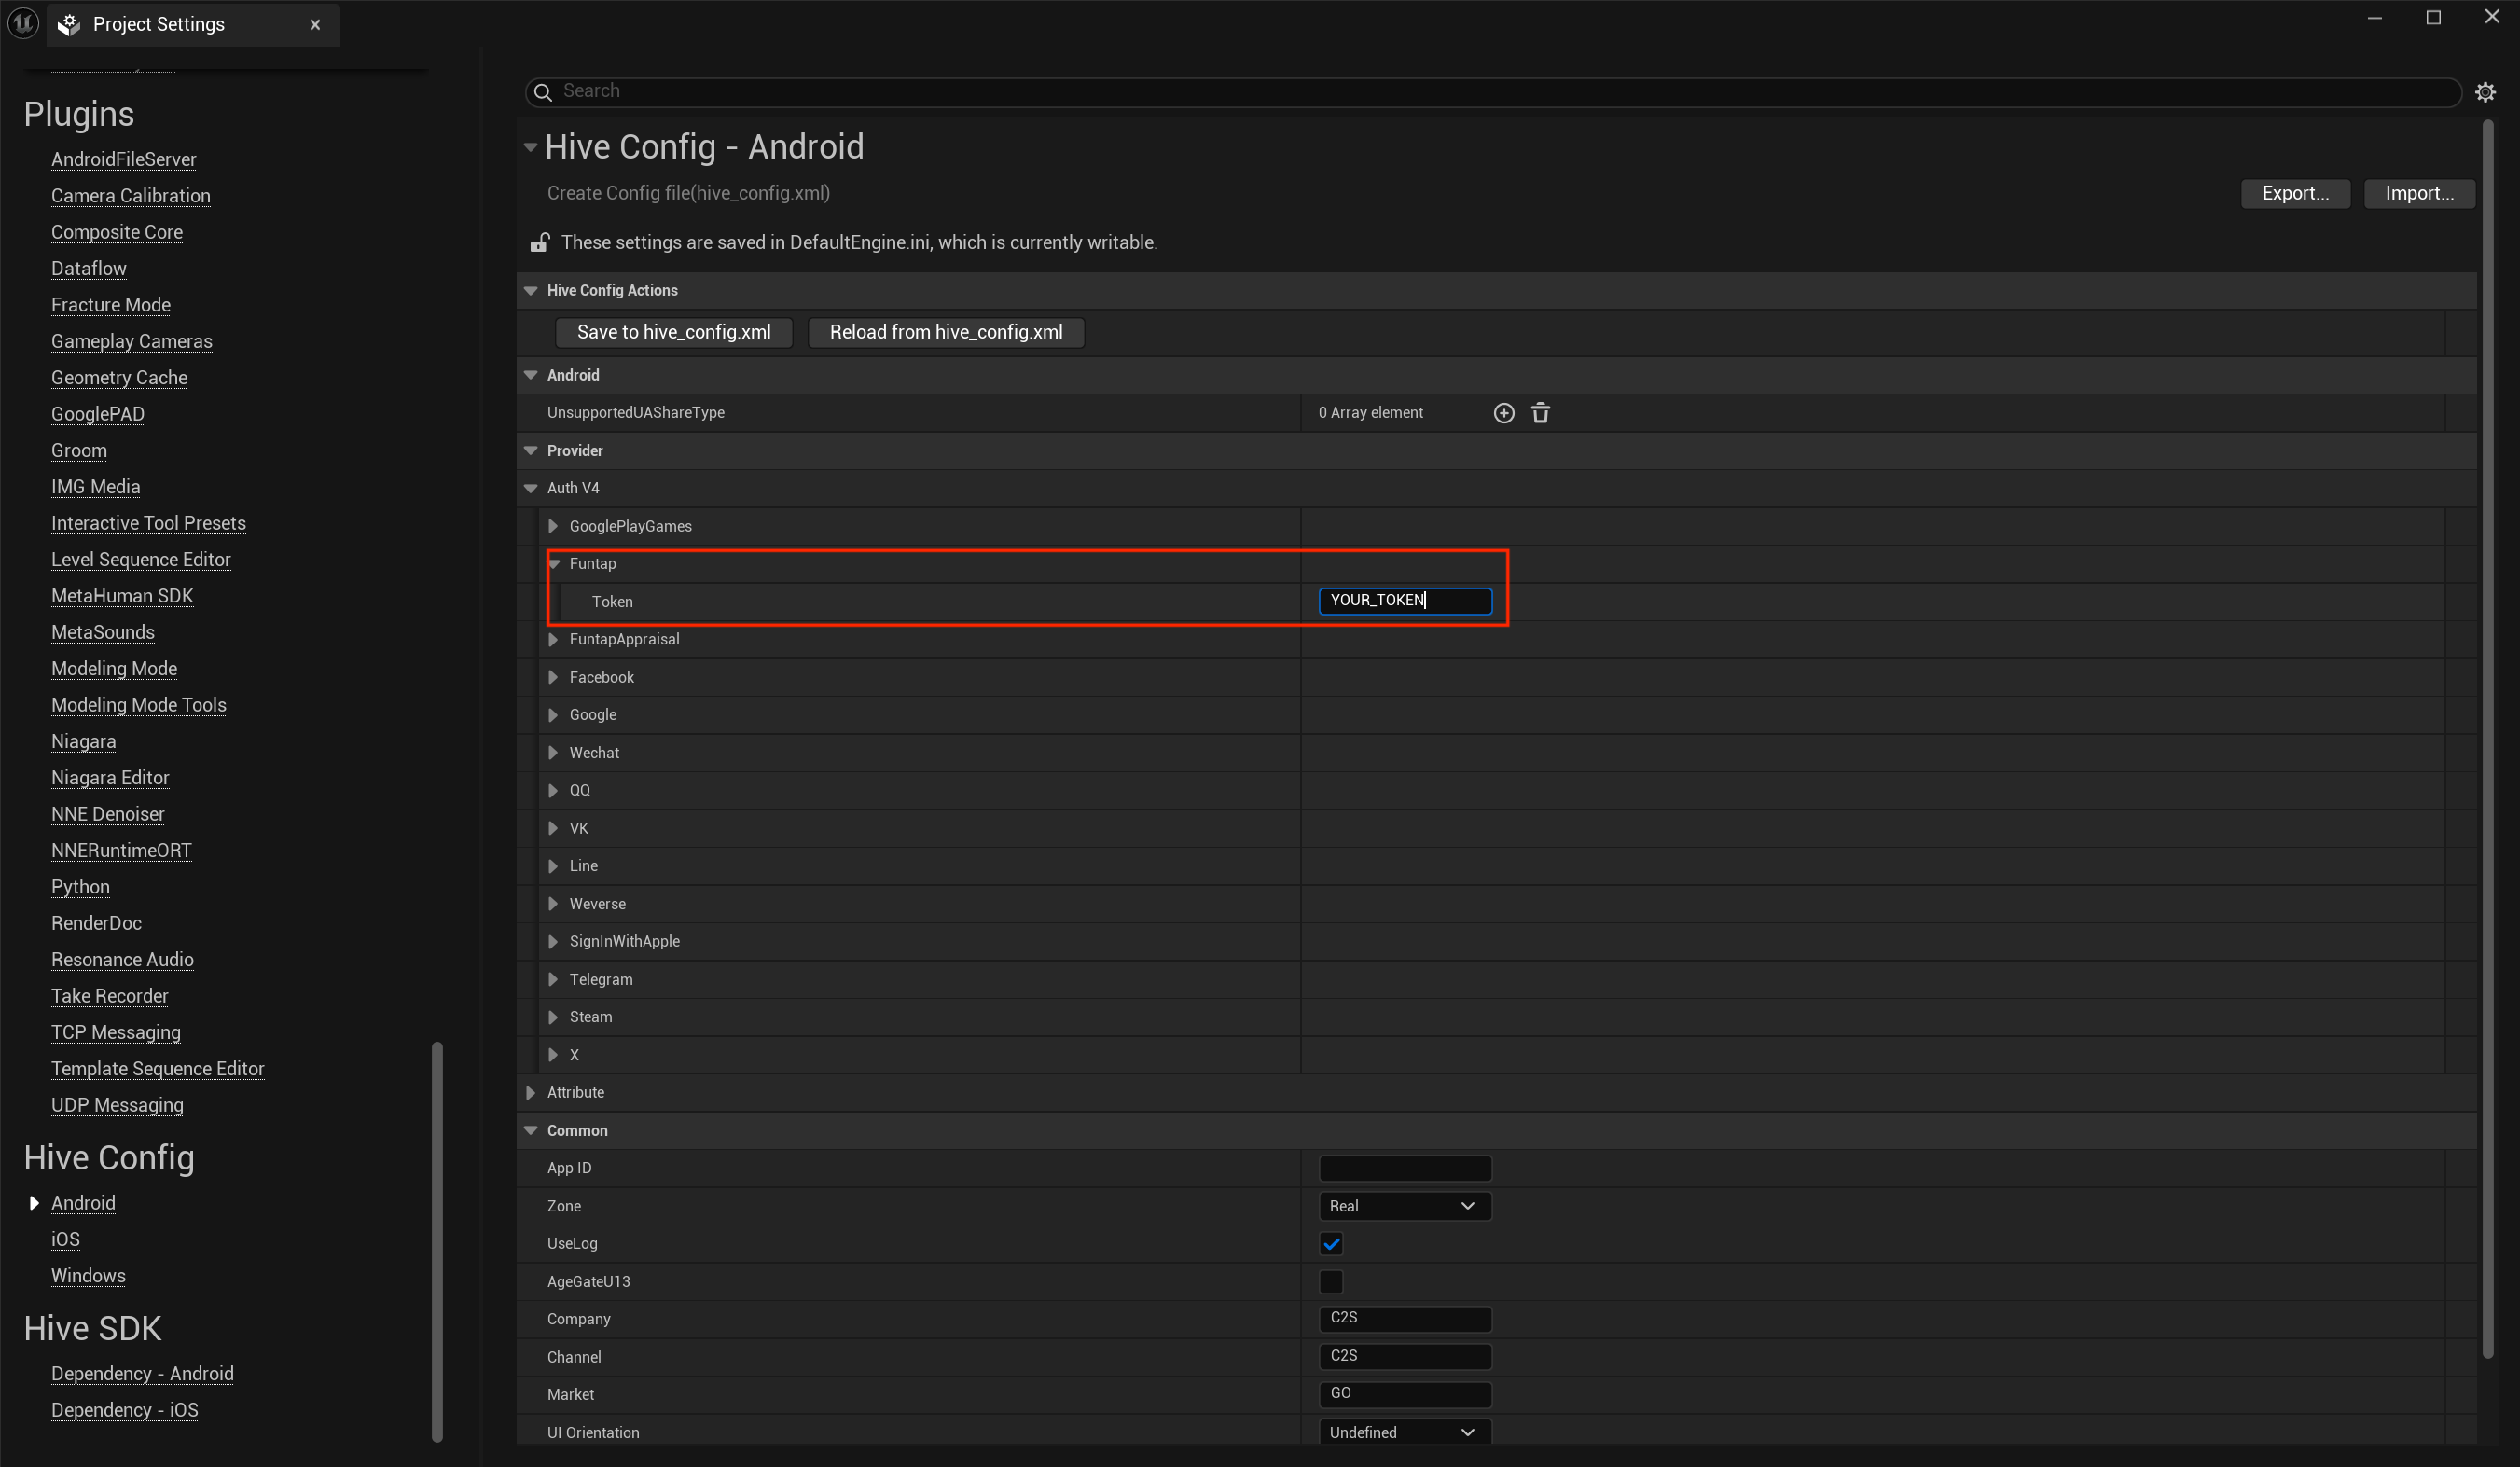
In Unreal Engine, expand the Funtap item in [Edit > Project Settings > Hive Config > Android], then enter the issued key in the token field.
Step 3. Check whether the government review is in progress
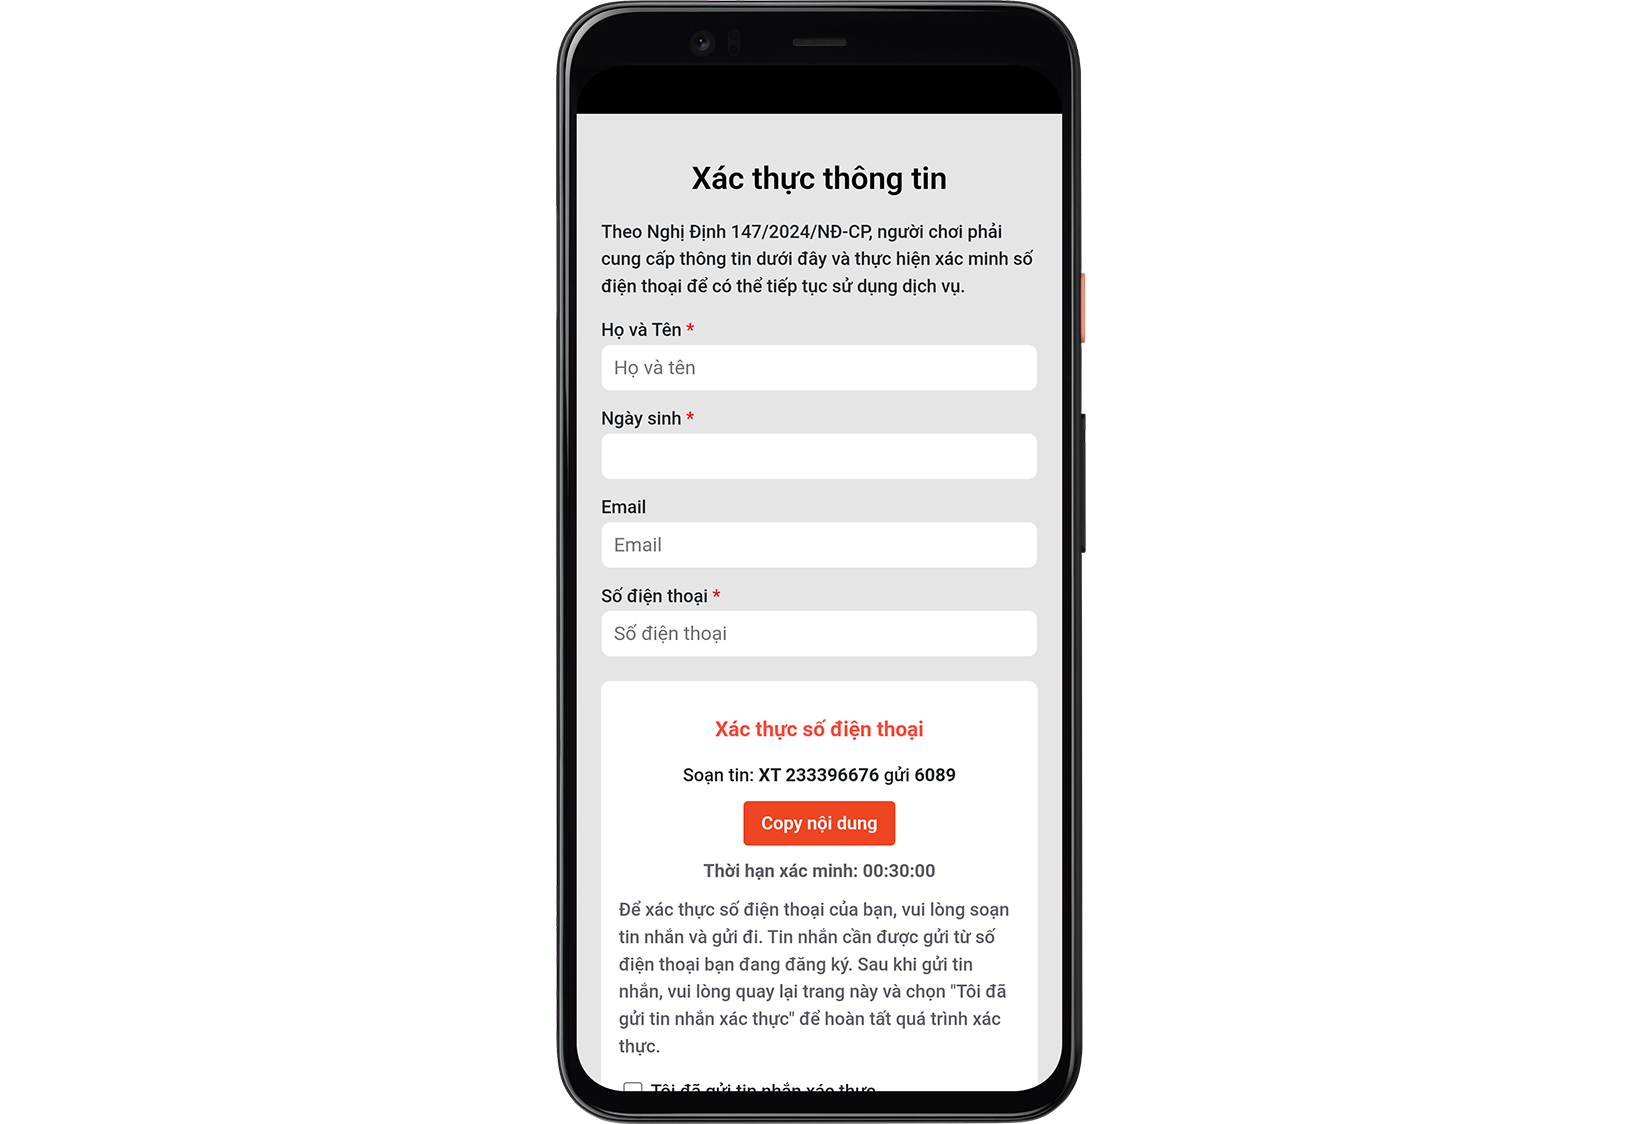
To decide whether to display the manual information update menu in Service Build, the user must first be logged in successfully. After login, when opening the character info screen or settings screen, call ProviderFuntap.isFuntapUnderGovernmentReview() to check whether the inspection is in progress. If the result is true, it is a government regulation inspection period, so Hive SDK automatically displays a WebView-style identity verification screen right after login as shown below. In this case, do not display the manual information update UI separately. At this time, if skipUseUserCheck in the hive_config.xml file is true, the identity verification screen is not shown even when login succeeds.
If the result is false, proceed to the next step.
Step 4. Check whether the user has completed information entry
If the result in Step 3 is false, determine whether the user can proceed with a manual information update. For userId, pass the PlayerID received in the PlayerInfo response after successful sign-in as a string. For more information about the PlayerInfo response values, refer to Before you start.
If the isCompleted value returned by ProviderFuntap.checkUserInfoComplete(userId) is true, the information has already been entered, so do not display the UI. If the isCompleted value is false, provide the information update UI in the next step.
#include "HiveProviderFuntap.h"

FString UserId = "USER_ID";

FHiveProviderFuntap::CheckUserInfoComplete(UserId, FHiveProviderFuntapOnCheckUserInfoCompleteDelegate::CreateLambda([this](const FHiveResultAPI& Result, bool bIsCompleted) {
    if (Result.IsSuccess()) {
        // If isCompleted is false, display the user info update UI
    }
}));
Step 5. Display the information update UI
In Step 4, if the value of isCompleted is false, provide a menu on the character info screen or settings screen that the user can select directly. When the user selects the menu, call ProviderFuntap.showUpdateUserInfo(userId) to open the information update screen. At this time, if skipUseUserCheck in the hive_config.xml file is true, it returns success without displaying the screen.