Upload new app to server
Once you have prepared the meta.json and app files, send these files to the Hive Console Sandbox Server or the Hive Console Live Server using an uploader.
Upload new app files
There are two types of uploaders: GUI and CUI. Depending on your development environment, choose one of the two methods to upload your app. Below, we'll guide you on how to use GUI and CUI uploaders in a scenario where you are launching a new game app. The total size of the files to be uploaded must be less than 30GB based on disk allocation size, and each file size must be less than 4GB.
Example Scenario
- AppID:
com.gcp2.stepbystep.windows.google.global.normal - Server to upload to:
LIVE - Initial app version to deploy:
1.0.0.0 - Location of the app to deploy:
D:\myGame_v1_0_0_0(ROOT_FOLDER)
Option 1: upload a new app via GUI
The GUI uploader uploads via a GUI interface.
- At Hive Sandbox Console or Hive Live Console, navigate to Crossplay Launcher > App Management > Upload IP, select the game and AppID, and register the IP address of the PC where you will upload the app files as the representative IP (Rep IP).
- Download the Crossplay Launcher tool and unzip it. Then, run GUI/uploader/CrossplayLauncherFileUploader.exe.
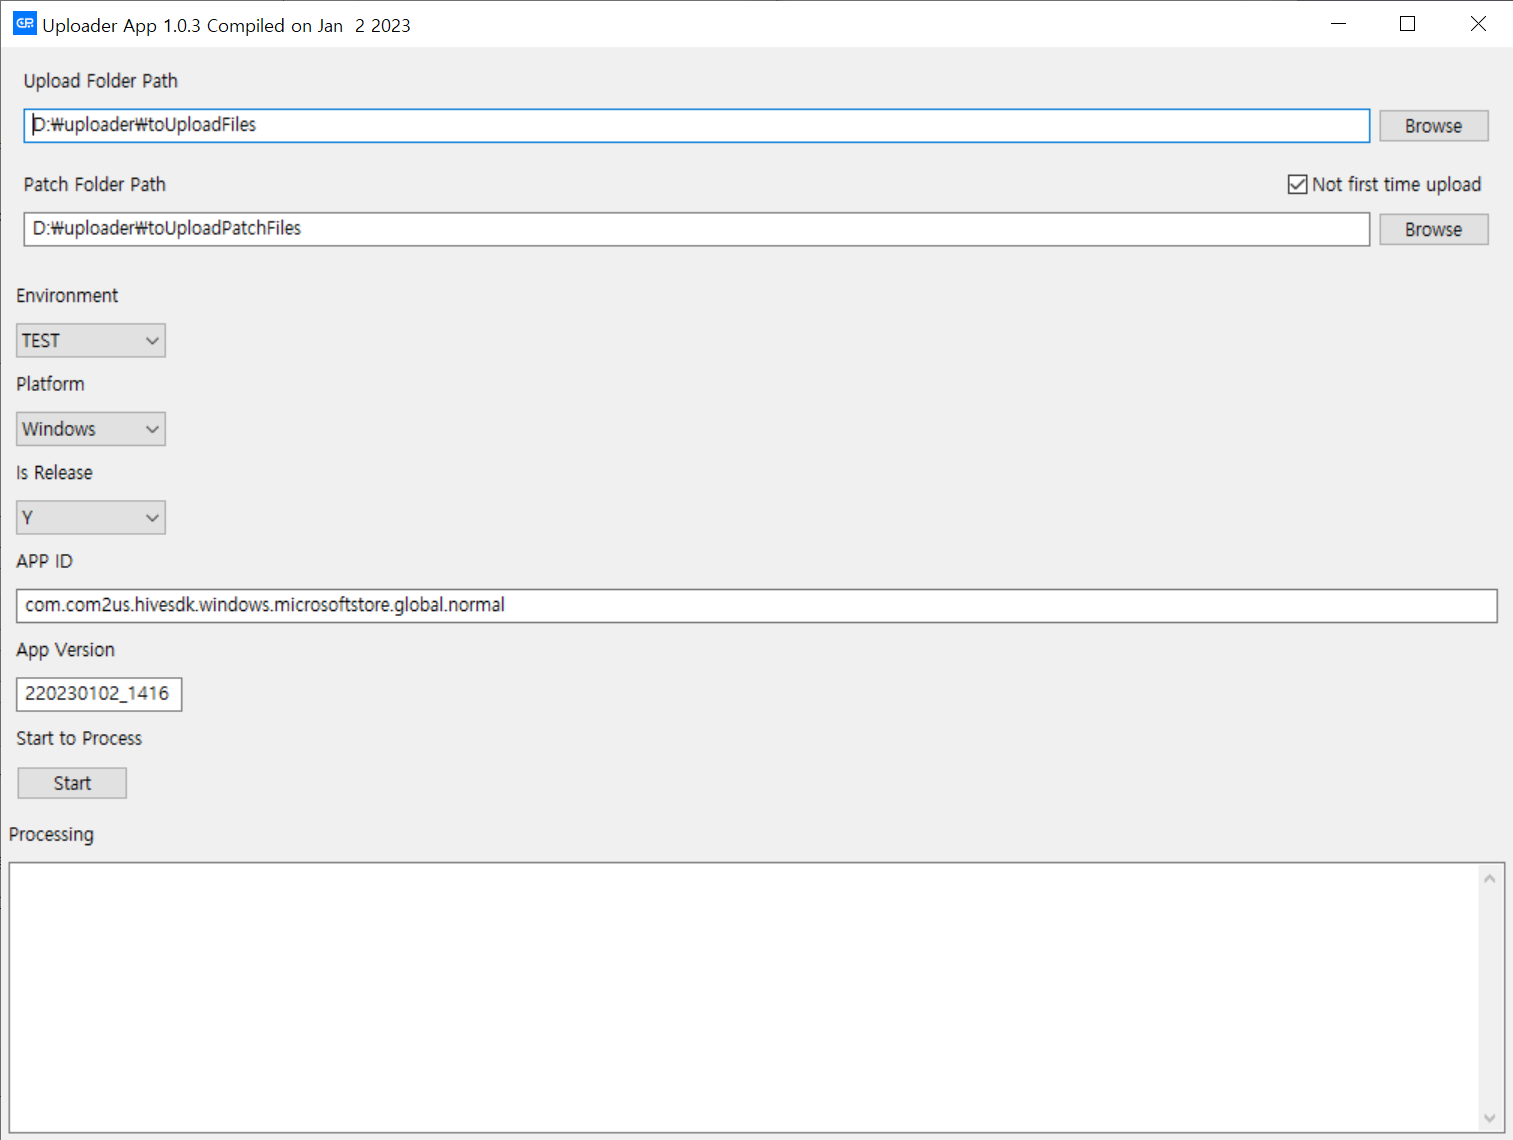
- In the uploader interface, input the following and click Start:
- Upload Folder Path:
D:\myGame_v1_0_0_0 - Patch Folder Path: None (leave blank for new app uploads)
- Not first time upload: None (do not check for new app uploads)
- Environment:
SANDBOXfor Sandbox,LIVE (REAL)for Live - Platform:
Windows - Is Release:
Y - APP ID:
com.gcp2.stepbystep.windows.google.global.normal - App Version:
1.0.0.0
- Upload Folder Path:
- If the upload is successful, the Processing window will display status code
201.
Option 2: upload a new app via CUI
- At Hive Sandbox Console or Hive Live Console, navigate to Crossplay Launcher > App Management > Upload IP, select the game and AppID, and register the IP address of the PC where you will upload the app files as the representative IP (Rep IP).
- Download the Crossplay Launcher tool and unzip it.
-
Execute CUI/uploader/cpflupl.exe in Windows Terminal or PowerShell with the following command-line arguments:
- -envi:
SANDBOXfor Sandbox,LIVE (REAL)for Live - ‐‐platform:
w - ‐‐release:
y - ‐‐appid:
com.gcp2.stepbystep.windows.google.global.normal - ‐‐version:
1.0.0.0 - ‐‐filepath:
D:\myGame_v1_0_0_0, default istoUploadFiles -
-runbatch: Applicable
    cpflupl.exe \
    --appid="com.gcp2.stepbystep.windows.google.global.normal" \
    --version="1.0.0.0" \
    -envi="LIVE" \
    ‐‐platform="w" \
    --filepath="D:\myGame_v1_0_0_0" \
    -runbatch \
    –release="y"
- -envi:
-
If the upload is successful, the terminal or shell will display status code
201.
Check upload result
After the upload is completed, go to Hive Console > Crossplay Launcher > App Management > Download Setting to verify that the app has been successfully uploaded.
