iOS
SDK for iOS provides a Promotion feature. This document describes how to configure an iOS app to use the Promotion feature.
Using Universal Links
Universal Links allow users to install and launch the app through invitation pages and enable inviter rewards. The SDK for iOS supports both URI Scheme-based and Universal Link-based deferred deep links.
Common Setup
To use Universal Links, follow these common setup steps.
Server Setup
- Prepare the following values for your environment and save them in an apple-app-site-association file:
- TEAM ID: Your TEAM ID from the Apple Developer Console
- Bundle Identifier: The bundle ID of the app using Universal Links
- URL Path: The HTTP URL path to support Universal Links
-
Upload the apple-app-site-association file to the root of your web server or to the .well-known subdirectory. The file must be in JSON format and should not have an extension.
Example apple-app-site-association file:
{
    "applinks": {
        "apps": [],
        "details": [
            {
                "appID": "--TEAM ID.--Bundle Identifier",
                "paths": ["--URL Path"]
            }
        ]
    }
}
Example from Apple:
iOS App Setup
Set up your iOS app in Xcode as follows:
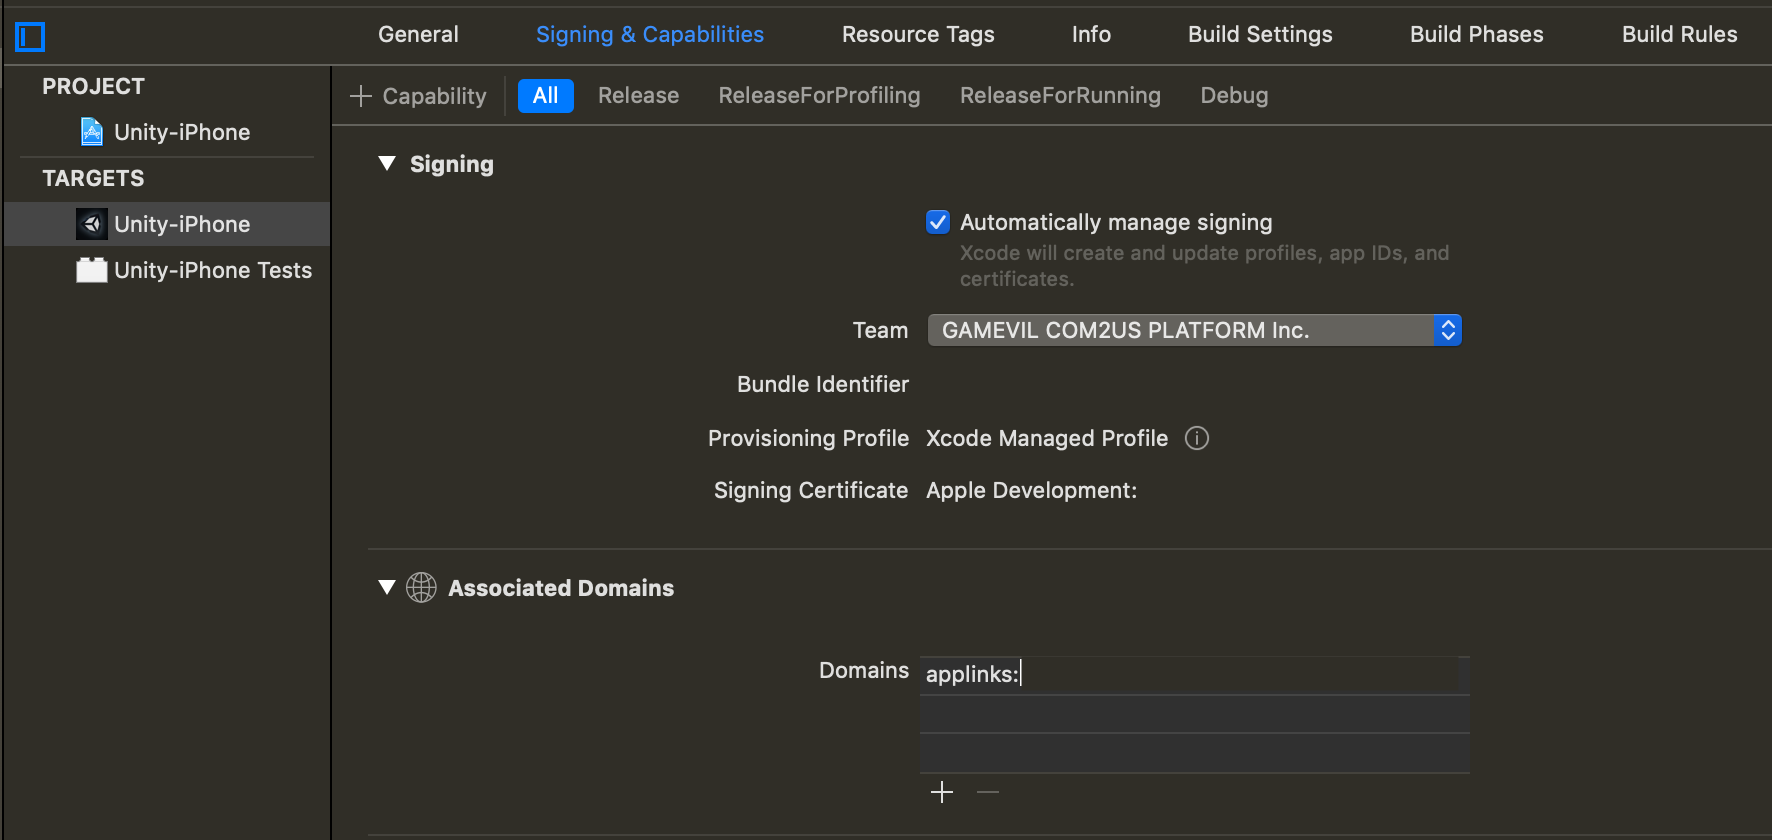
- In the Xcode project navigator, select your project.
- Select your app from the TARGETS list.
- Click the Signing & Capabilities tab.

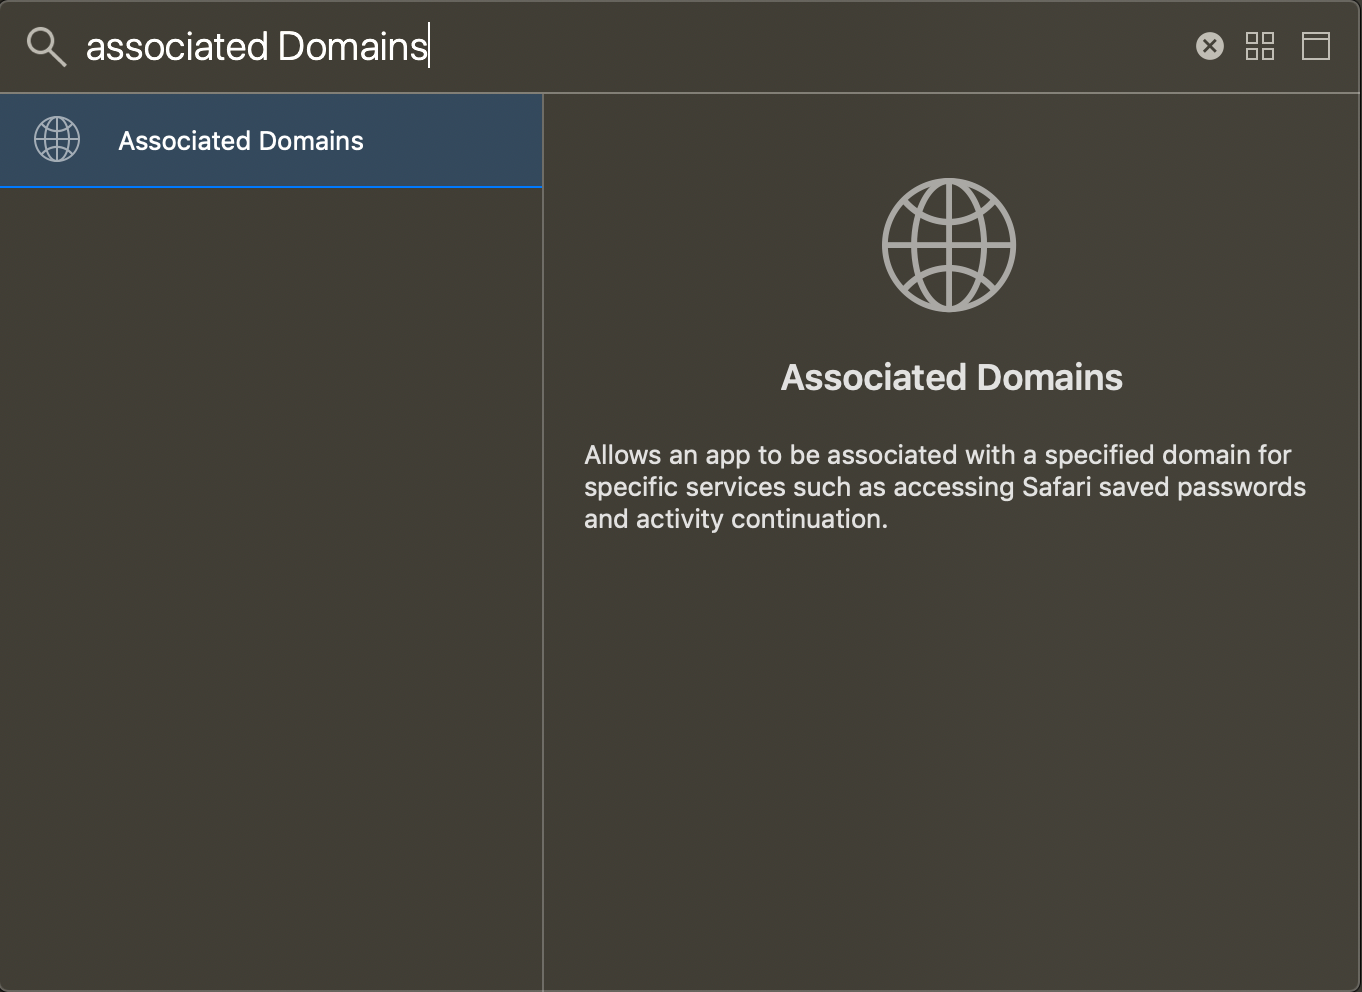
- Click the + Capability button at the top left of the Signing & Capabilities tab.
- Add Associated Domains from the list.
- Enable Associated Domains in the app's Capabilities in the Apple Developer Console.

Using UA Deferred Deep Links
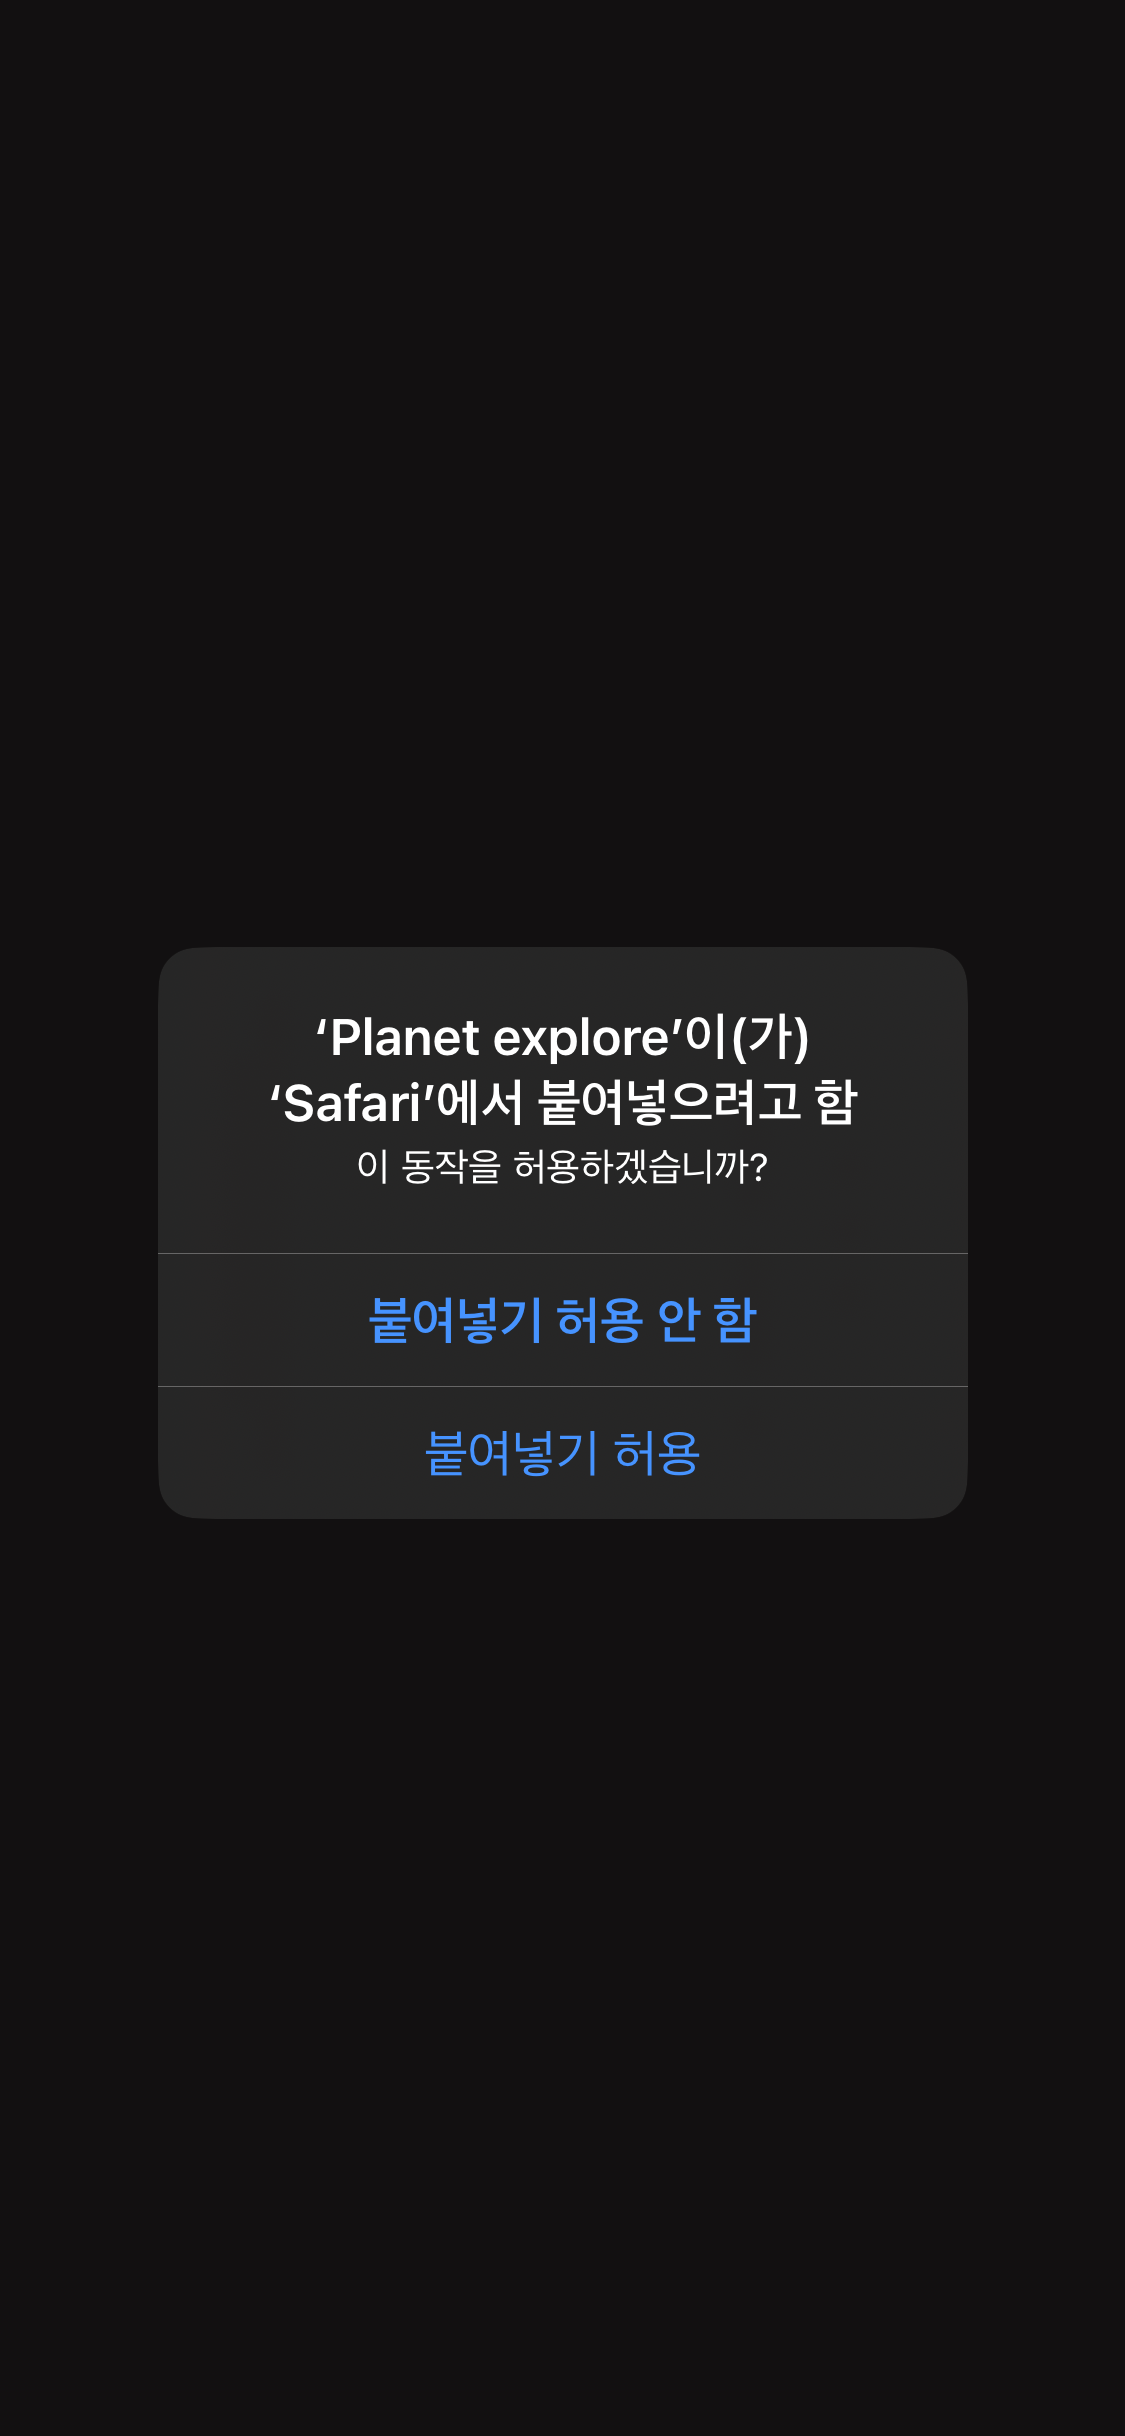
Deferred deep links allow users to launch the app via Universal Link invitation links and enable inviter rewards. UIPasteboard permission is required for deferred deep links. When a user installs and launches the app for the first time using an invitation link, a toast popup may appear on iOS versions below 16.1, and a system permission request popup may appear on iOS 16.1 and above. To disable the system permission popup, refer to the Promotion Operation Guide and set deferred deep links to "disabled".
| | |
Note
For additional console setup instructions for generating Universal Link-based inviter links, refer to the Promotion Operation Guide.
The system permission request popup text cannot be customized by developers.
Xcode Project Setup
To use deferred deep links, configure your Xcode project as follows:
- Select the main TARGETS in your Xcode project.
-
In the Signing & Capabilities tab, add the following domains under Associated Domains:

- applinks:sandbox-promotion.qpyou.cn: Universal Link domain for the sandbox server environment
- applinks:promotion.qpyou.cn: Universal Link domain for the production server environment
hive_config.xml Setup
Add the following code to the hive_config.xml file in your SDK:
Using direct links
Direct links are URLs that, when clicked by users, direct them to specific locations within the game app (after installing the game app) or expose specific web views to encourage user engagement.
The destination address where users navigate through direct links is set in Hive Console > Direct Link Management, and various destinations such as marketplaces, specific locations within the game app (deep links), and specific web views can be flexibly configured according to the user's OS environment.
The operational sequence when direct links are applied in conjunction with the game app is as follows:
- Share direct links as various destination links (market links, deep links, web URLs)
- When a user clicks a direct link, it operates as follows according to the destination set in Hive Console > Direct Link Management: - Market navigation: Regardless of the user's game app installation status, navigate to the market link set in Hive Console > Direct Link Management - In-app navigation (deep link) - If the game app is installed in the user's environment: Navigate to the designated location within the game app (scheme deep link) - If the game app is not installed in the user's environment: Navigate to the game app installation location in the market supported by each OS environment or the uninstalled user redirect URL set when creating the deep link - Web URL: Regardless of the user's game app installation status, navigate to a specific web view outside the game
- When the user proceeds in the order of 'game app launch > login > user engagement (UE) SetReady operation', the event included in the link information is executed in the game app (performing related functions or UI exposure, performing custom functions defined in UE, etc.)
Warning
When the game app is not installed in the user's environment, the precautions regarding direct link behavior according to Hive SDK version are as follows:
- Hive SDK v4 below 25.10.0 - Although it encourages game app installation on the user's device who clicked the direct link, direct link information is not delivered when the game app is launched immediately after installation. - After game app installation is completed, clicking the direct link again will deliver the direct link information to the game app simultaneously with game app launch. The event is then performed.
- Hive SDK v4 25.10.0 and above - It encourages game app installation on the user's device who clicked the direct link, and when the game app is launched immediately after installation, the direct link operates in the following two ways: - The game app communicates with Hive SDK's promotion server to obtain direct link information. The promotion server checks the device history and communication information of the user who first clicked the direct link and delivers appropriate direct link information to the game app client. The event is then performed. - After game app installation is completed, clicking the direct link again will deliver the direct link information to the game app simultaneously with game app launch. The event is then performed.
Xcode project setup
To apply direct link functionality in the iOS target Hive SDK, configure your Xcode project in the following order:
- Select the main TARGETS in your Xcode project.
- In the Associated Domains section of the Signing & Capabilities tab, configure the domains as follows:

* <i>applinks:sandbox-direct-link.withhive.com</i>: Universal link domain for direct link functionality operating in sandbox server environment
* <i>applinks:direct-link.withhive.com</i>: Universal link domain for direct link functionality operating in production server environment


