Contract
Contract
Issues and manages contracts required for launching and operating Web3 games.
- Multisig wallet address : It's the multisig wallet address from which the contract was issued.
- Game Title : The name of the game from which the contract was issued.
- contract address
- NFT : The contract address for NFT. By clicking the link button to the right of the address, you can view the contract information in greater detail.
- LOCK : Locked contract address. By clicking the link button on the right of the address, you can view the contract information in greater detail.
- Issued date : It's the date when the contract was issued.
Issue new contract
NFT contract
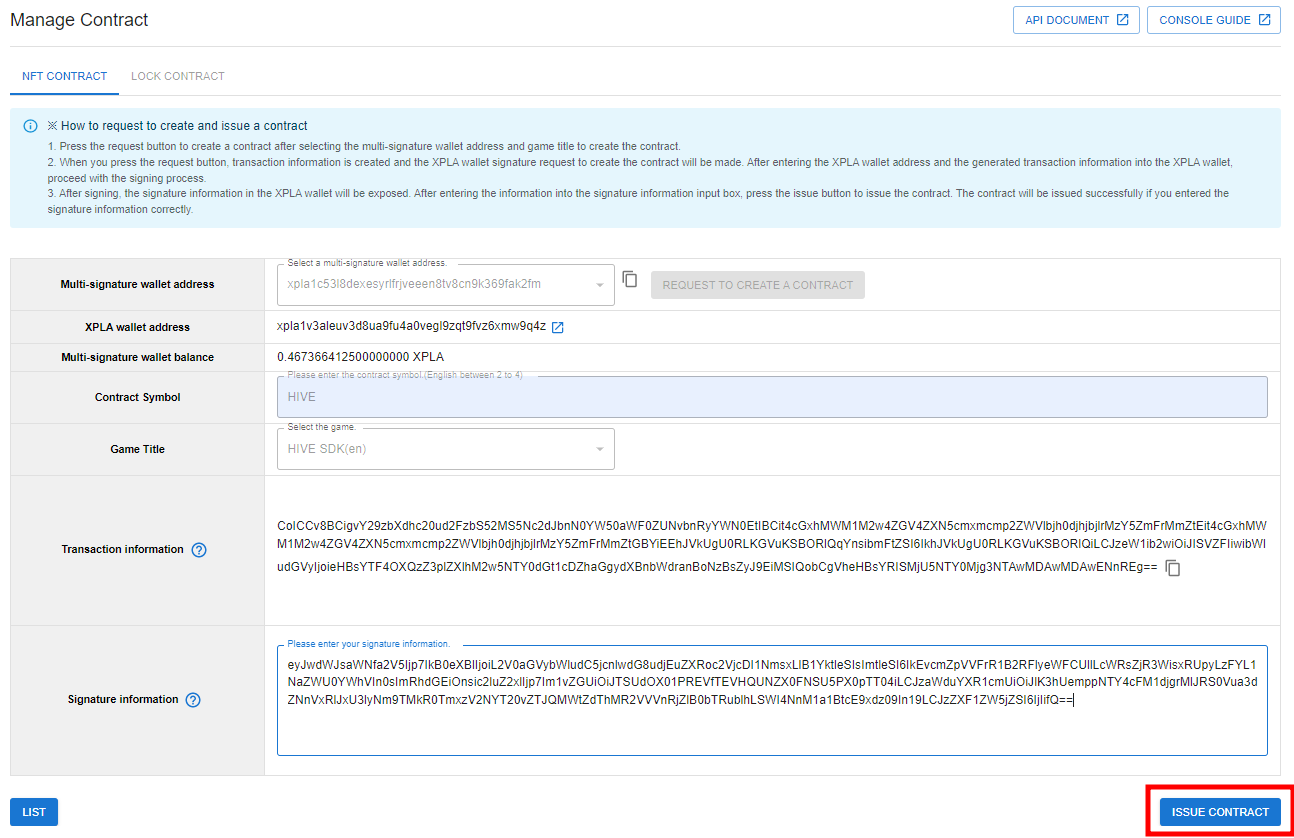
This is a contract on the XPLA mainnet that is required to provide game item and character minting functions.
- To access the NFT contract publication page, press the Issue New Contract button.
- Select a multisig wallet address.
Warning
Contract can be issued only when the application for participating in the beta game is completed with the XPLA wallet addressed in which the multisig wallet was created. Create an XPLA wallet and multisig wallet in Console > Blockchain > Manage Wallet before issuing a contract, and then complete the beta game participation application in Console > Blockchain > Beta Game Launcher with the XPLA wallet address.
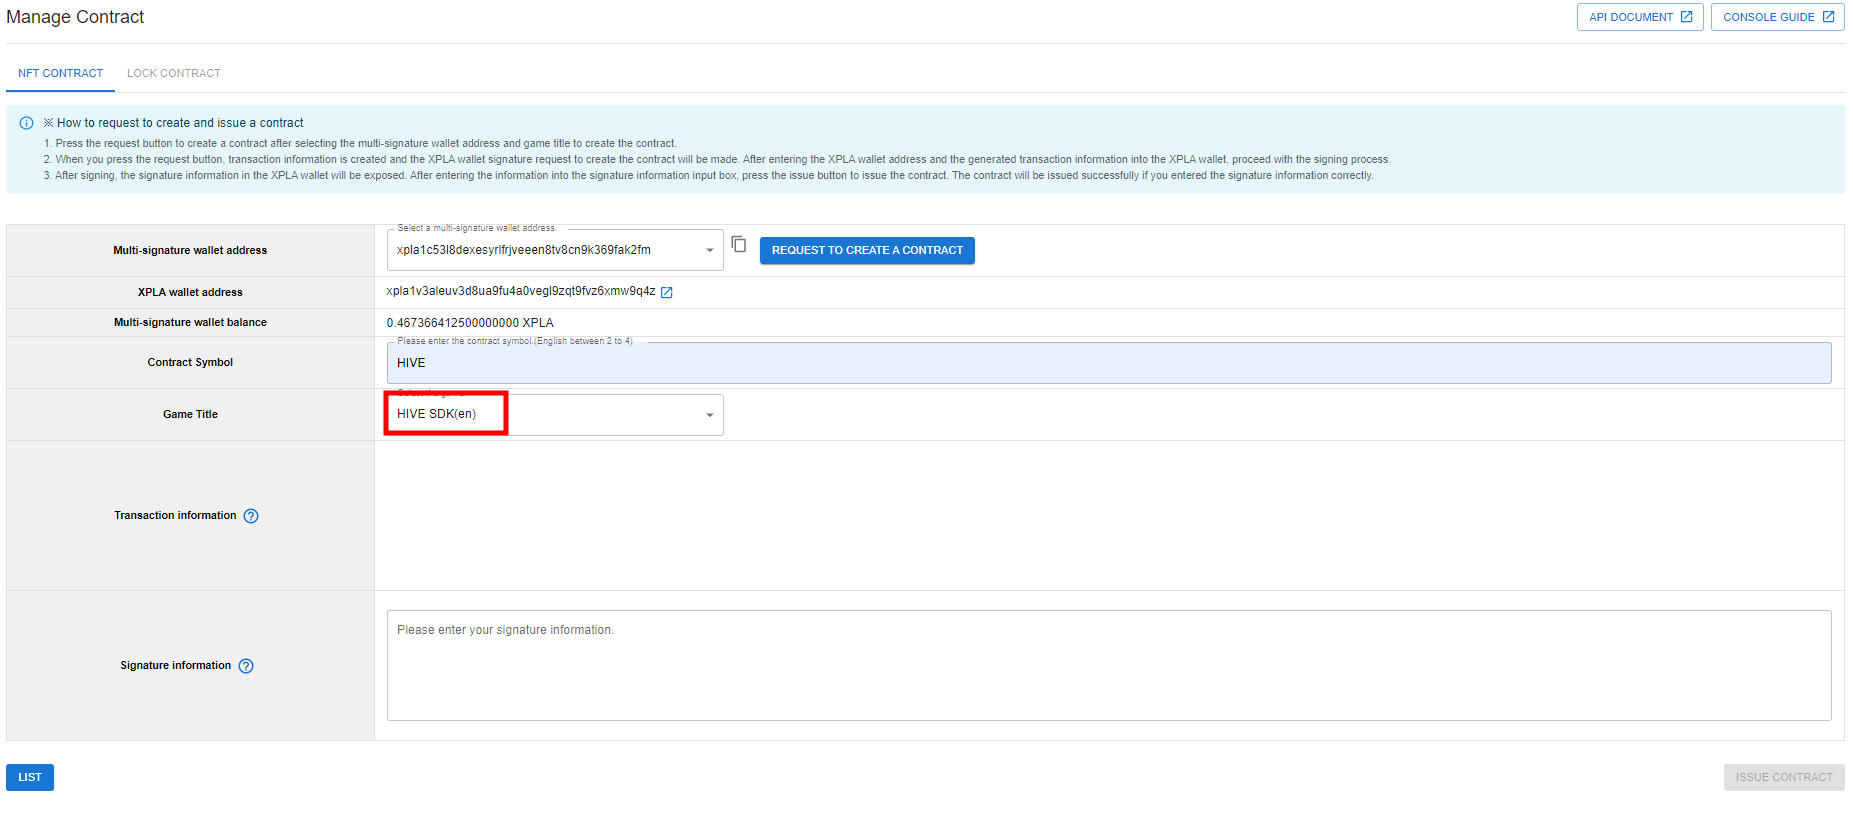
- Fill in the contract symbol.
- The name of the contract represents the contract symbol.
- Select a game title.
- Only games for which the beta game participation application has been completed using the XPLA wallet address associated with the created multisig wallet can be selected.
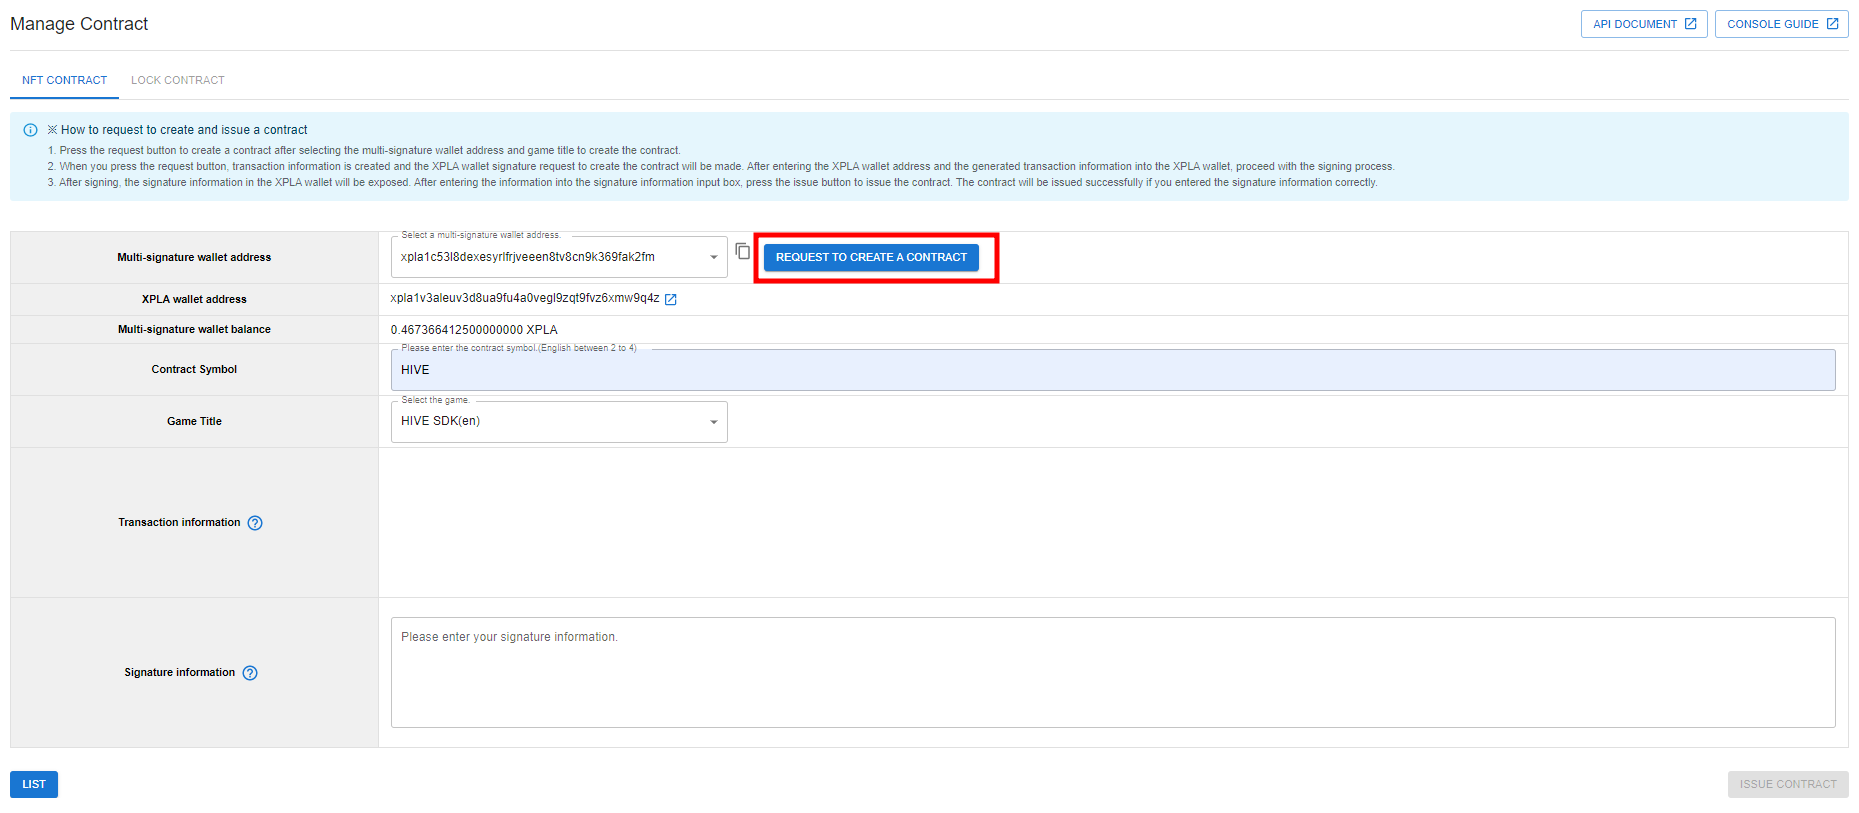
- Press the Request to Create a Contract button.
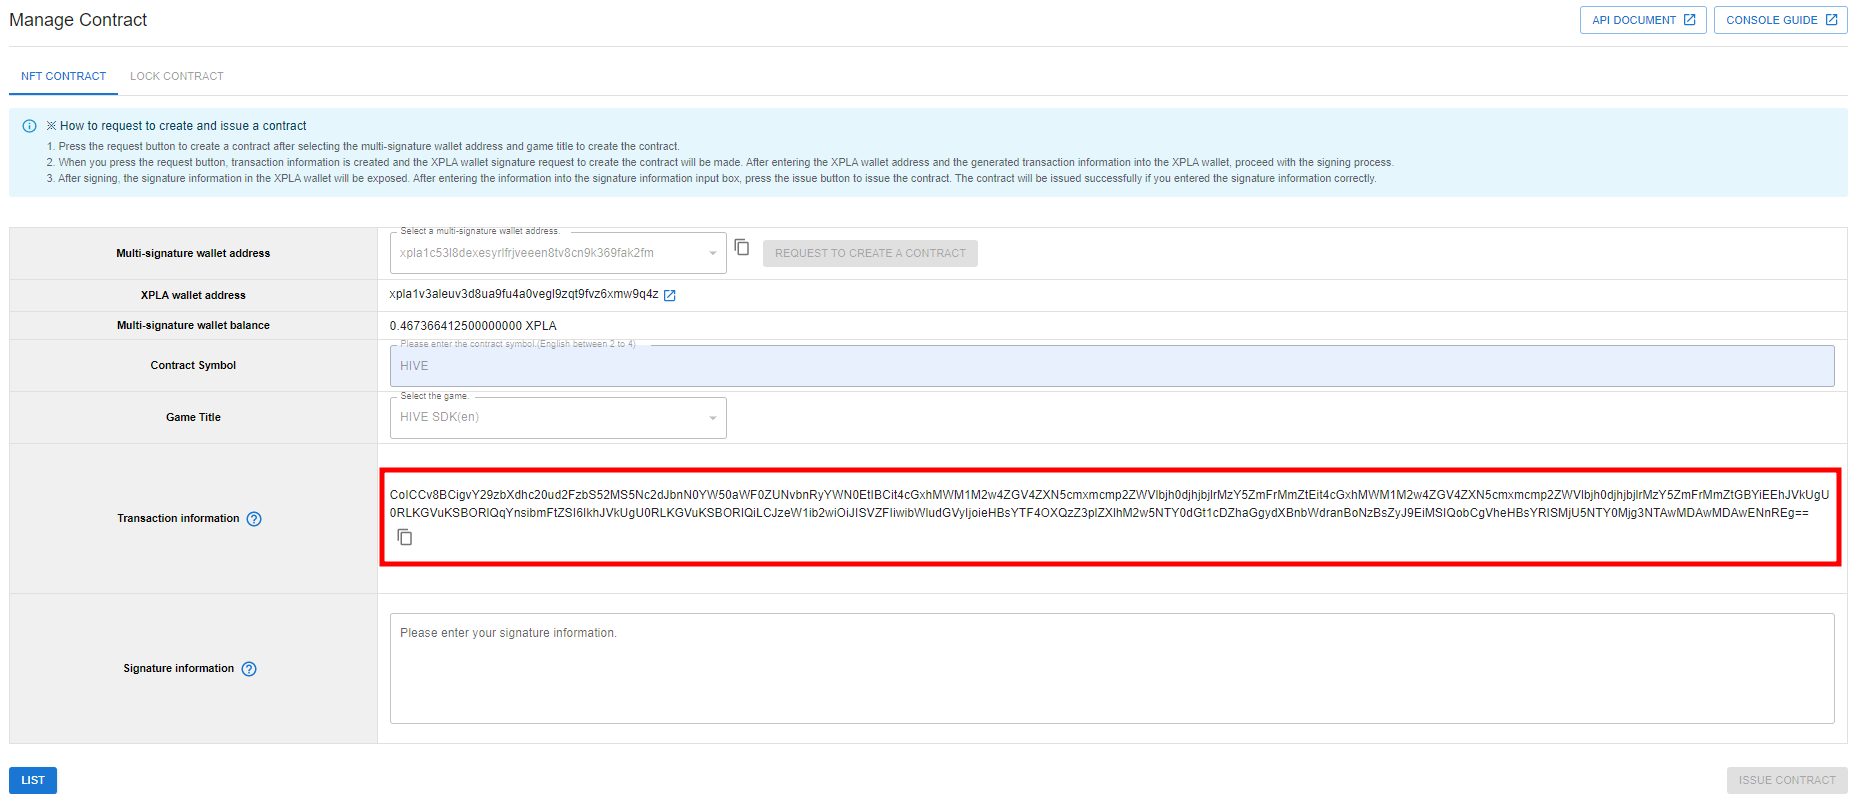
- The contract issuance page > transaction information is automatically entered when the contract creation request is completed.
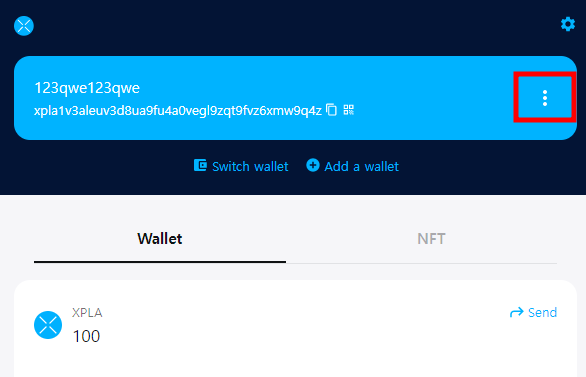
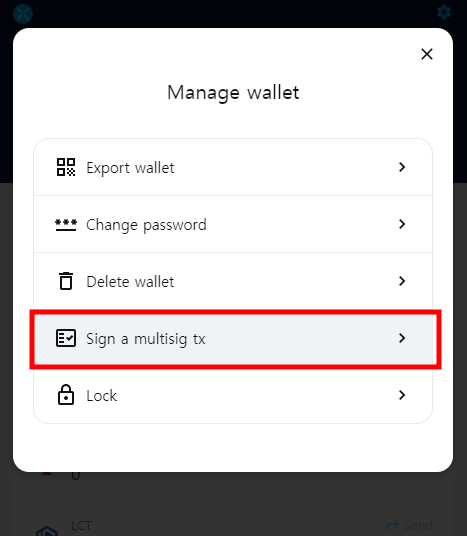
- Launch the XPLA extension and select View More icon > Sign a multisig tx.
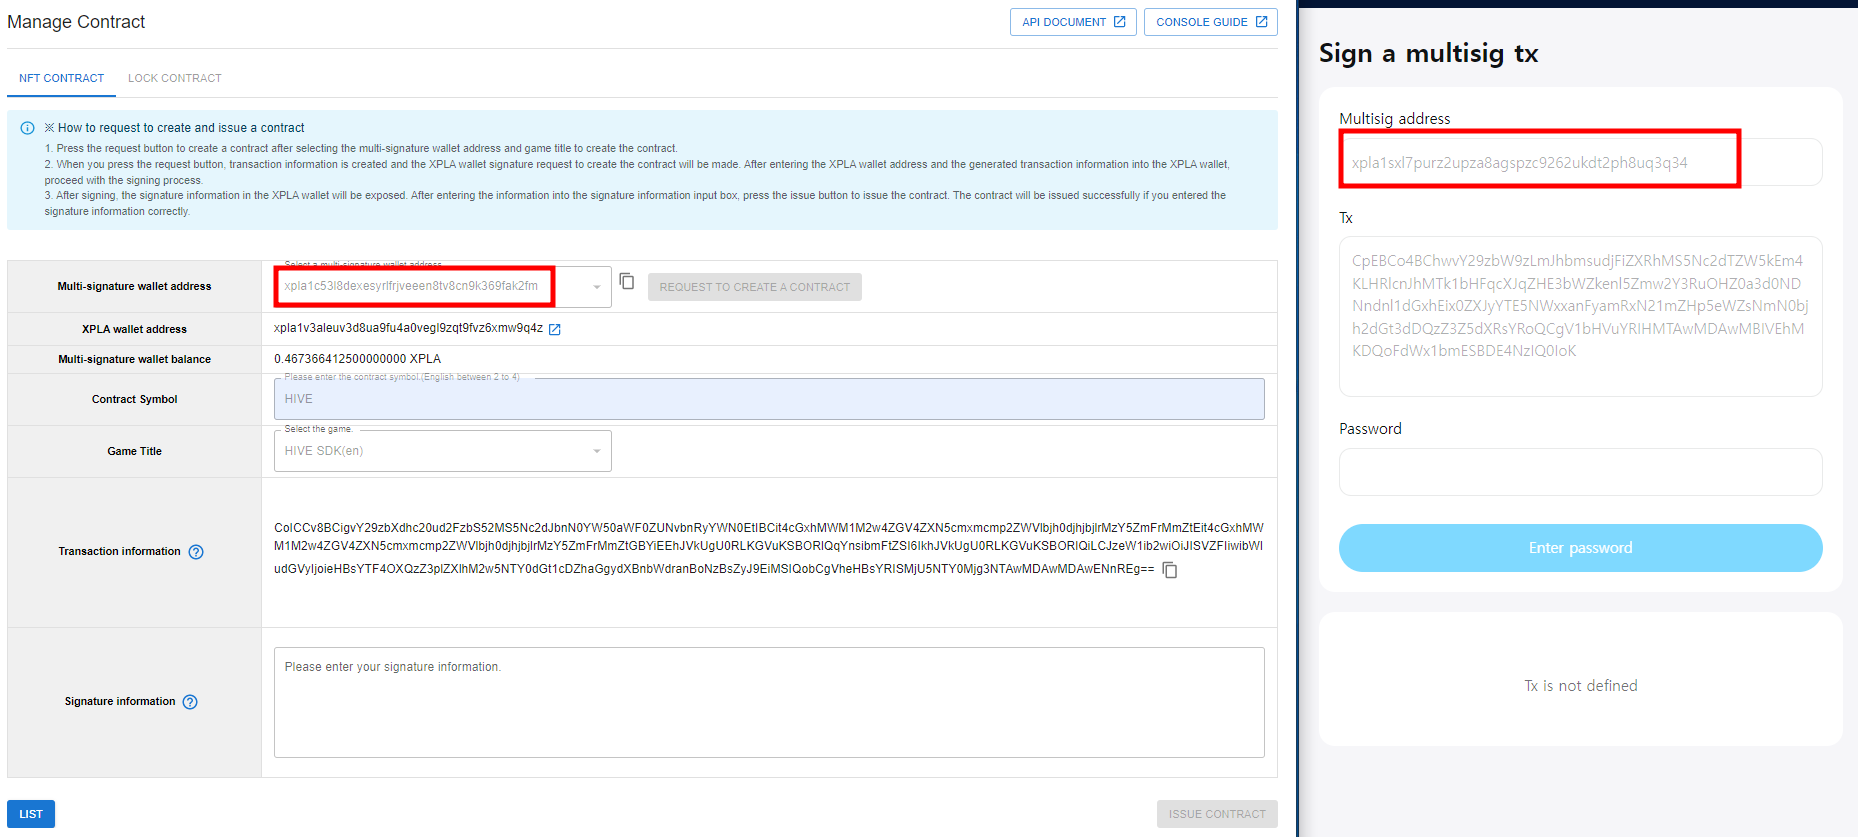
- Copy the multisig wallet address shown on the contract issuance page and enter it into the XPLA extension.
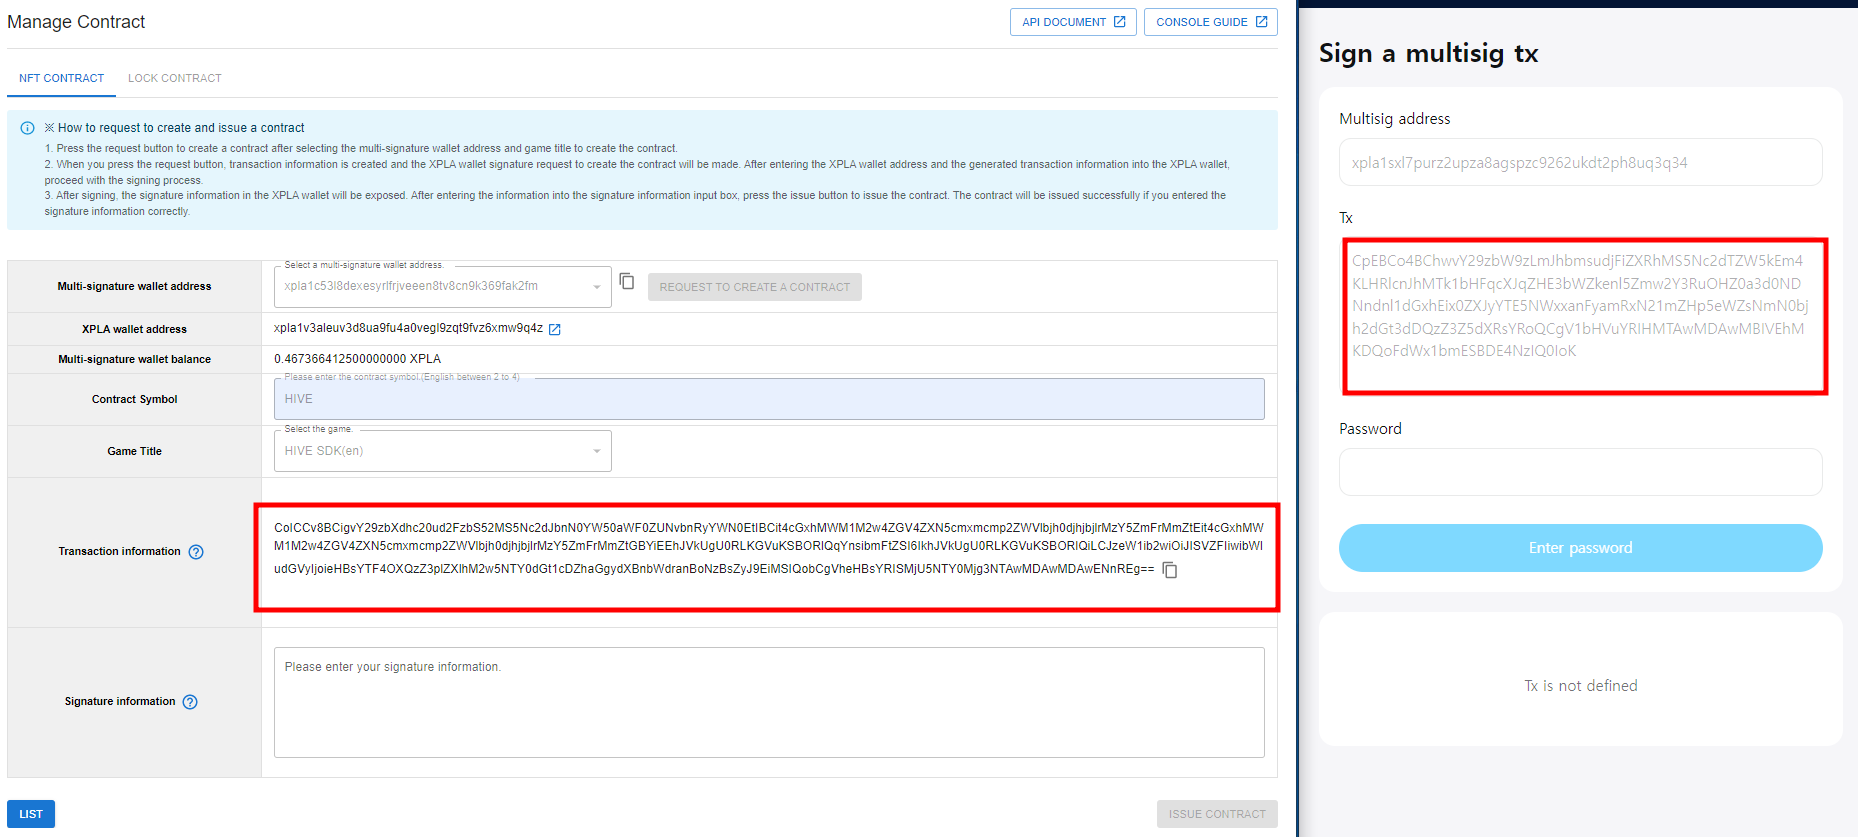
- Copy the transaction information shown on the contract issuance page and enter it into the XPLA extension.
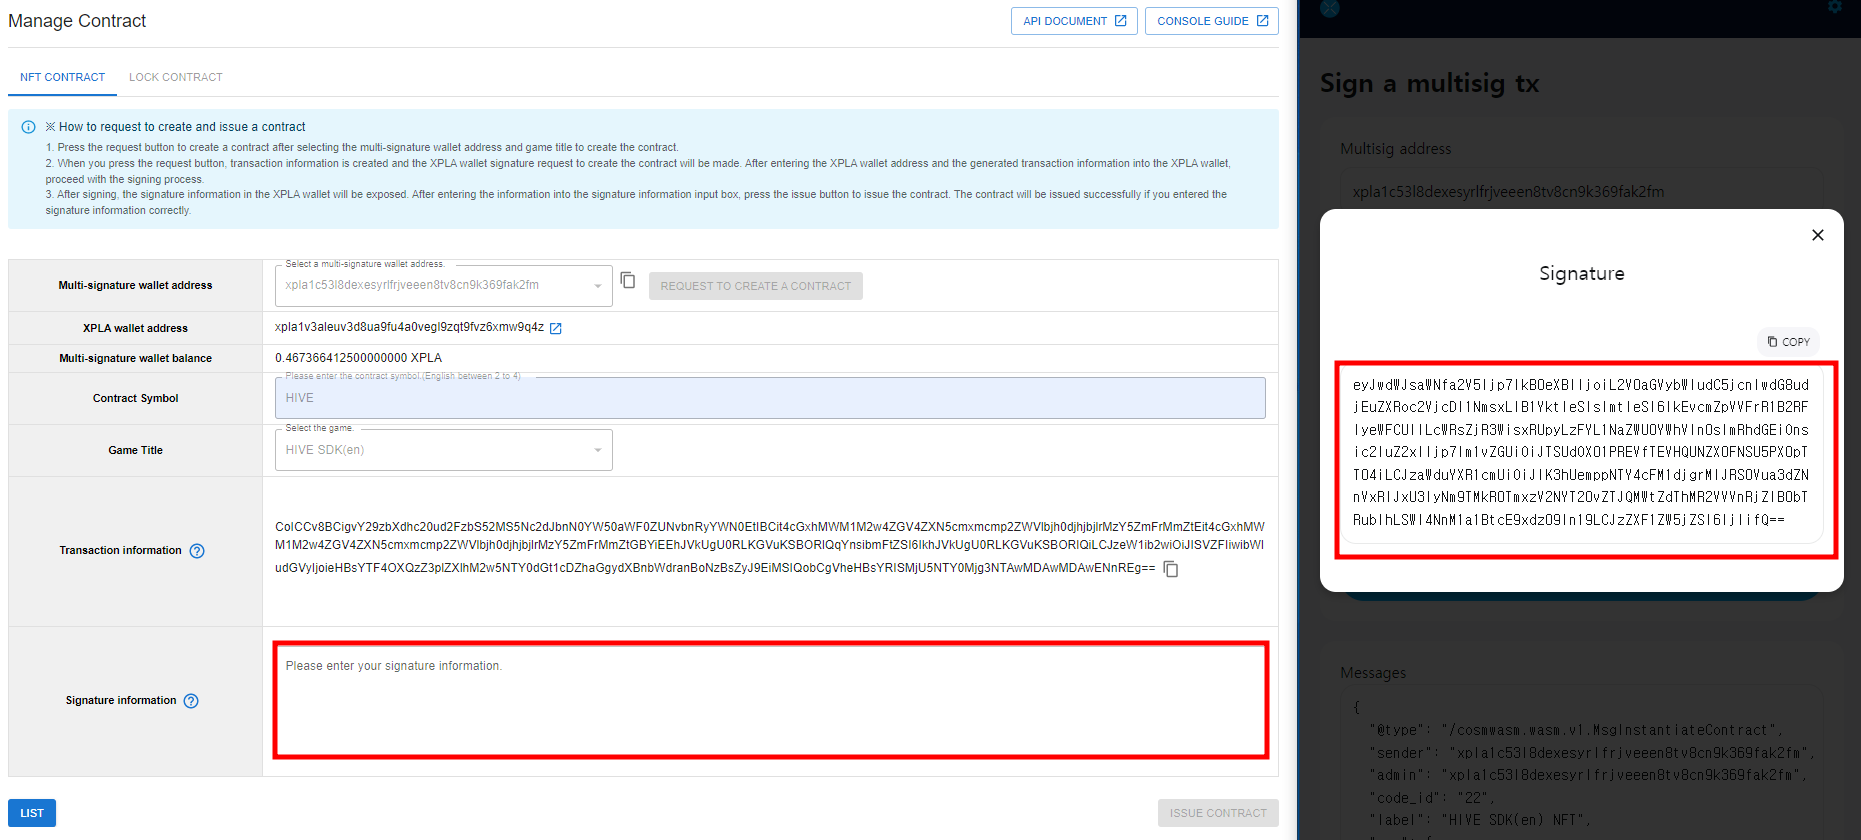
- After entering the password and finishing the signing task, copy the exposed Signature information and enter it into the contract issuance page > Signature information.
- Select the Issue a Contract button to complete the contract issuance.
LOCK contract
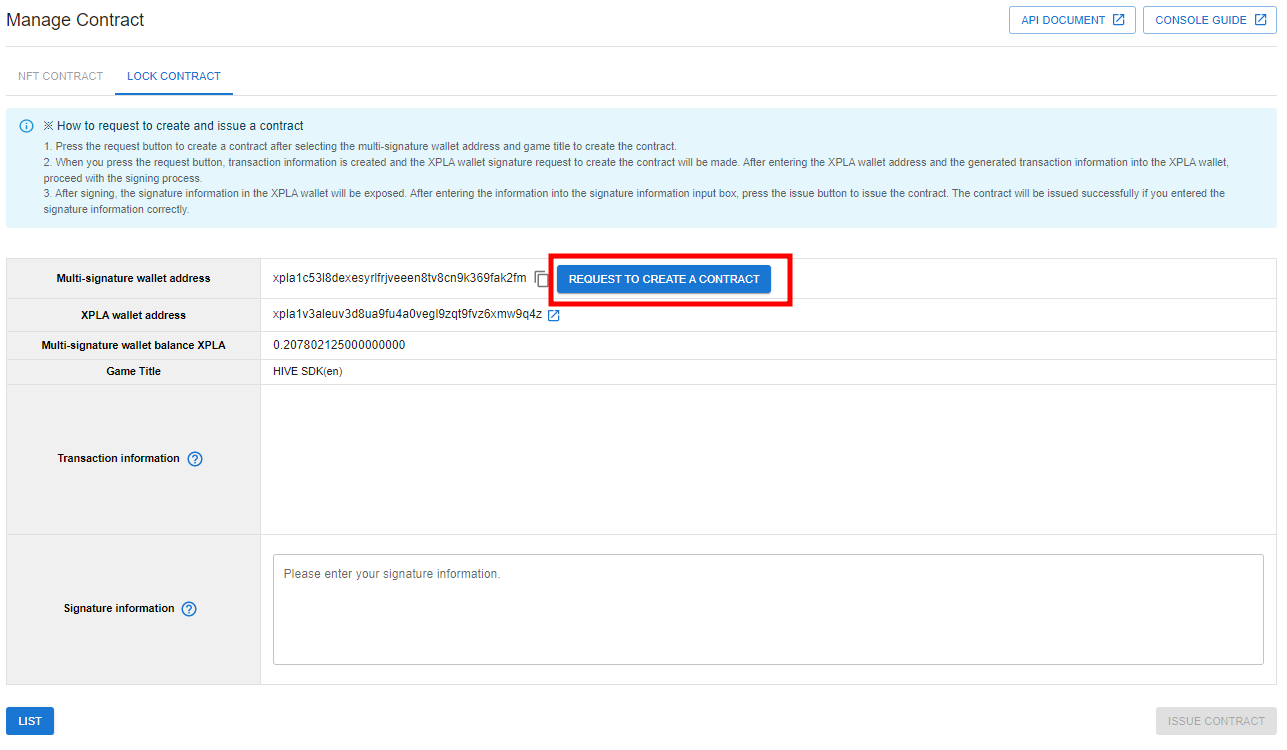
- This is the contract required for NFT enable/disable function.
- Game users can freely use their NFTs in the C2X Vault (virtual currency wallet) and in-game using the lock contract.
- Because the lock contract and the NFT contract issuance information are the same, select the Request to Create a Contract button without further selection or input.
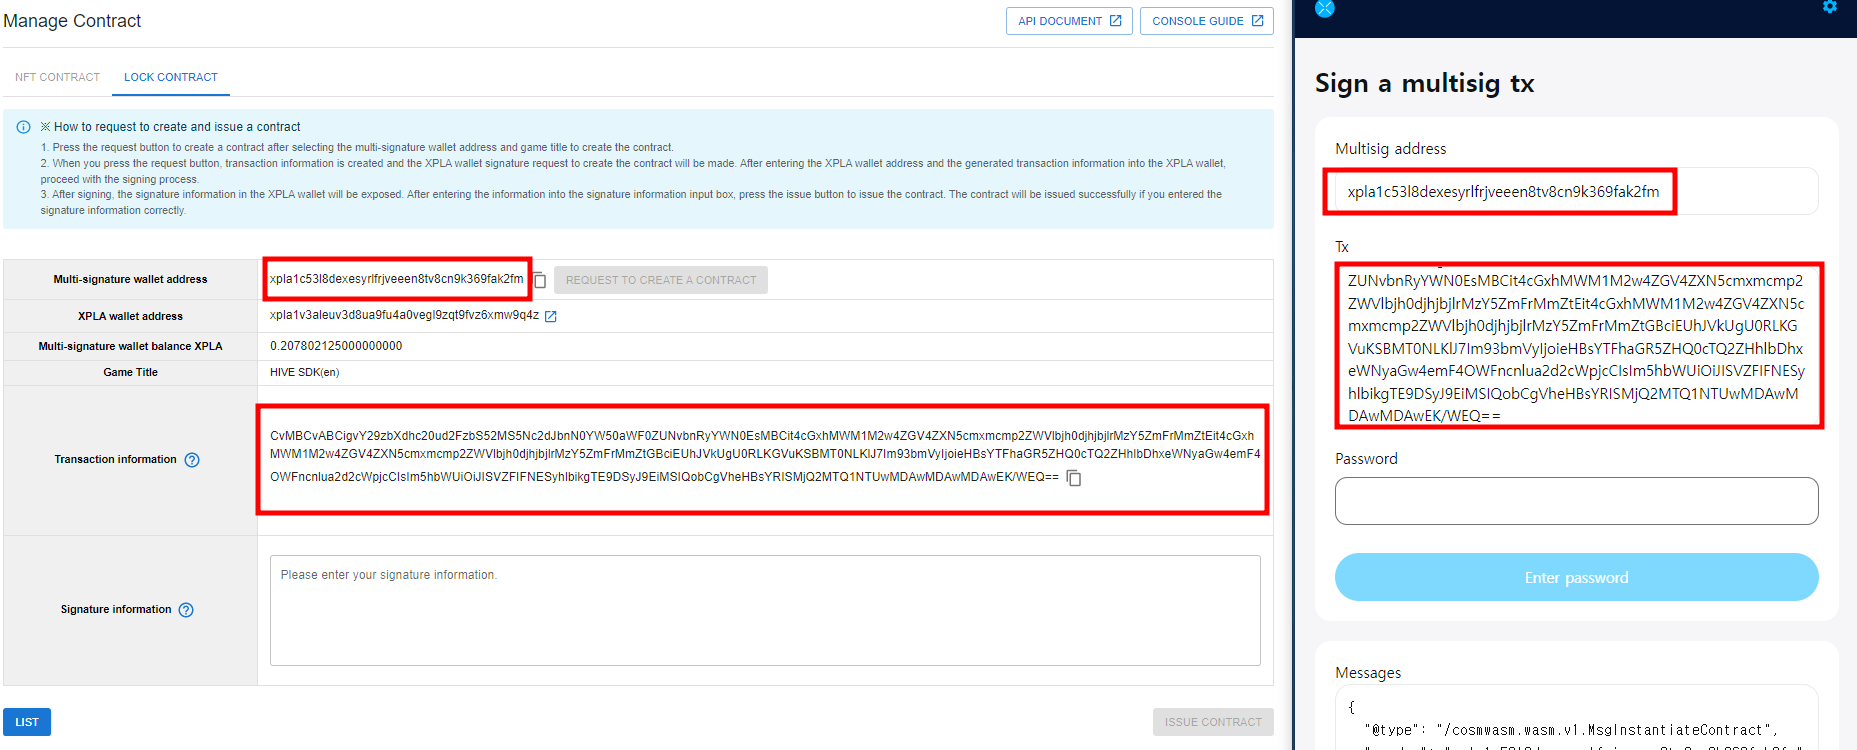
- Copy the multisig wallet address shown on the contract issuance page and enter it into the XPLA extension.
- Copy the transaction information shown on the contract issuance page and enter it into the XPLA extension.
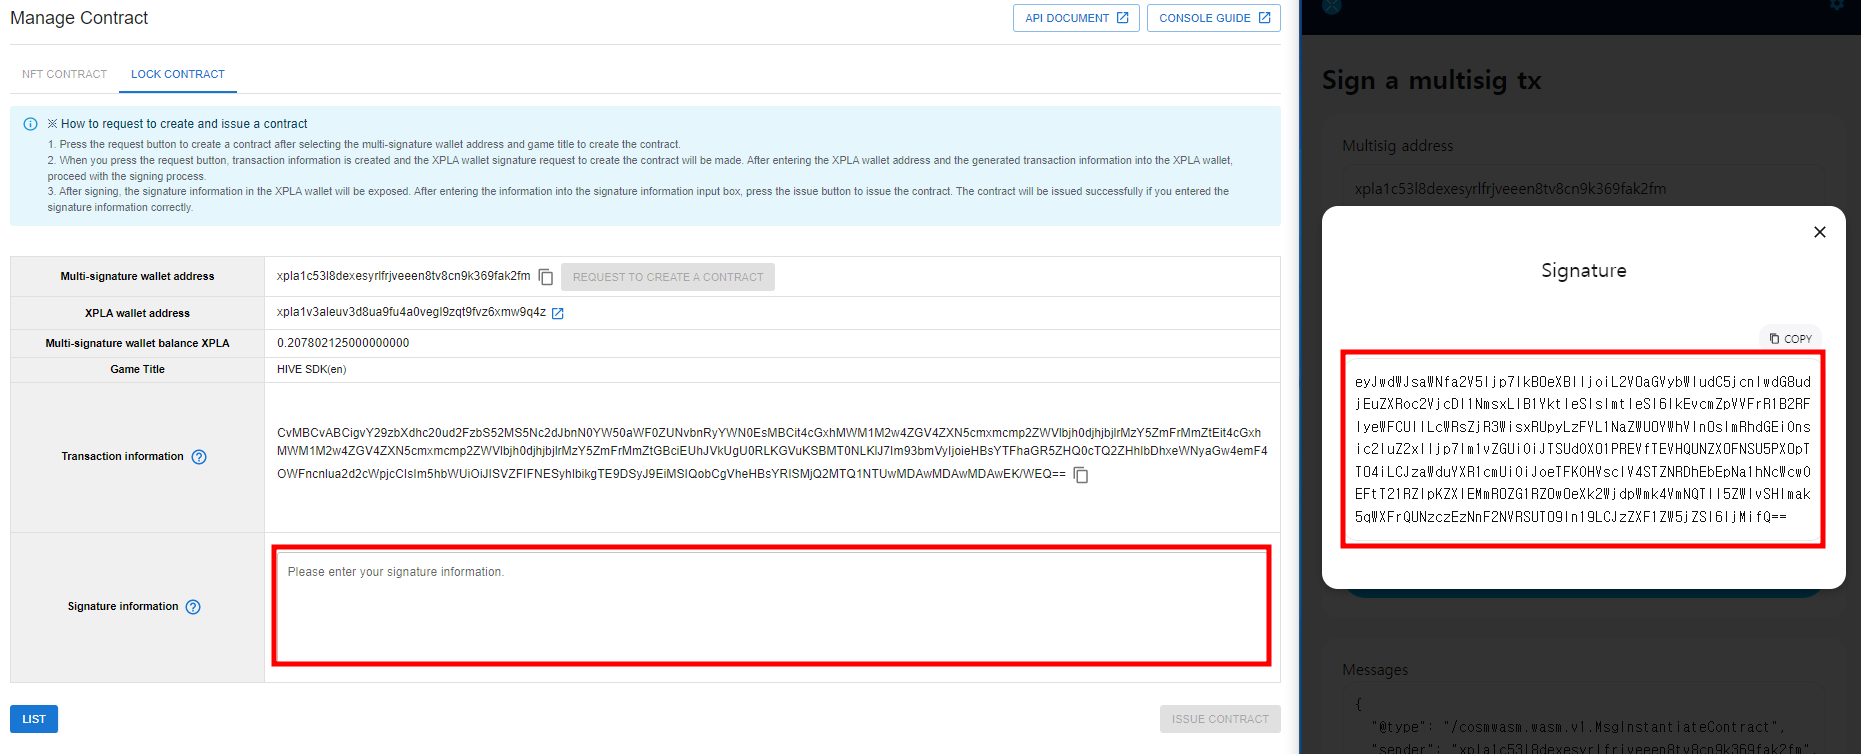
- After entering the password and finishing the signing task, copy the exposed Signature information and enter it into the contract issuance page > Signature information.
- Select the Issue a Contract button to complete the contract issuance.


