Promotion Settings
It is a menu where you can set up basic information about an application. You’ll be able to use the app information you set here from other promotion menues. When you launch a new game, first, you need to register the app here in order to select the game from other promotion menues.
Basic settings
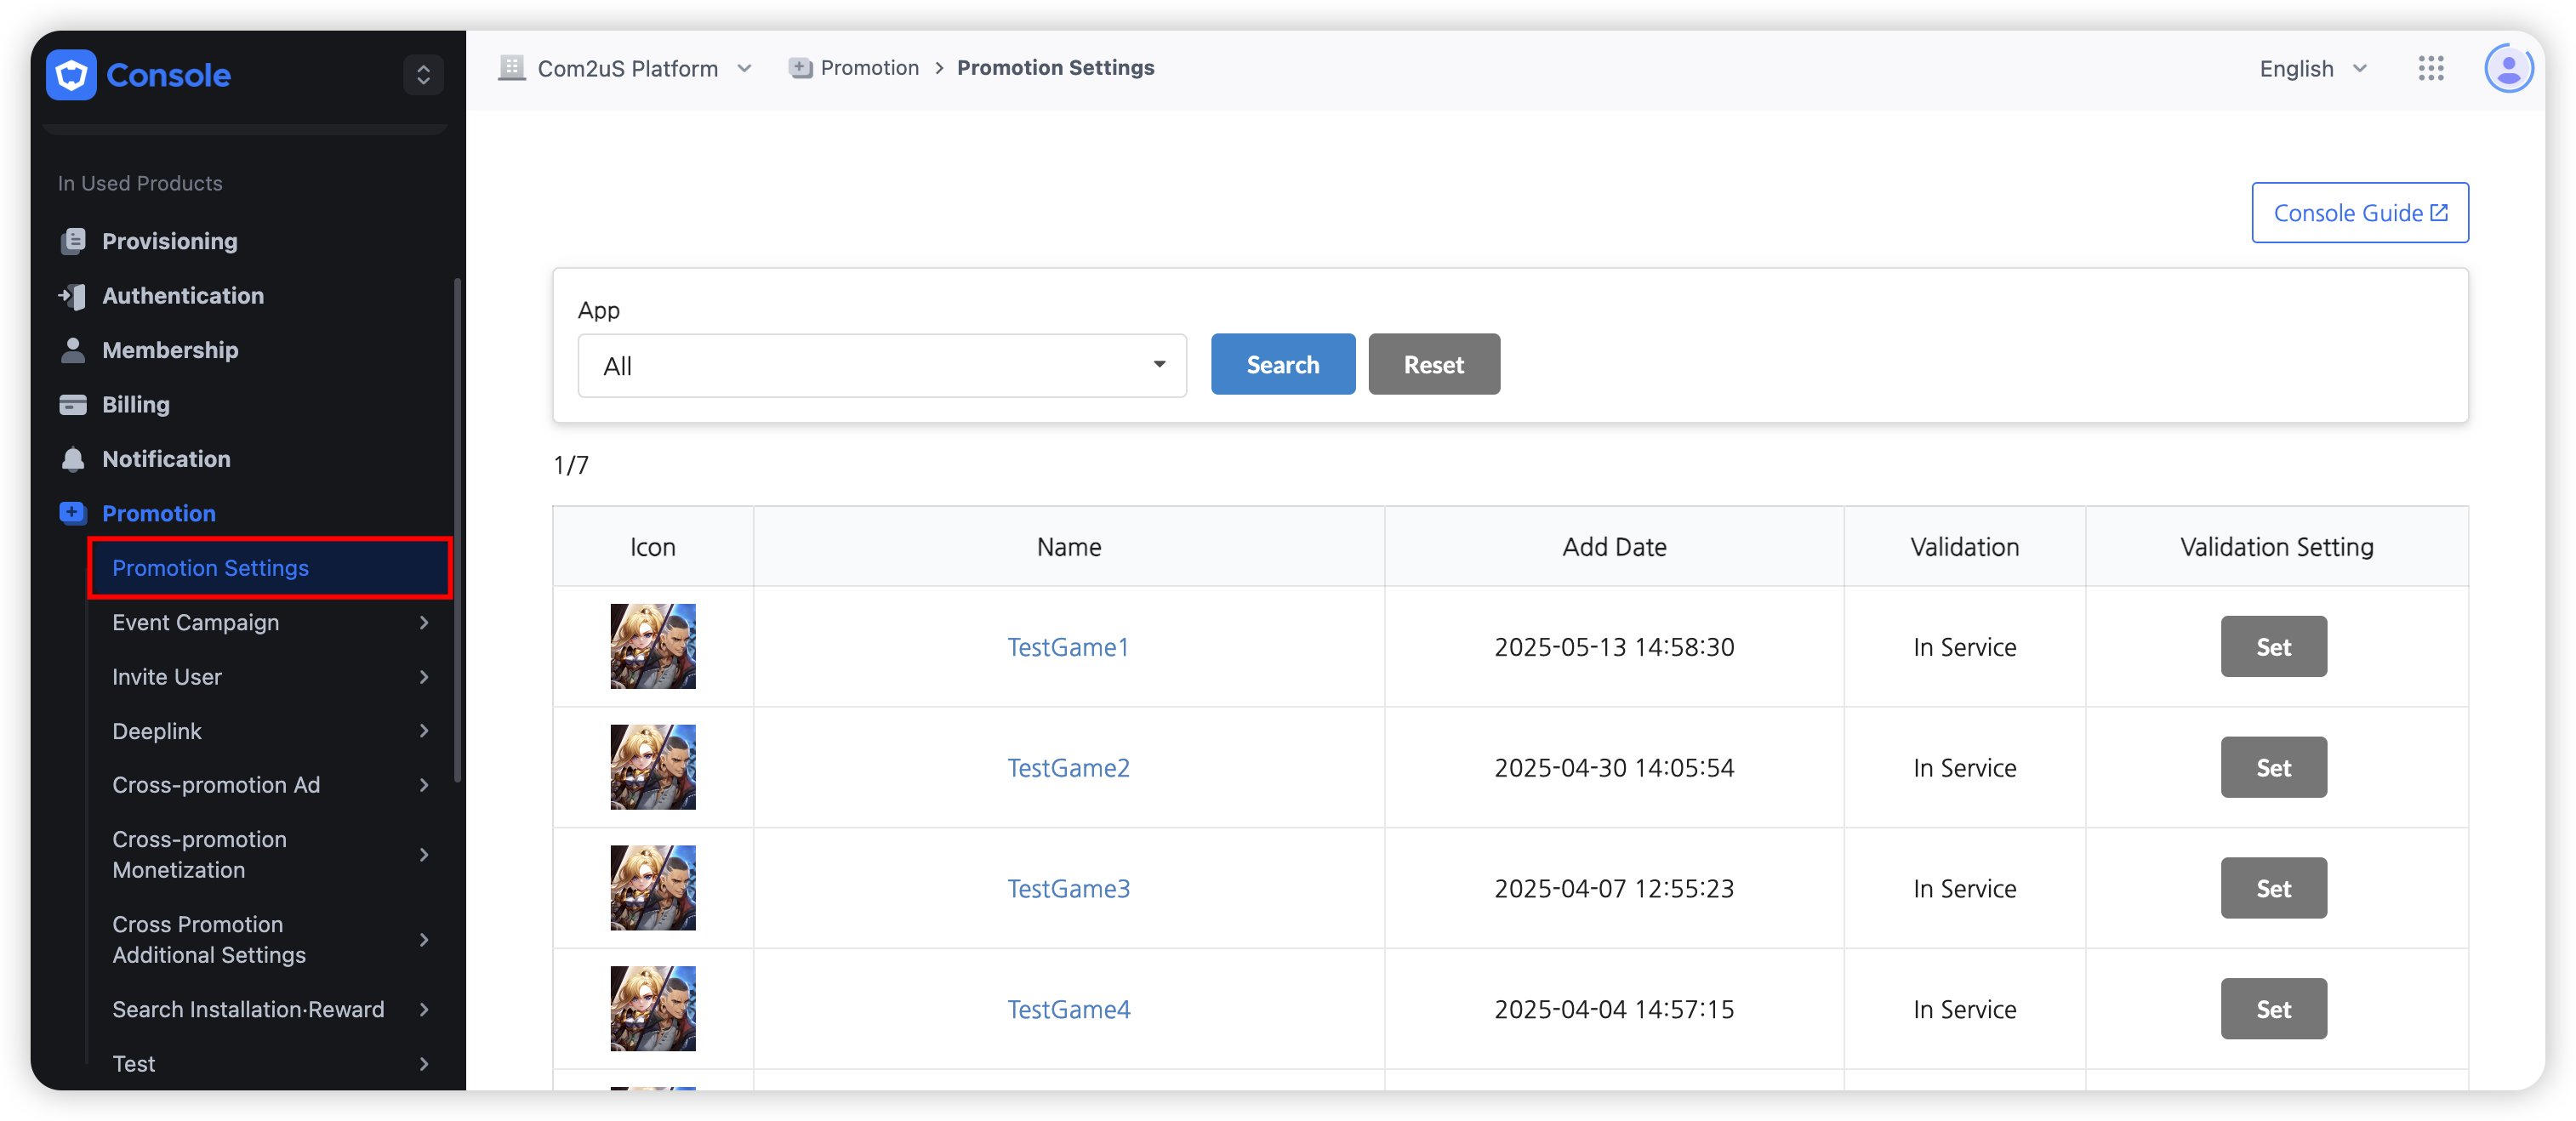
Click on the Promotion-> Promotion settings.

App information registered at the App Center will be automatically registered. Some of the basic information will be automatically synchronized.
- The app icon, game title, game server and App ID information will be synchronized to the information registered at the App Center and such info cannot be modified. Please go to the App Center to make modifications, if necessary. Other information must be entered manually.
- The campaign banner will be exposed according to the orientation that’s set up for the game.
- There’s no limitation to the campaign exposure according to the User Age Grade.
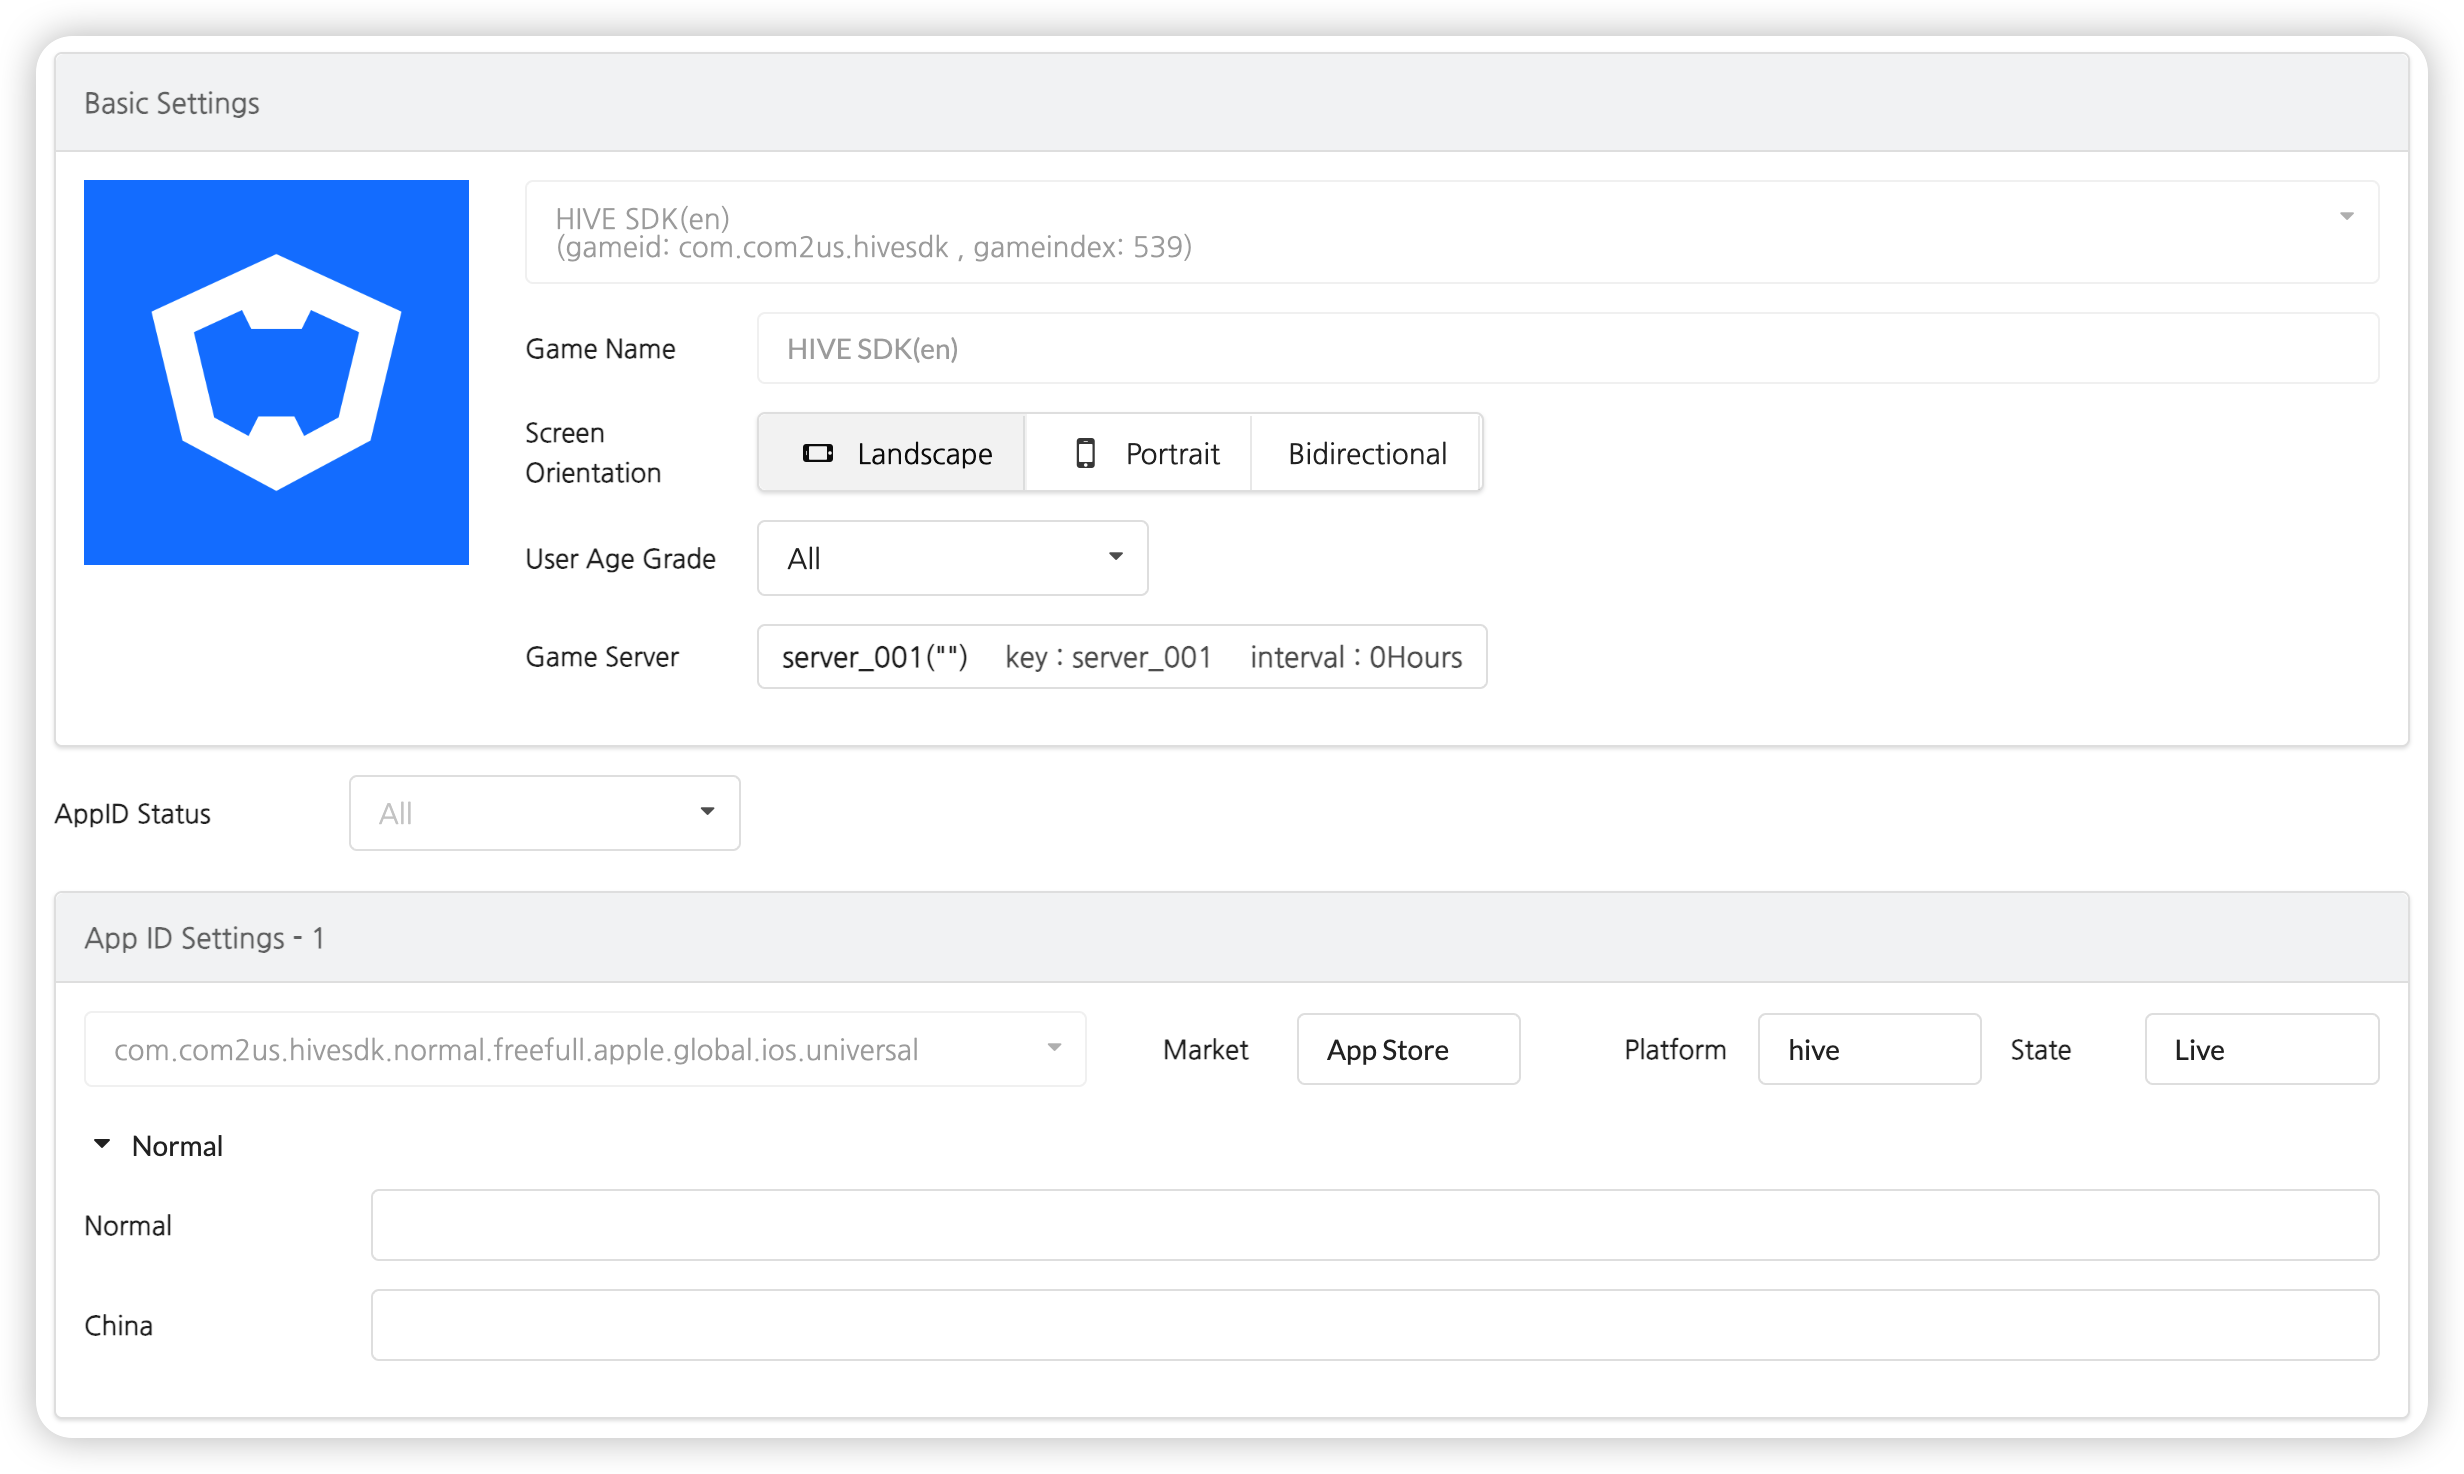
- App ID Settings
- Inputs by Item
- [1] Normal: Enter the URL for each App ID.
- [2] China : Enter the China-specific Android download URL, if available.
- If there’s an OS not in service, enter http://ua.withhive.com/ua/block/not_support in the corresponding Download URL in order to display a page that notifies the users it is unavailable.
- Inputs by Item
Click on the Save Button once you enter all basic information. You’ll now be able to move to another tab to enter additional info.
CPA settings
It’s a feature where you can issue a CPA Code when using the CPA. Once registered, it can’t be modified or deleted.
- Click on “CPA Settings” -> Register CPA”.
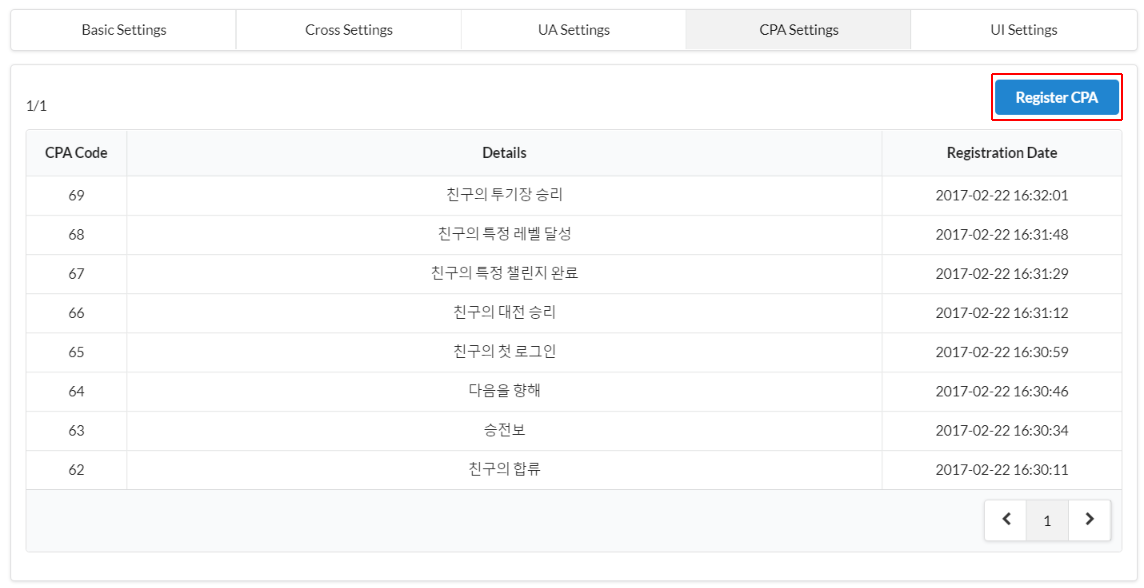
- Enter the CPA details in the pop-up window and the CPA Code will be issued automatically. The code will be called in the game to check the activation status and to give out the reward.
- The CPA details you enter are for management use only and won’t be displayed in the game.

UI settings
This is where you can set up the layout of news, custom view and custom board. This feature may not be supported depending on the Hive SDK versions, and the UI Settings Menu will be deactivated in the backoffice.
You can see the settings being applied immediately in the game after you save it.
Custom view/board UI settings
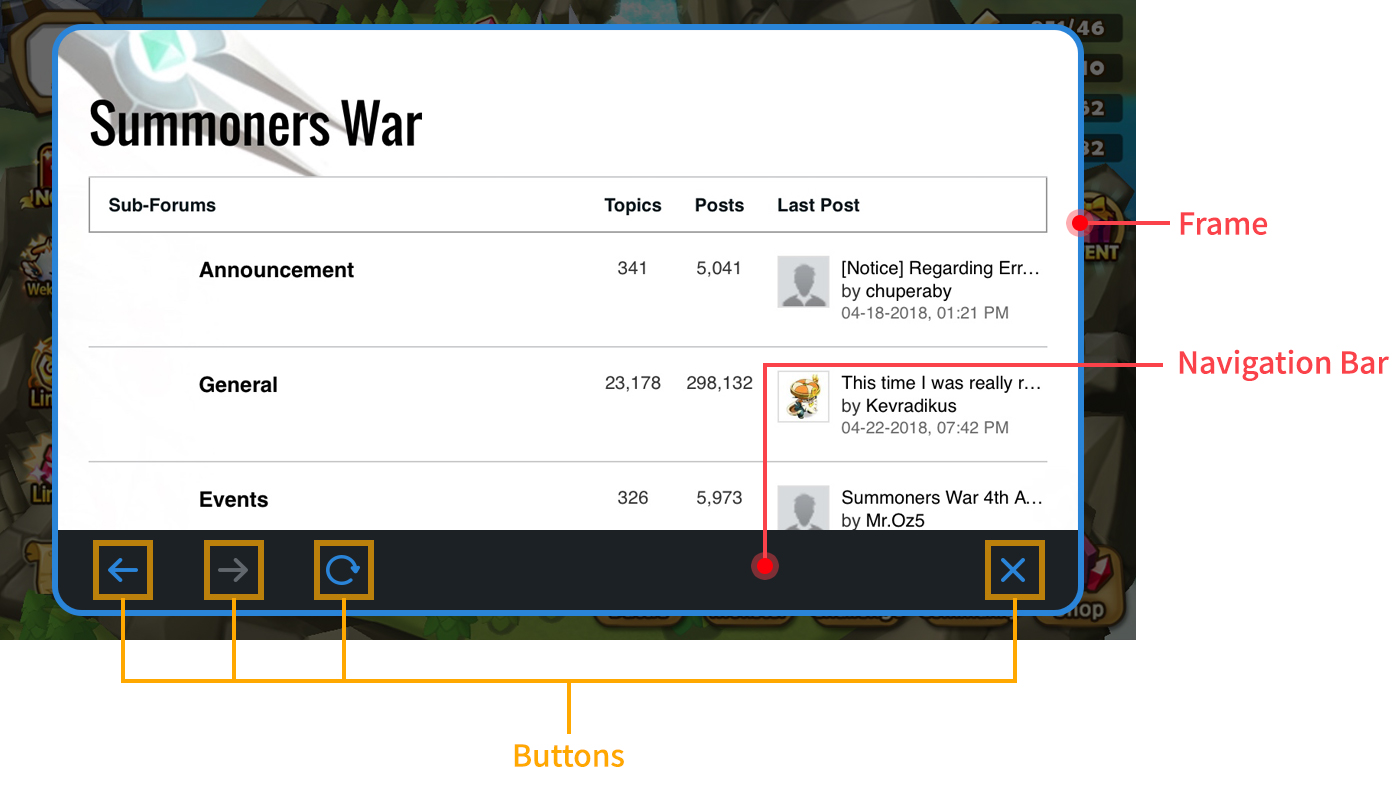
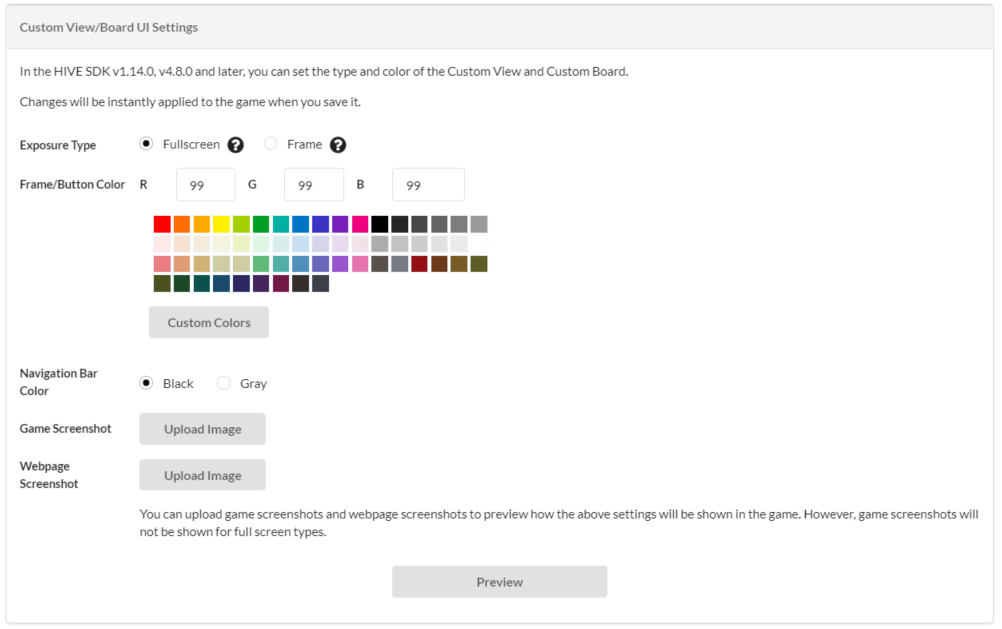
This function enables you to set up the type and color of the frame that displays the custom view and custom board. You can specify the background color, frame and button color of the navigation bar in the custom view and check how it looks via preview.
[Custom View UI Configuration - Frame Type]
For games that are already using Custom View/Board, you can see the three exposure types as shown in the image below when you connect to the console for the first time. For games that use the Custom View/Board for the first time, you only have two options: full screen and frame.
- Exposure type: If you put a cursor over the "?" image next to each category, you'll be able to check example images of each.
- Classic: A form of Custom View that's already in use. You won't be able to revert back once you select another option. The bottom category (color settings, etc.) will be disabled in a Classic format.
- Full Screen: Exposes in the form of covering the entire game screen.

- Frame: Exposes in the form of surrounding the frame in the center of the game screen.

- Classic: A form of Custom View that's already in use. You won't be able to revert back once you select another option. The bottom category (color settings, etc.) will be disabled in a Classic format.
- Frames and Button Colors: You can either enter the R/G/B values directly or select colors from the color palette. For full screen types, only the button colors will be applied to the game.
- Navigation Bar Colors: You can select either black or light gray for the navigation bar.
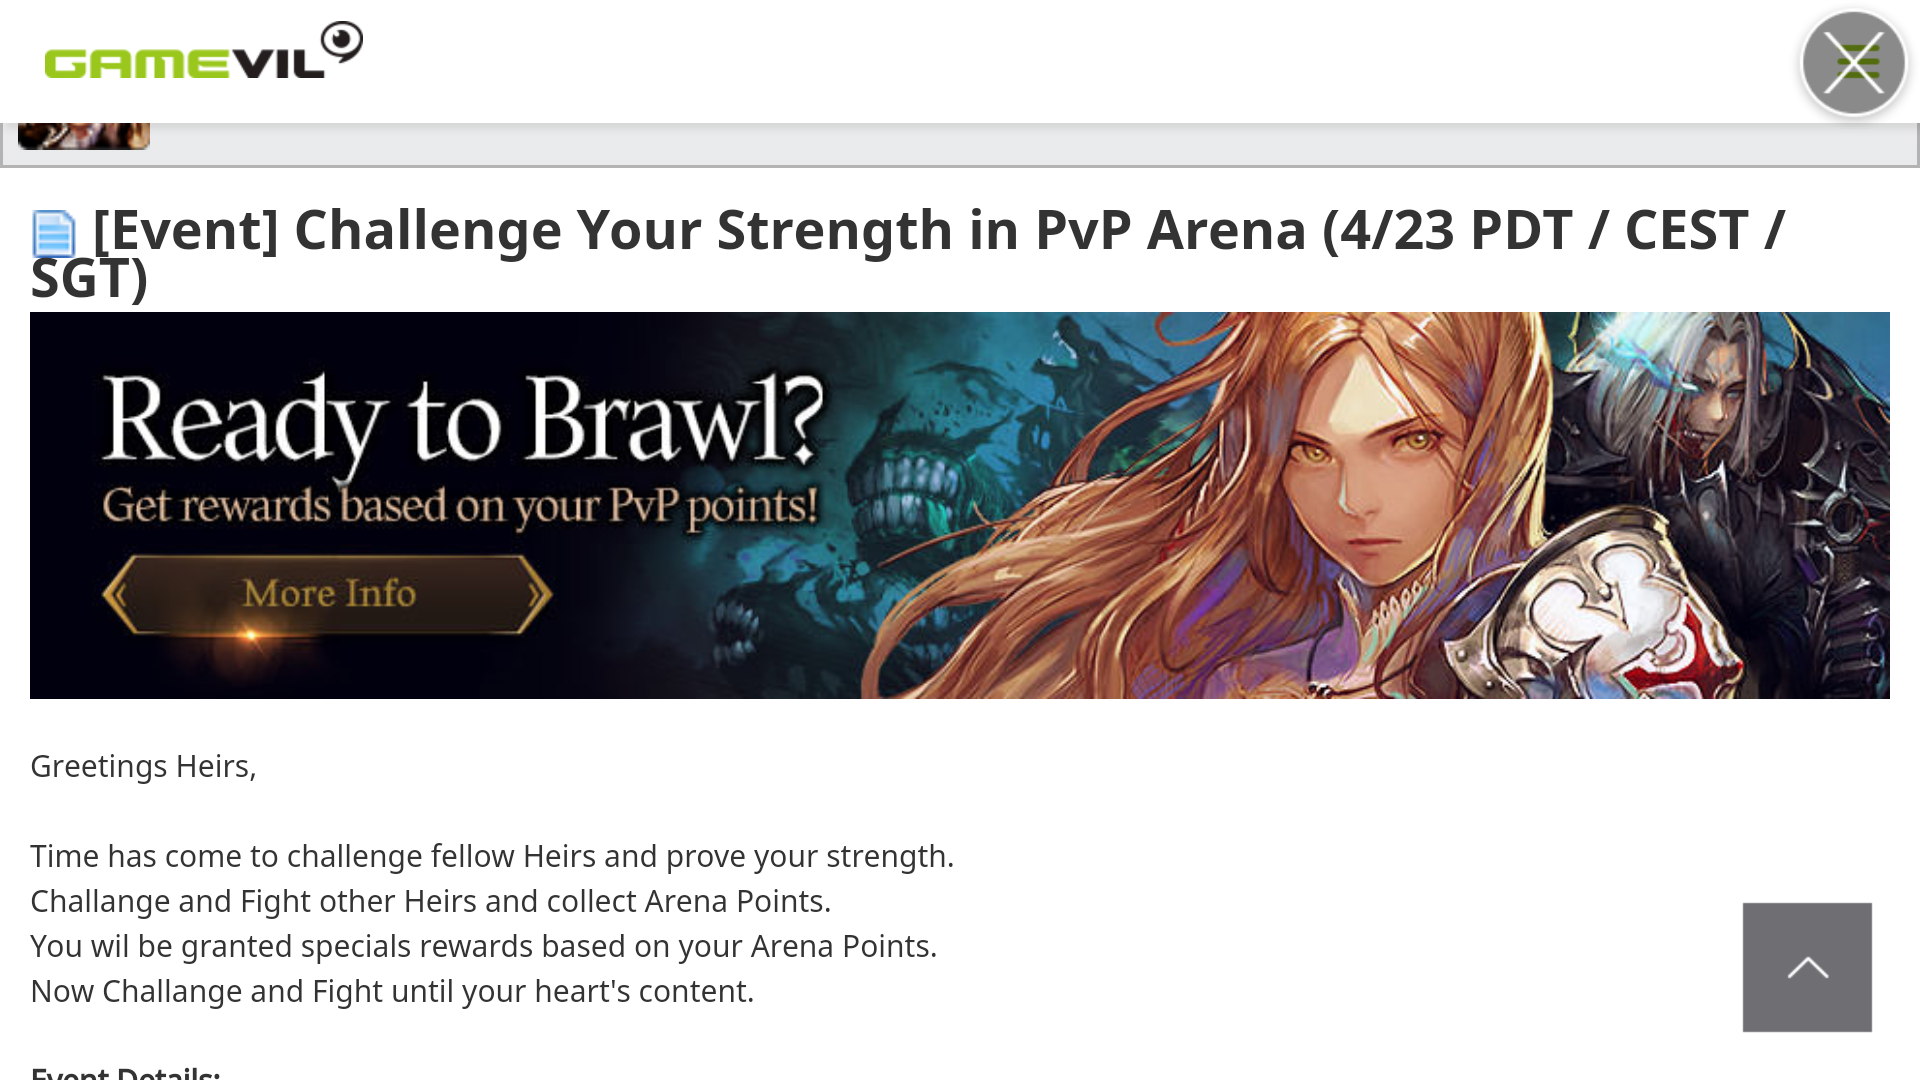
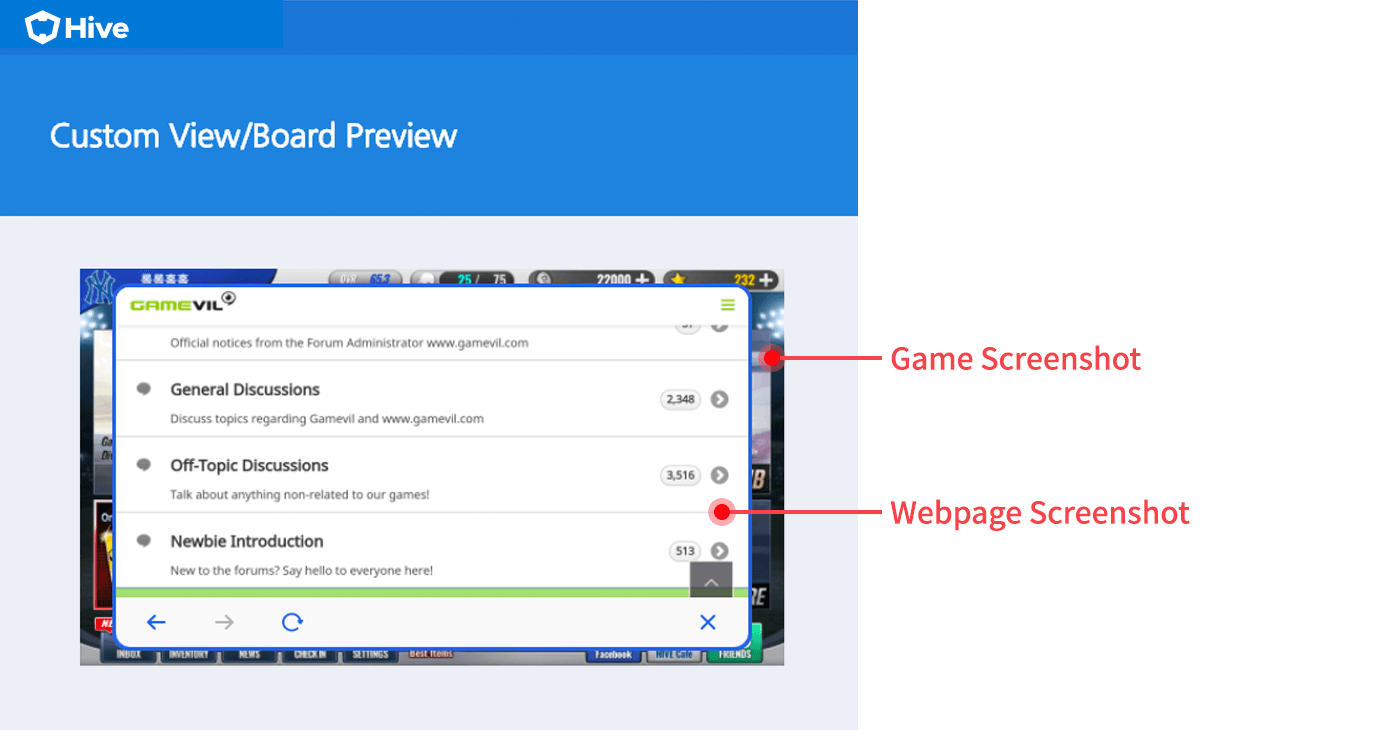
- Game Screenshot/Webpage Screenshot: You can register screenshots to the preview so that you can set it up like the actual game. [Example of a preview]
News UI settings
[Details per setting category]
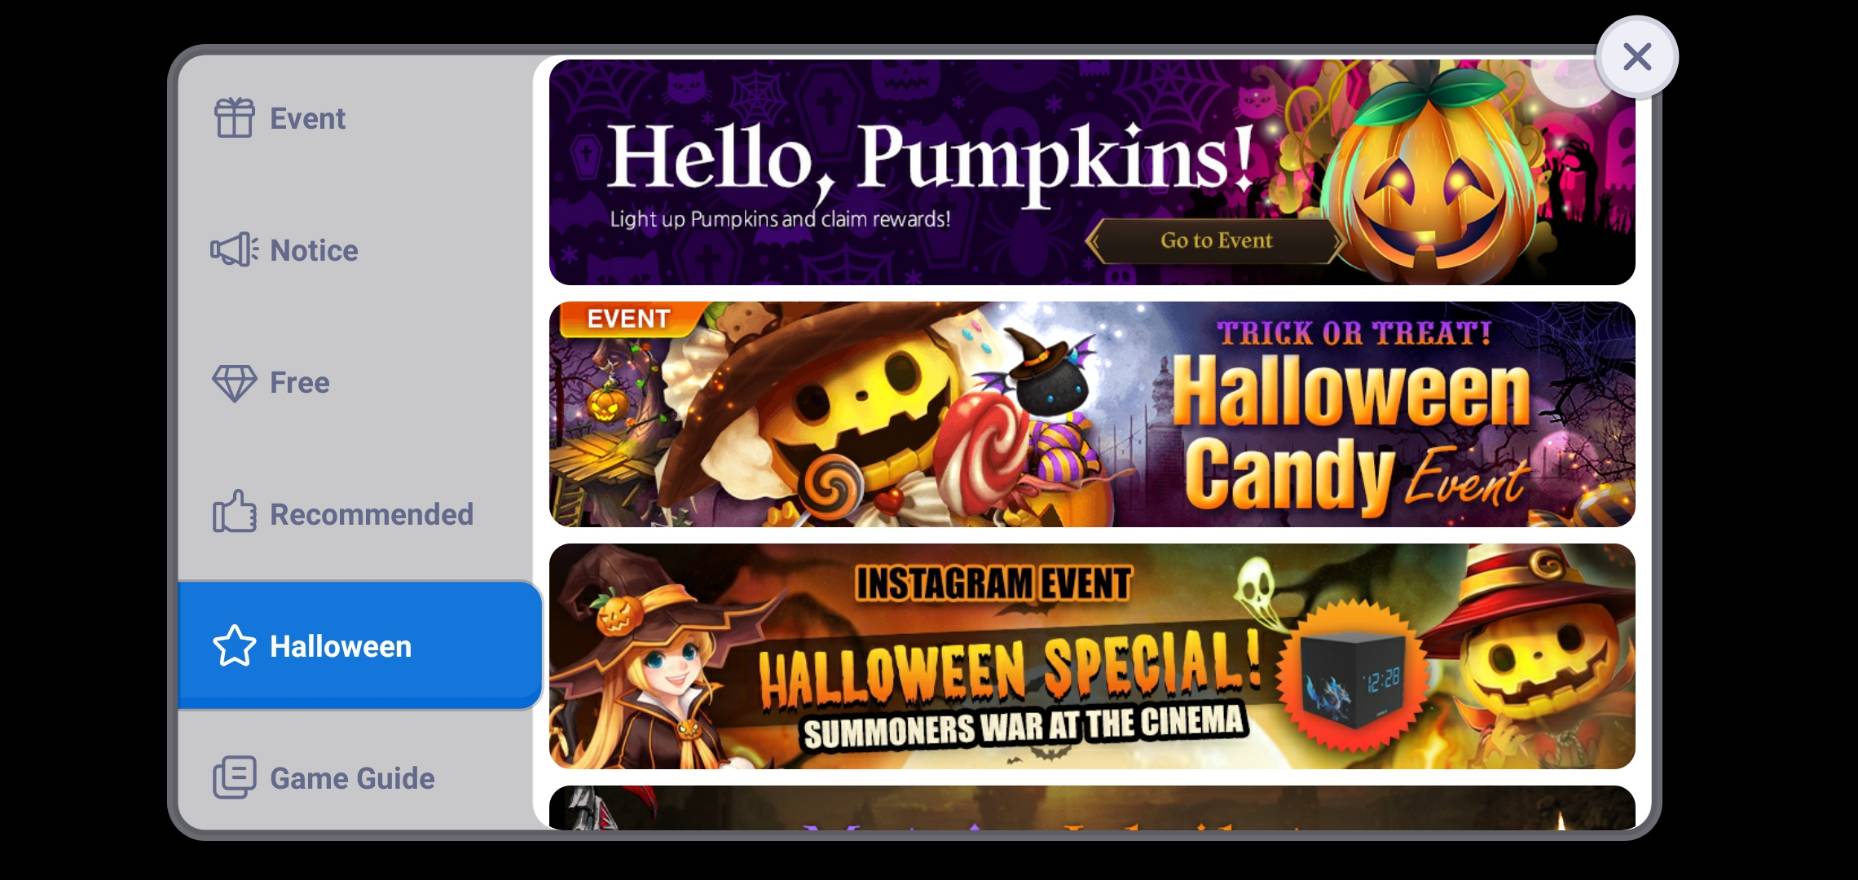
From News, you can add and display a general banner classified by promotion type name as a separate menu. Improved News is only available for games applied with Hive SDK v4.15.0, v1.19.0, C2S.19.0 or higher.
If there are no specific settings, all general banners, announcements are exposed by default. If there is no content to be exposed in other menus except for announcements, those menus will be hidden. After completing the settings per category, restart the game and the changed items will be immediately visible in the game.
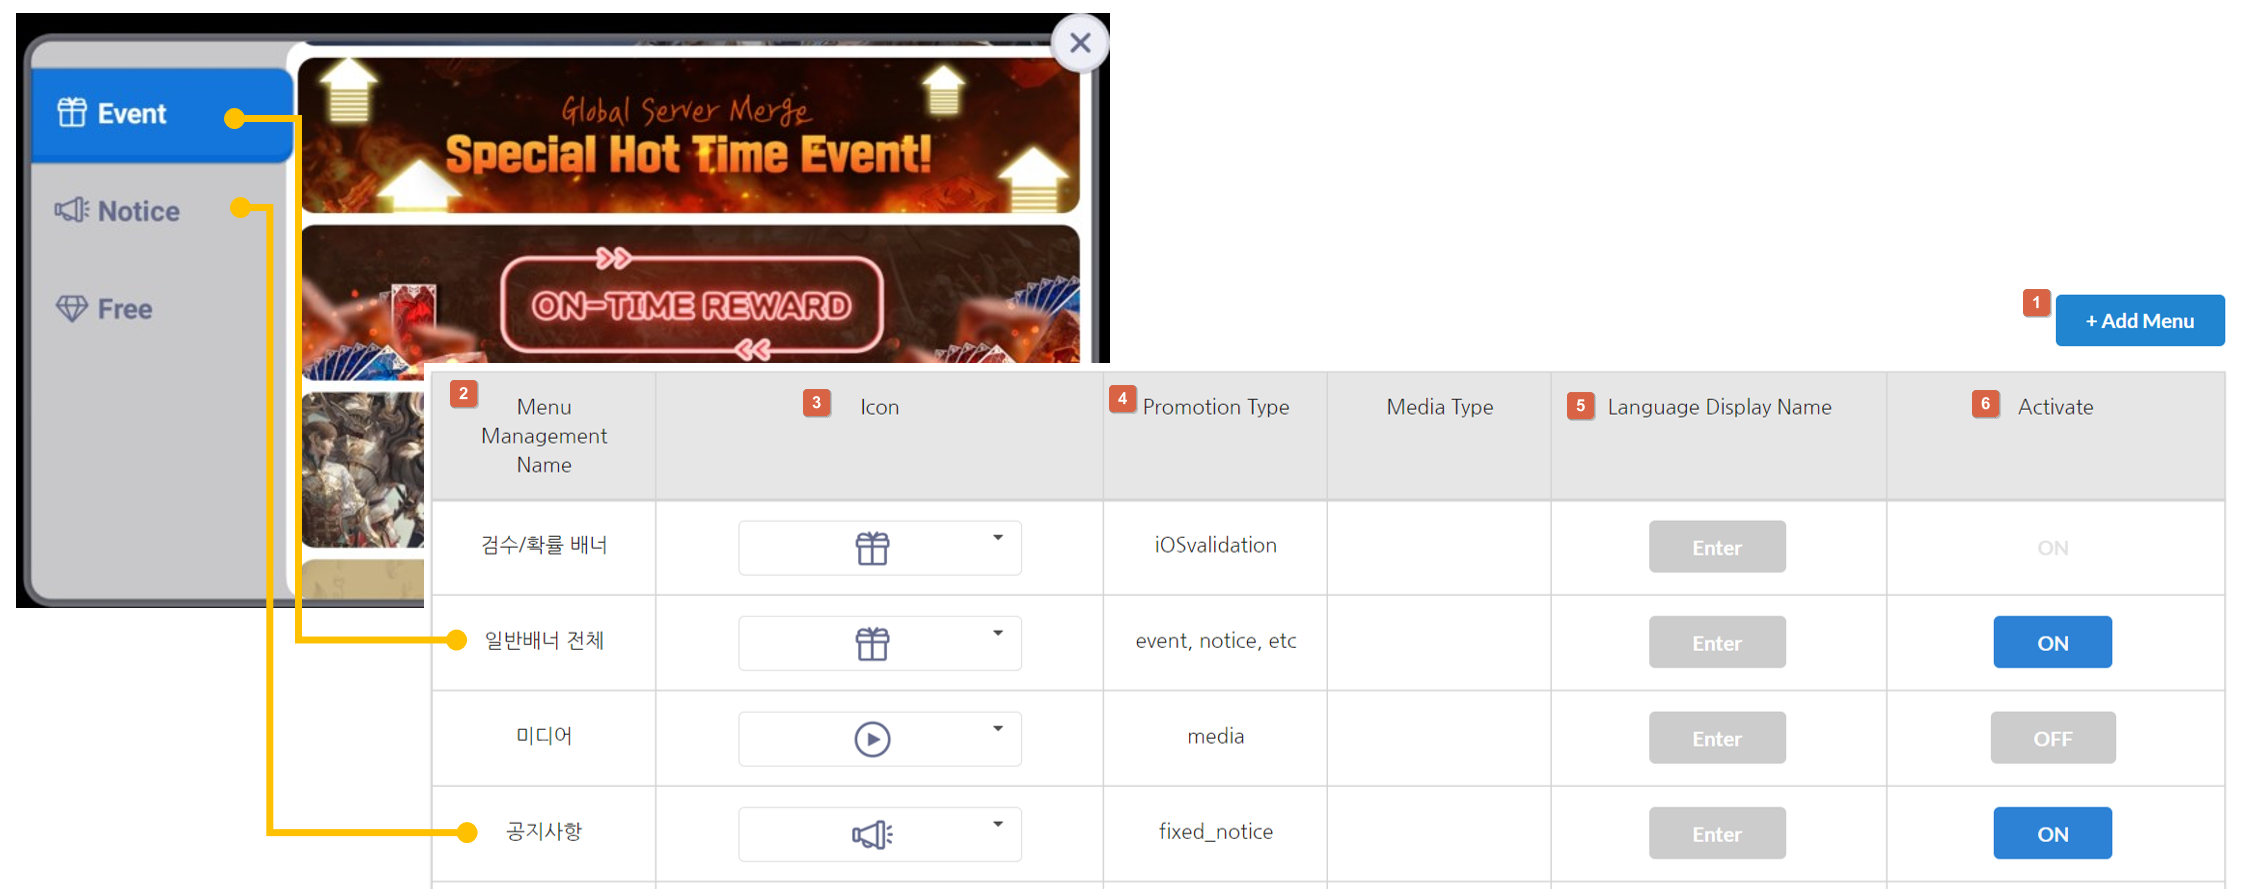
[Add Menu]
You can add menus per promotion type of general banner to expose to News. General banners cannot be used with promotion types (excluding validation rate banners, recommended games and notices) that are generated manually. OFF\ the entire general banner."}" data-sheets-userformat="{"2":4995,"3":{"1":0},"4":[null,2,16777215],"10":2,"11":4,"12":0,"15":"Arial"}">To use the added promotion type, please turn OFF the entire general banner.
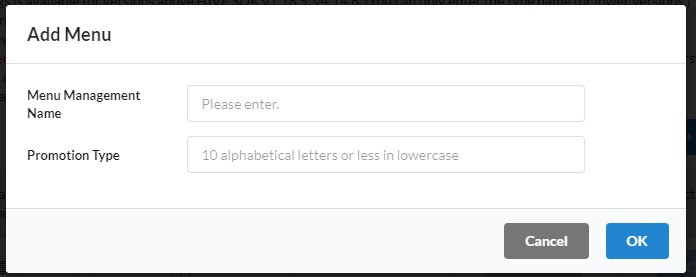
① To add a menu, click [Add Menu], enter the menu management name and promotion type, and save.
Category
- General Banner: This is a menu and promotion type added to Campaign Settings> General Banner.
- Media Banner: This is a menu and promotion type that is added to the Campaign Settings> Media Banner.
② Menu Management Name : This is the name for managing menus and is hidden from users.
③ Icon
Select the appropriate icon for the News menu name from the list.

④ Promotion Type
Select a type name to distinguish the menu. This item must be selected when registering a campaign, so please register it in lowercase alphabets so that you can think of the menu management name. Type names, such as Event, Notice, and iOS Validation, are registered by default and cannot be deleted/changed. You can also add more promotion types to distinguish banners. iOS Validation is the type name for drop rate banner settings during iOS review. (View how to set drop rate banners)
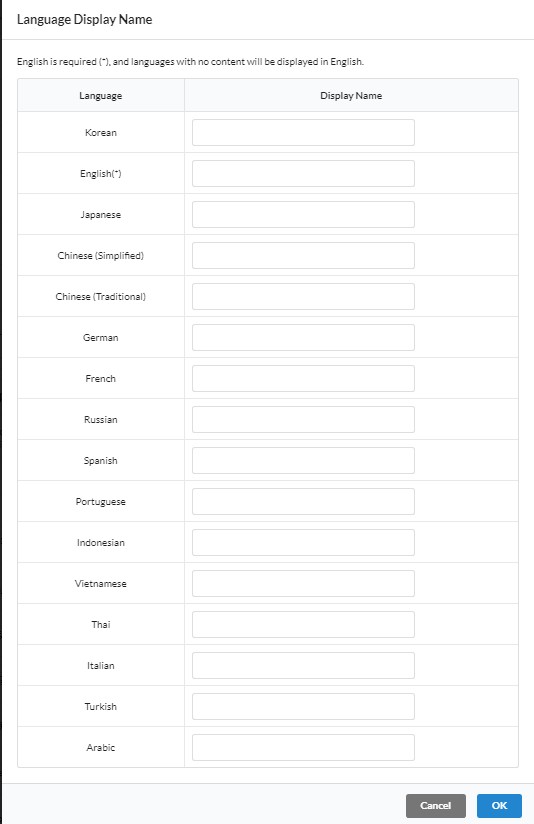
⑤ Language Display Name
Enter the menu name to be displayed when changing the game language in the game. It has to be entered in according to the game language, and English is required. Languages left unentered will be replaced by English.
⑥ Activate
You can set whether to activate the corresponding menu in the game. For buttons deactivated but turned “ON” like no. ⑦, it’s a menu provided to be displayed by default so you cannot change the status value.
[Changing Menu Order]
You can change the order of the menu. After the order change is complete, you must click the Save button at the bottom of the page to apply changes. After saving, you can restart the game to see the changed order in News.
[Delete Menu]
You can delete menus that you have created. If you delete the menu, campaigns with that promotion type set will not appear in News. To make your campaigns appear again, you'll need to change to a different promotion type.
[Preview]
Before you save, you can preview the News menu that you have set up in the current console. Each menu displays an example screen. 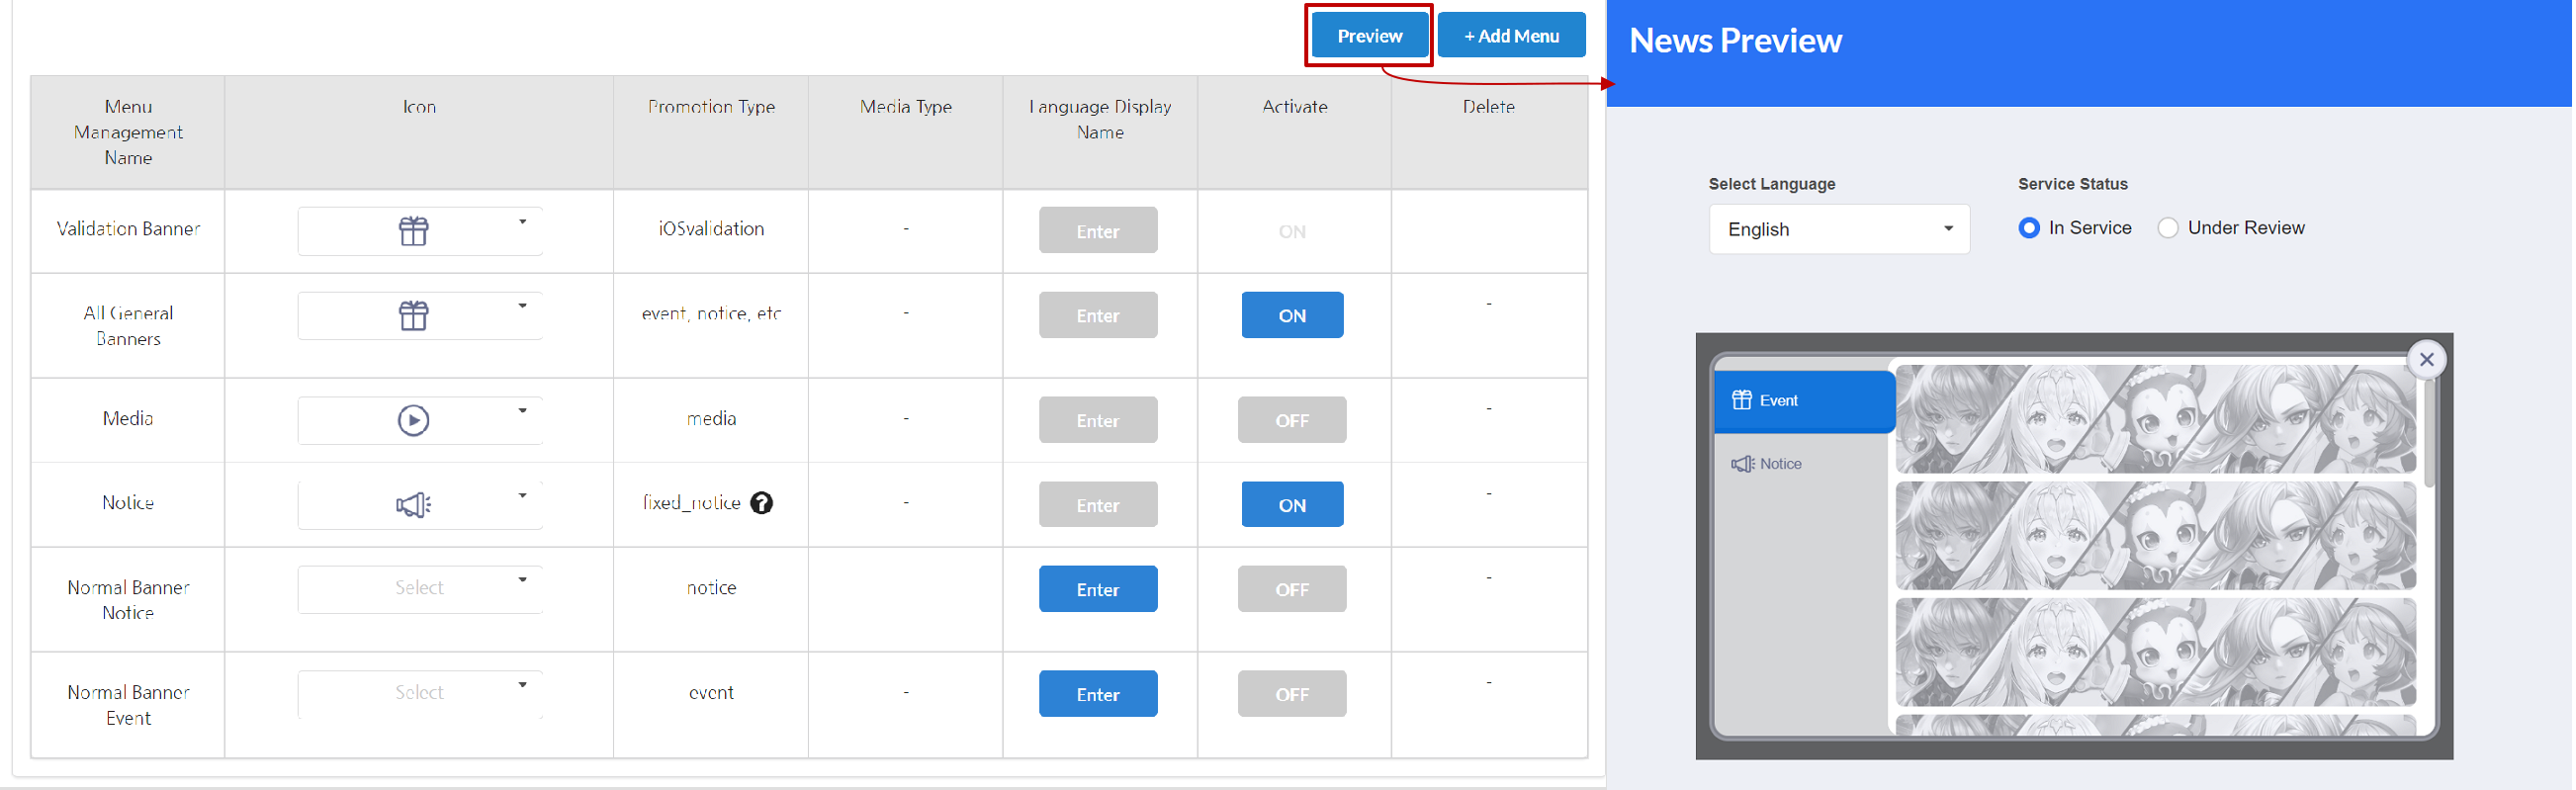
Warning
- It's recommended to place the general banner for the first menu. If you select other categories (notices, etc.) as the first page, the loading may be delayed.
Improved news gift icon settings
When using the improved news, you can create and use a gift icon customized for the game. The gift icon will be exposed only when the achieved event is applied. Click here for the corresponding development guide.If you do not register a gift icon, the default image will be applied.
[Default gift icon image of improved news]
| light mode | dark mode |

Upload the file according to the designated image size and file format.You can check the registered file by clicking on the uploaded file name.Click the Recycle Bin to delete the file. Once deleted, the default image is applied.
Create a gift icon according to the following design guide.
![]()
- The image size for creating a gift icon is 156x156px.
- Design the icon within 126x126px excluding the top margin of 10px, left and right margin of 15px, and bottom margin of 20px.
- In the margin space, you can use effects such as Drop Shadow or Outer Glow.
- When saving an image, click File> Export> Save for Web (Ctrl+Alt+Shift+S) and select the file extension as PNG.
- Download sample psd file
Improved news media settings
When using the media banner in improved news, you can specify the arrangement of thumbnails. Select and click Save to apply changes to the game right away.
Stop viewing interstitial banner period settings
 The ability to 'stop viewing' for a specified period is provided at the bottom of interstitial banners. Please select a period to stop viewing.
Note
- "Don't show this again today" will be displayed when you select "Don't show this for 1 day". "Don't show this for n days" will be displayed for all other periods.

Review/exit pop-up UI settings
You can customize the phrases shown in the review/exit pop-ups per game. There's a limit to the MAX number of characters per area, and a default phrase will be exposed unless you make a modification manually. This feature is available on Hive SDK 1.16.2/4.11.0 or later.
Review pop-up
<Default Settings>
You can set the text displayed in the review pop-up. It is exposed as a default phrase if you do not manually change it. 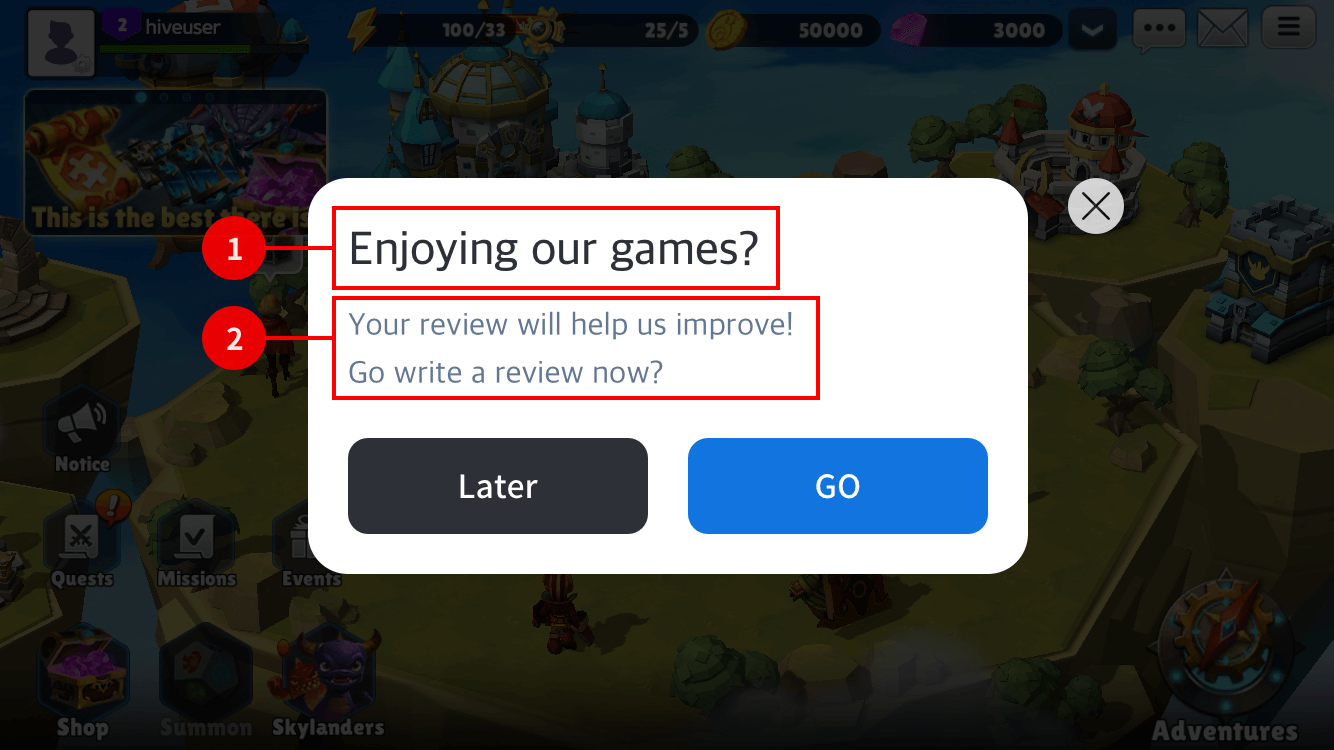
- Title area: 45 characters (English)
- Description area: 150 characters (English)
<Direct Settings>
You can directly set the text, left button and image displayed in the review pop-up.This feature is available on Hive SDK 4.15.8 or later.
- Design Guide
- The horizontal image size is 192*232(or 384*464) and the vertical image size is 280*100(or 560*200).
- Register a png image with a transparent background.

- Image placement: You can set the position of the image displayed in the review pop-up. This is only applicable to review pop-ups for horizontal games.
- Please register both horizontal and vertical images. All images are required for tablet mode.
- Preview : A preview pop-up is exposed when you click the Preview button. You can check the review pop-up screen with the registered image applied before saving.
- You can set the left button of the review pop-up.
- Do it later: After a user closes the review pop-up, it can be exposed again.
- Don't do it: After a user closes the review pop-up, it cannot be displayed again.
- Direct Settings: You can set the button name and movement path.
- For the button name, you can enter up to 16 Korean characters.
- URL : Enter the interwork, a scheme to move to the in-game functions. Enter a URL to be directed to the external link.(ex_interwork://hive/promotion/show?type=300114)
- Review Pop-up Re-exposure: Set whether or not to re-expose when a user clicks the directly entered left button. If checked, the review pop-up may be exposed again after clicking the button.
※The button on the right is fixed to 'Write a Review'. The button directs users to the market.
Title: Can enter up to 32 Korean characters.
Text: Can enter up to 60 Korean characters. Line breaks can be made up to 5 lines.
Exit pop-up
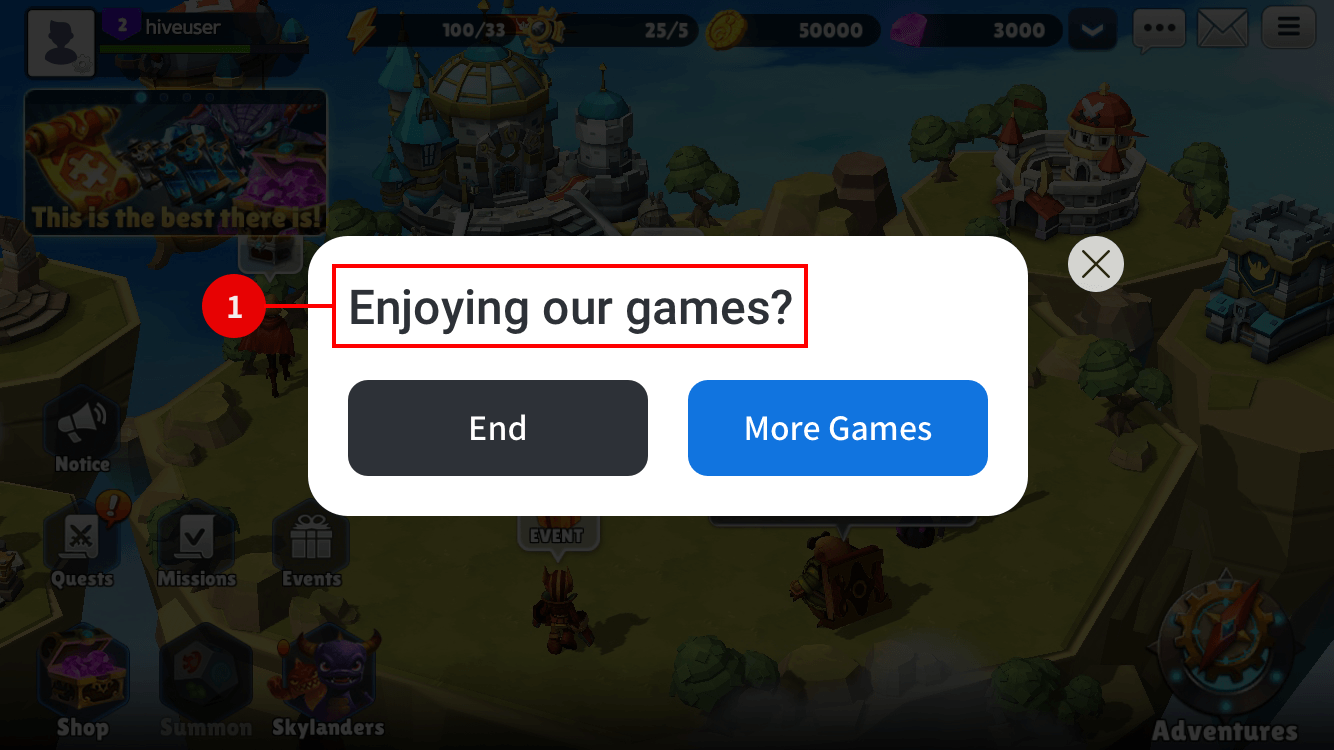
- Title area: 50 characters (English)