Manage Content(S)
The Content (S) Management tab manages the content text required when configuring the Terms of Service Combination (M). As it manages the contents of the text that the actual users check and agree with, you’ll have most access here especially when there’s an issue such as revision of the terms of service.
List
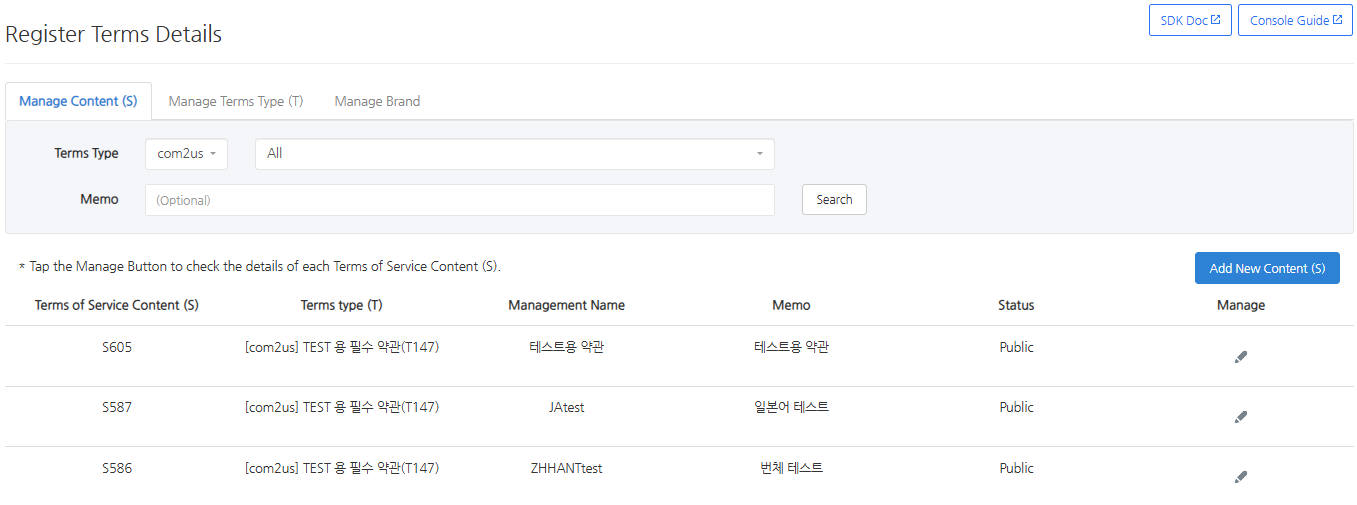
The Content Management tab provides the search function. In the upper search terms type area, you can search for subordinate terms of service content (S) by first selecting a brand and then selecting a terms type. In the Memo section, you can search for notes that the administrator added when registering the terms of service contents (S). For this reason, it is recommended that you enter memo to search or distinguish easily upon creation.
The leftmost code is the code number of the terms of service content (S). It is called “S code”.
The second column shows the brand and terms type. Brand information distinguishes which companies have access to subterms type(T) and content (S).
The management name is the document title you can check in the process of selecting S code when configuring the terms of service combination (M). Please come up with a tittle that can be easily distinguished.
A memo is a place where you can enter additional information that you couldn’t include in the management name. You can write long and detailed information, and use the texts in the memo to find S codes. It is highly recommended to write texts that can be easily managed by admin.
Add New Content(S)
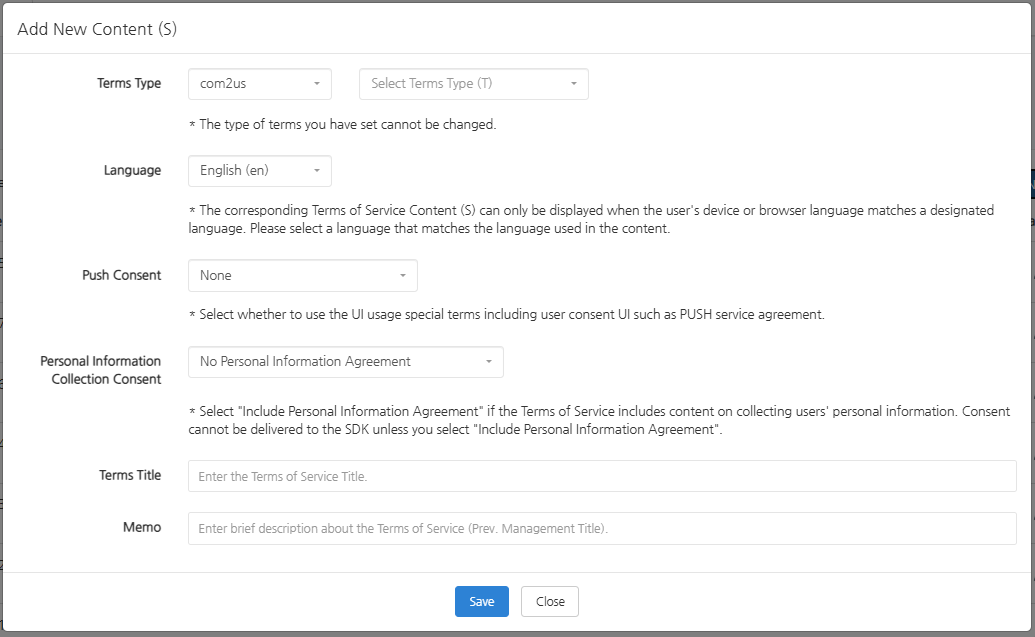
Click top-right Add New Content(S) button on the list to create the default format to create a new S code.
Terms type
You can select brands and terms type in the terms type field. This information affects the URL of the terms of service and cannot be changed afterwards.
Language
Once you designated a language, the terms of service content (S) can only be displayed when the user’s device or browser language matches the corresponding language. If you choose Korean, the terms of service will be displayed only if your device and browser language is also Korean. Please select a language that matches your input.
Push consent
You can use the Terms of Service Format when registering special terms and conditions that do not contain texts such as a user agreement to receive SMS and push notifications. There’s a total of 3 items: SMS agreement, Push agreement and Nighttime Push agreement.
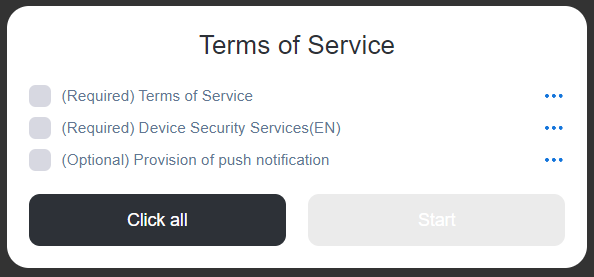
When configuring the agreement window as above, there is no separate text for the items such as Event Push Agreement. However, when creating this terms of service combination (M), there must be an S code called Event Push Agreement within the S code in order to add more optional choices as above. You can create such S codes by selecting Push Agreement in the format.
Warning
You must select if it’s one of Push/ Nighttime Push Agreement. If you don’t select the corresponding field even if the terms of service is the terms to get consent from users to receive Push, the information may not be properly delivered to the server even if the user selects the Agree checkbox after the terms of service is exposed.
Personal information collection consent
You should choose whether these terms and conditions will ask users to agree with collecting their personal information. If this terms and conditions are provided to an area where the user must be asked whether they agree to provide their personal information or not, such as the Republic of Korea or the GDPR, you must select "Include".
(1) When you select "Include Personal Information Agreement" in the S Code
- Select when this terms and conditions are provided to an area where the user must be asked whether they agree to provide their personal information or not, such as the Republic of Korea or the GDPR.
- If a user agrees to the terms and conditions after you've selected the current option when writing the S code, it will be considered as he or she has permitted you to collect personal information and such information will be collected and forwarded at the server.
- If a user doesn't agree to the terms and conditions after you've selected the current option when writing the S code, you cannot collect his or her personal information.
(2) When you select "No Personal Information Agreement" in the S Code
- When providing the terms and conditions to an area where there is no law to ask users whether their personal information will be collected or not (= areas where personal information can be collected without consent from users).
- Since personal information can be collected even if the user does not agree to the terms and conditions after selecting the option when creating the S code, the personal information can be collected and forwarded.
Terms title
The format to add new content (S) will be completed when you enter the terms of service title, memo and save.
Manage Previous Content (S)
Click on the pencil button in the management area on the far right of the list. You must enter existing content management page to add and modify body text of the actual terms.
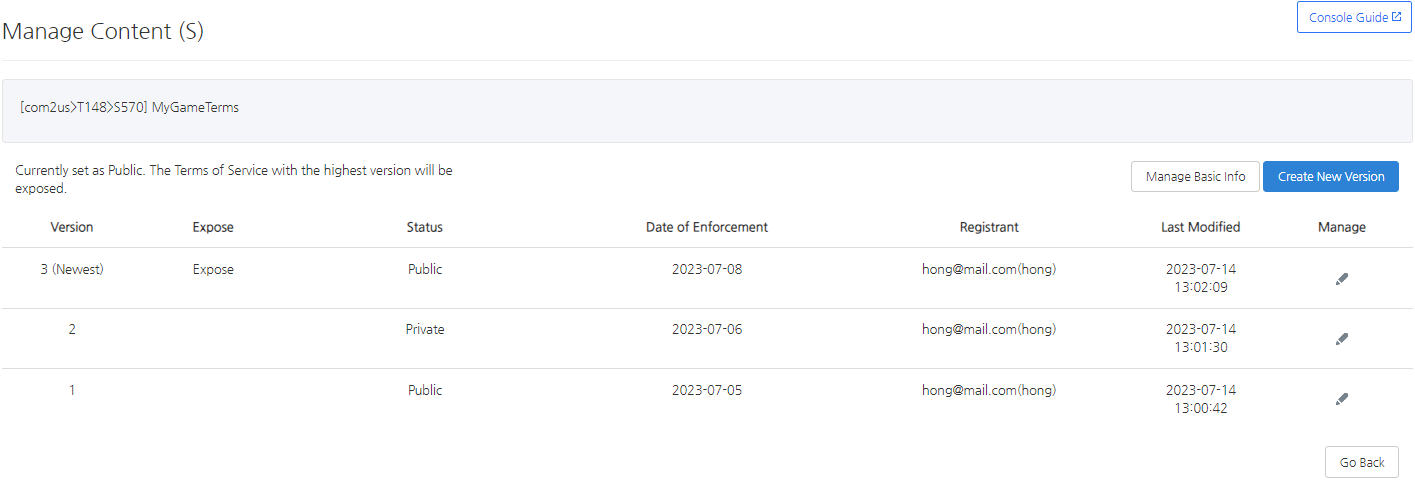
If you click on the Manage button for a specific terms of service (S code), you will enter the detailed management area as shown above.
You can see at a glance which S code you are editing by displaying the Brand > Terms Type(T) > S code name of the corresponding S code.
Manage Basic Info
Within the management area of a specific terms of service, you can change the basic information of that S code by pressing the top Manage Basic Information button. This is the information registered when you press Add New Content (S) button on the Terms of Service Content (S) list. You can edit all items except terms type.
Create New Version
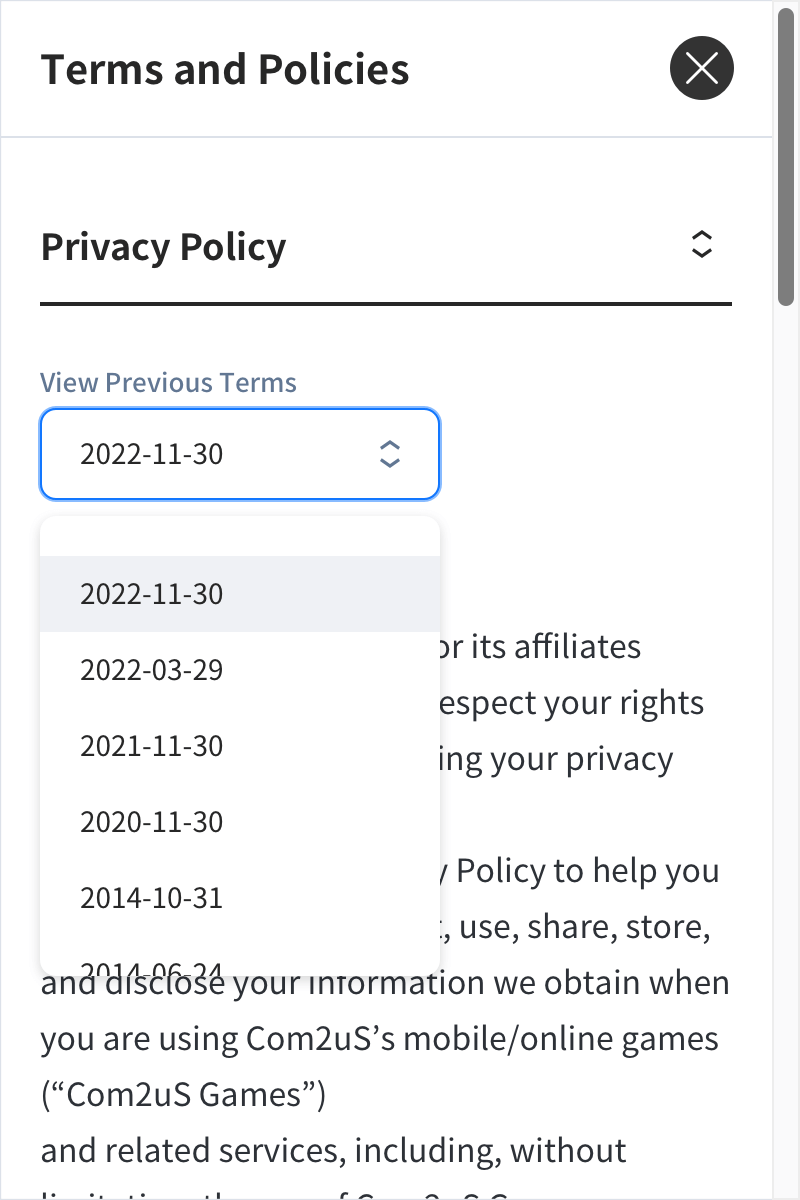
Within the management section of a specific terms of service, you can press the Create New Version button at the top to create a new version document for the corresponding S code. Several documents are combined to form a group of documents for one S code. If there is an S code called Terms of Service and the corresponding S code terms are revised, you should create a new version of the document and expose the latest document by default instead of deleting or overwriting the old text, and the previous version should be exposed in the View Again UI along with it.
You can select the date of the previous version document in the View Again and check as shown above.
Warning
When providing terms of service, make sure to pay attention to managing versions as there can be cases where you must create a new version of a document and where you must upgrade the version of the existing document.
Unless you set the Terms of Service status to Public in Public Status, it will not be exposed. Make sure to check the Public Status Settings.
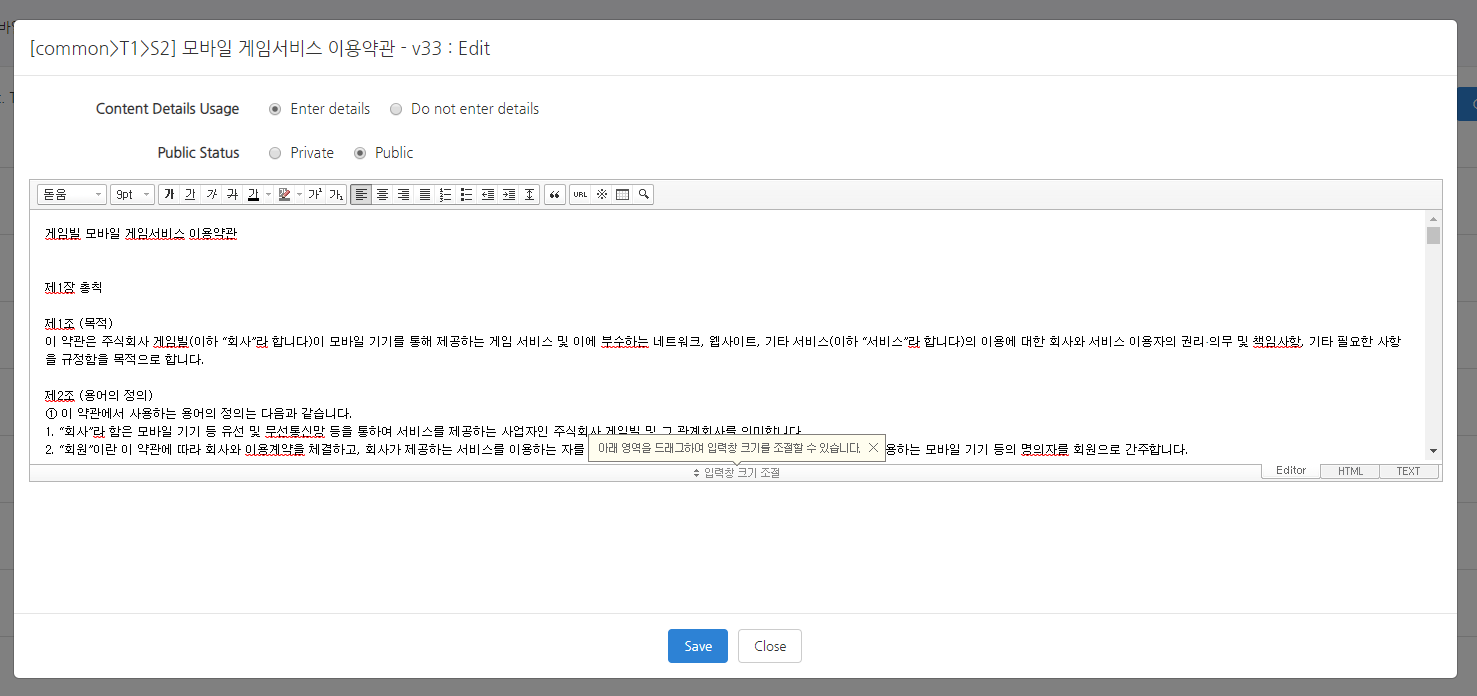
When registering a new version of the terms of service, you will fill out the popup window as shown above. If you select “Do not enter details” for Content Details Usage, the bottom text UI will not be exposed. This is a feature that’s needed when you create terms of service without contents, and the default value is set as “Enter details”. When you’re registering terms of service for the first time, you must enter the Date of Enforcement. However, you can change the date afterwards. You can check the effective date in "View Previous Terms" of the View Terms of Service Again screen. You can change the Public status depending on whether you decide to expose the terms of service version or not. If it’s terms of service that shouldn’t be exposed yet, keep the status as Private and save.
Manage Previous Versions
In the specific terms of service management area, you can edit the version by clicking the Manage button (pencil icon) to the right of the individual version. Use it if you need to revise an existing version rather than a new one.
