Unity
Hercules Unity Package 安裝指南
Hercules 可透過 Unity Package Manager(UPM)安裝。
請選擇以下兩種方法之一,加入登錄庫與 Hercules 套件。
方法 1. 直接編輯 manifest.json 檔案進行安裝
開啟 Unity 專案中的下列檔案。
將下列內容加入 manifest.json 的根層級,或與現有設定合併。
{
  "scopedRegistries": [
    {
      "name": "Com2uS Platform Security Repo",
      "url": "https://aas-auth.withhive.com/upm",
      "scopes": [
        "com.com2us.security"
      ]
    }
  ],
  "dependencies": {
    "com.com2us.security.hercules": "26.9.8",
    ...
  }
}
Warning
如果已有 scopedRegistries 或 dependencies 項目,請勿刪除或覆寫,請將上述內容加入現有清單。
儲存設定後,開啟 Unity 專案,Hercules 套件便會自動安裝。
變更版本
修改 dependencies 中指定的版本,即可將 Hercules 更新為所需版本。
移除
從 dependencies 中刪除下列項目,即可移除 Hercules 套件。
如果不再使用 Hercules,也可以移除先前加入 scopedRegistries 的 Com2uS Platform Security Repo。
如需瞭解編輯 manifest.json 的詳細資訊,請參閱 Unity 官方文件。
方法 2. 在 Unity Editor 中安裝
1. 加入 Scoped Registry
開啟 Unity 專案,然後前往下列選單。
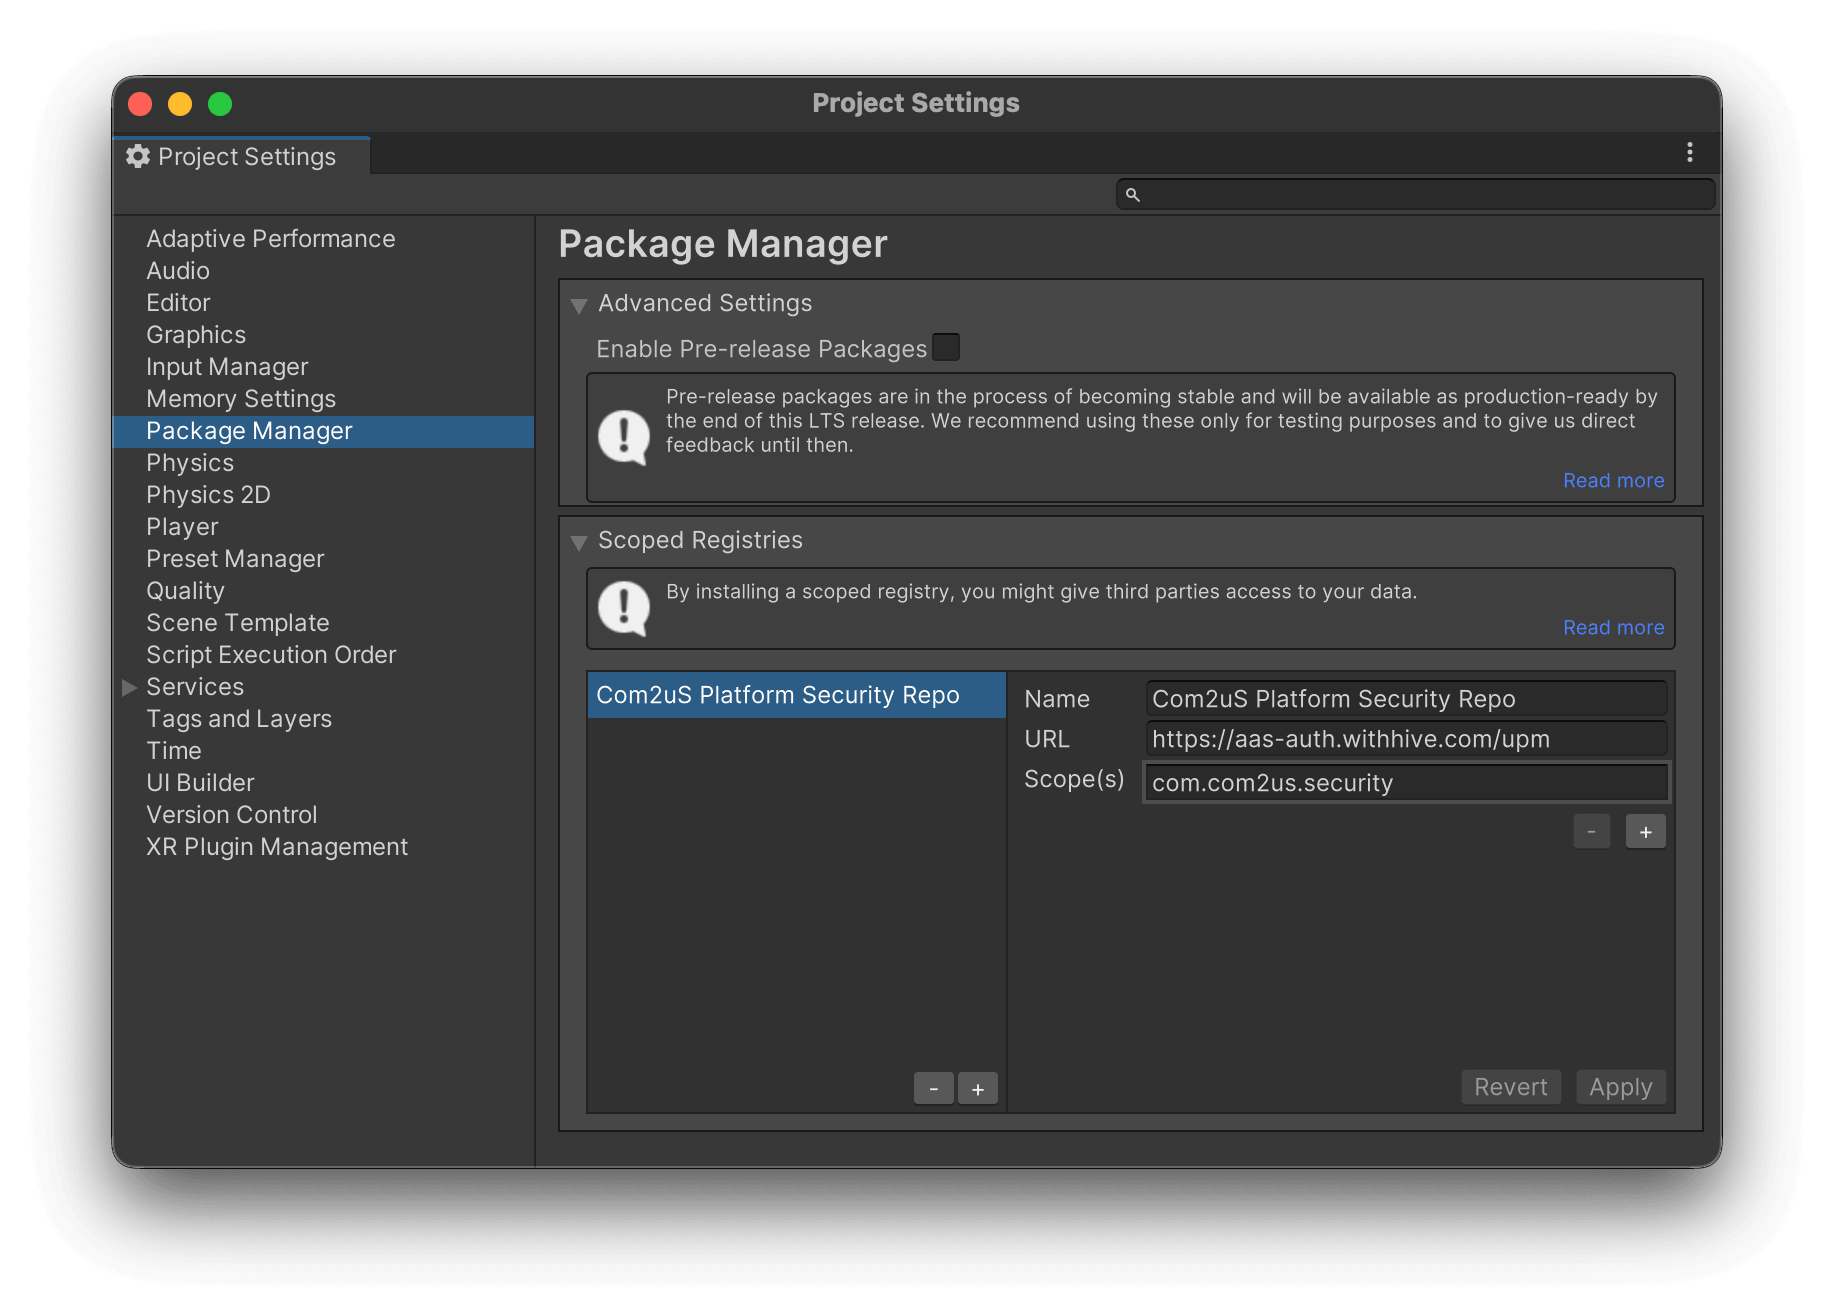
在 Scoped Registries 中加入下列登錄庫。
| 項目 | 值 |
|---|---|
| Name | Com2uS Platform Security Repo |
| URL | https://aas-auth.withhive.com/upm |
| Scope(s) | com.com2us.security |
2. 加入 Hercules 套件
開啟下列選單。
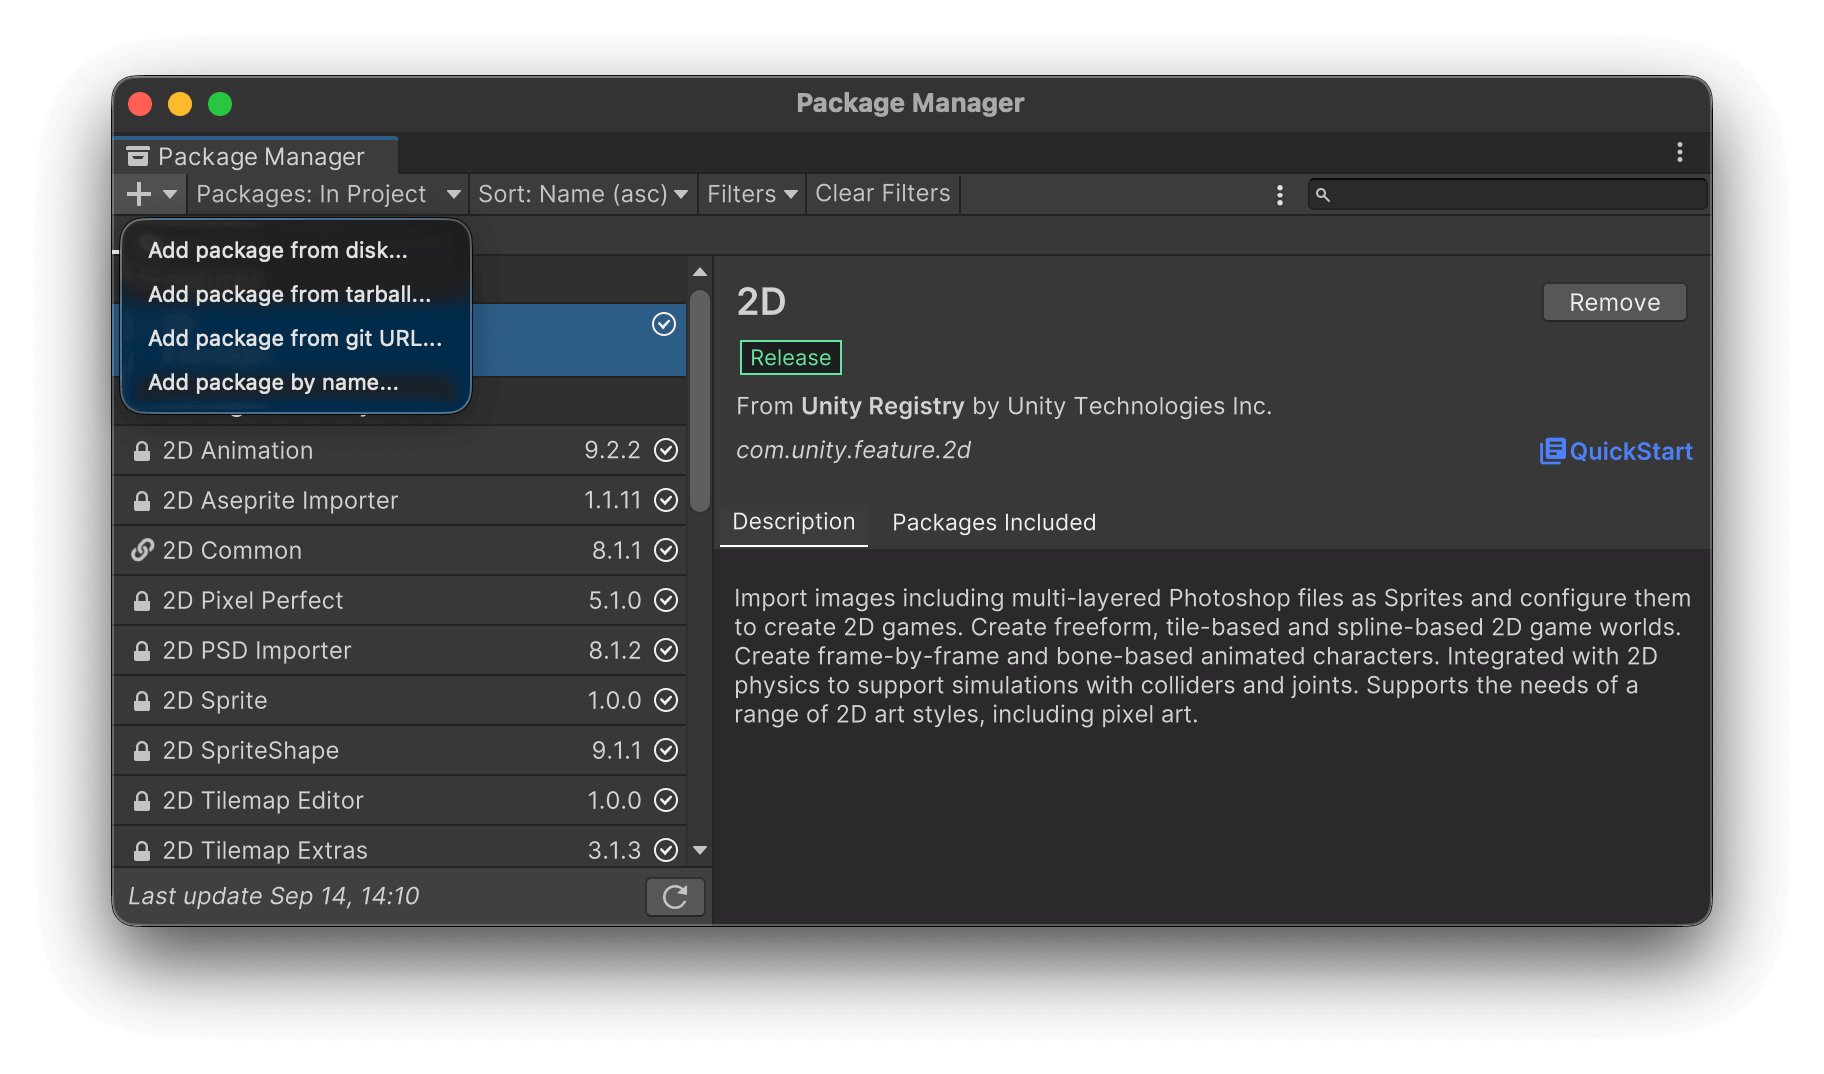
按一下 Package Manager 左上角的 + 按鈕,然後選擇 Add package by name...。
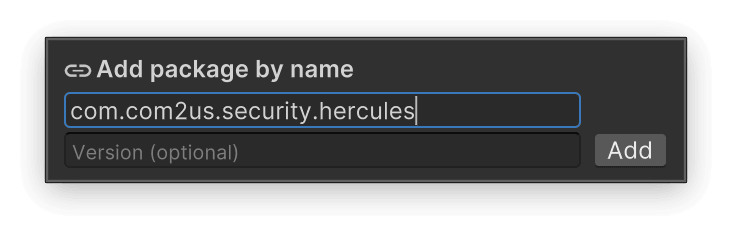
輸入下列資訊。
| 項目 | 值 |
|---|---|
| Name | com.com2us.security.hercules |
| Version | 要安裝的 Hercules 版本(選填) |
若未填寫 Version,系統會選擇最新版本。
安裝完成後,即可在 Package Manager 中確認 Hercules 套件。
變更版本與移除
安裝後,可在 Unity Package Manager 中變更 Hercules 版本或移除套件。
如果已移除 Hercules,且不再使用該登錄庫,也請從下列位置移除先前加入的 Scoped Registry。
直接修改 Hercules 套件並使用
若要直接修改已安裝的 Hercules 套件並使用,請將套件轉換為 Embedded package。
在 Unity Editor 的 Project 視窗中,對已安裝的 Hercules 套件按滑鼠右鍵,然後選擇 Show in Explorer(Windows)或 Reveal in Finder(macOS)。
將開啟的 Hercules 套件資料夾複製到專案的 Packages 資料夾,並移除資料夾名稱末尾的 @<fingerprint> 部分。
例如,若已安裝的套件位於下列位置:
請調整為下列結構。
複製的套件會被辨識為 Unity 專案中包含的 Embedded package,之後即可直接修改並使用 Packages/com.com2us.security.hercules 資料夾中的檔案。
如需瞭解 Embedded package 的詳細資訊,請參閱 Unity 官方文件。