Account management screen
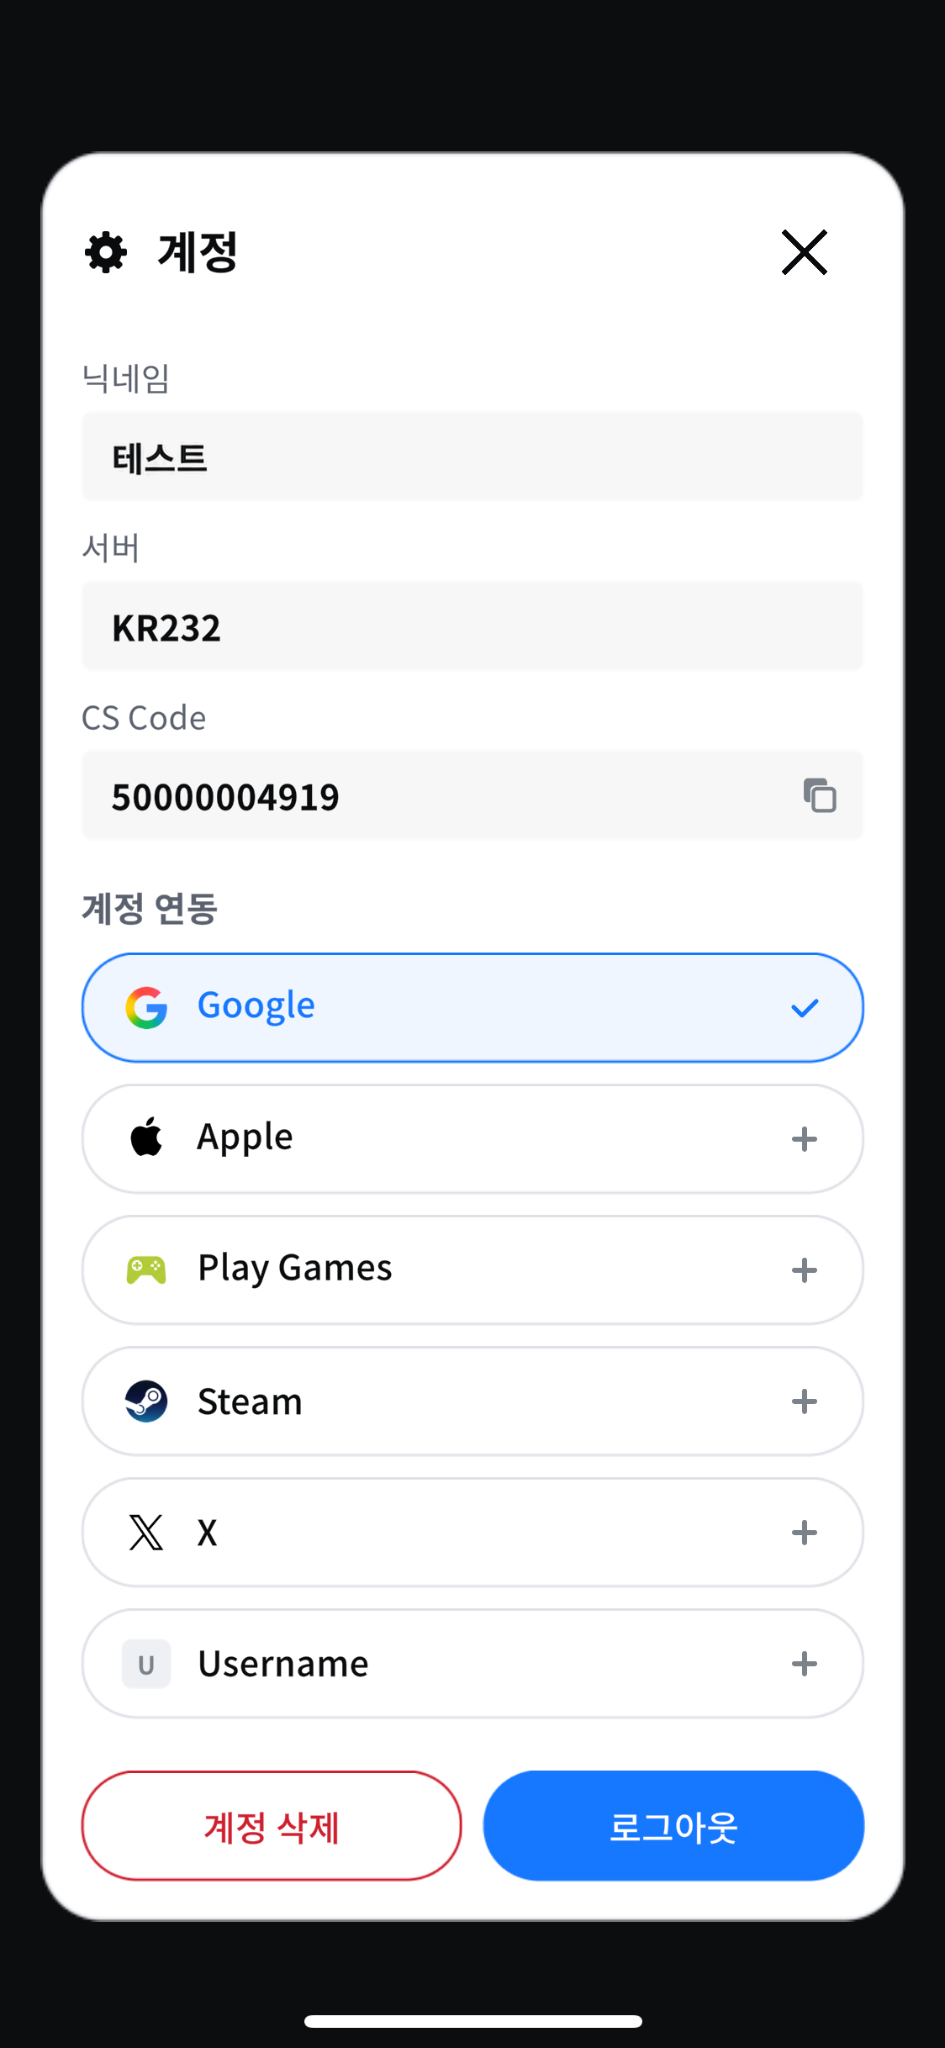
This is the screen where a logged-in user checks the account information and linked login methods, adds or removes links, and logs out.
Screen examples
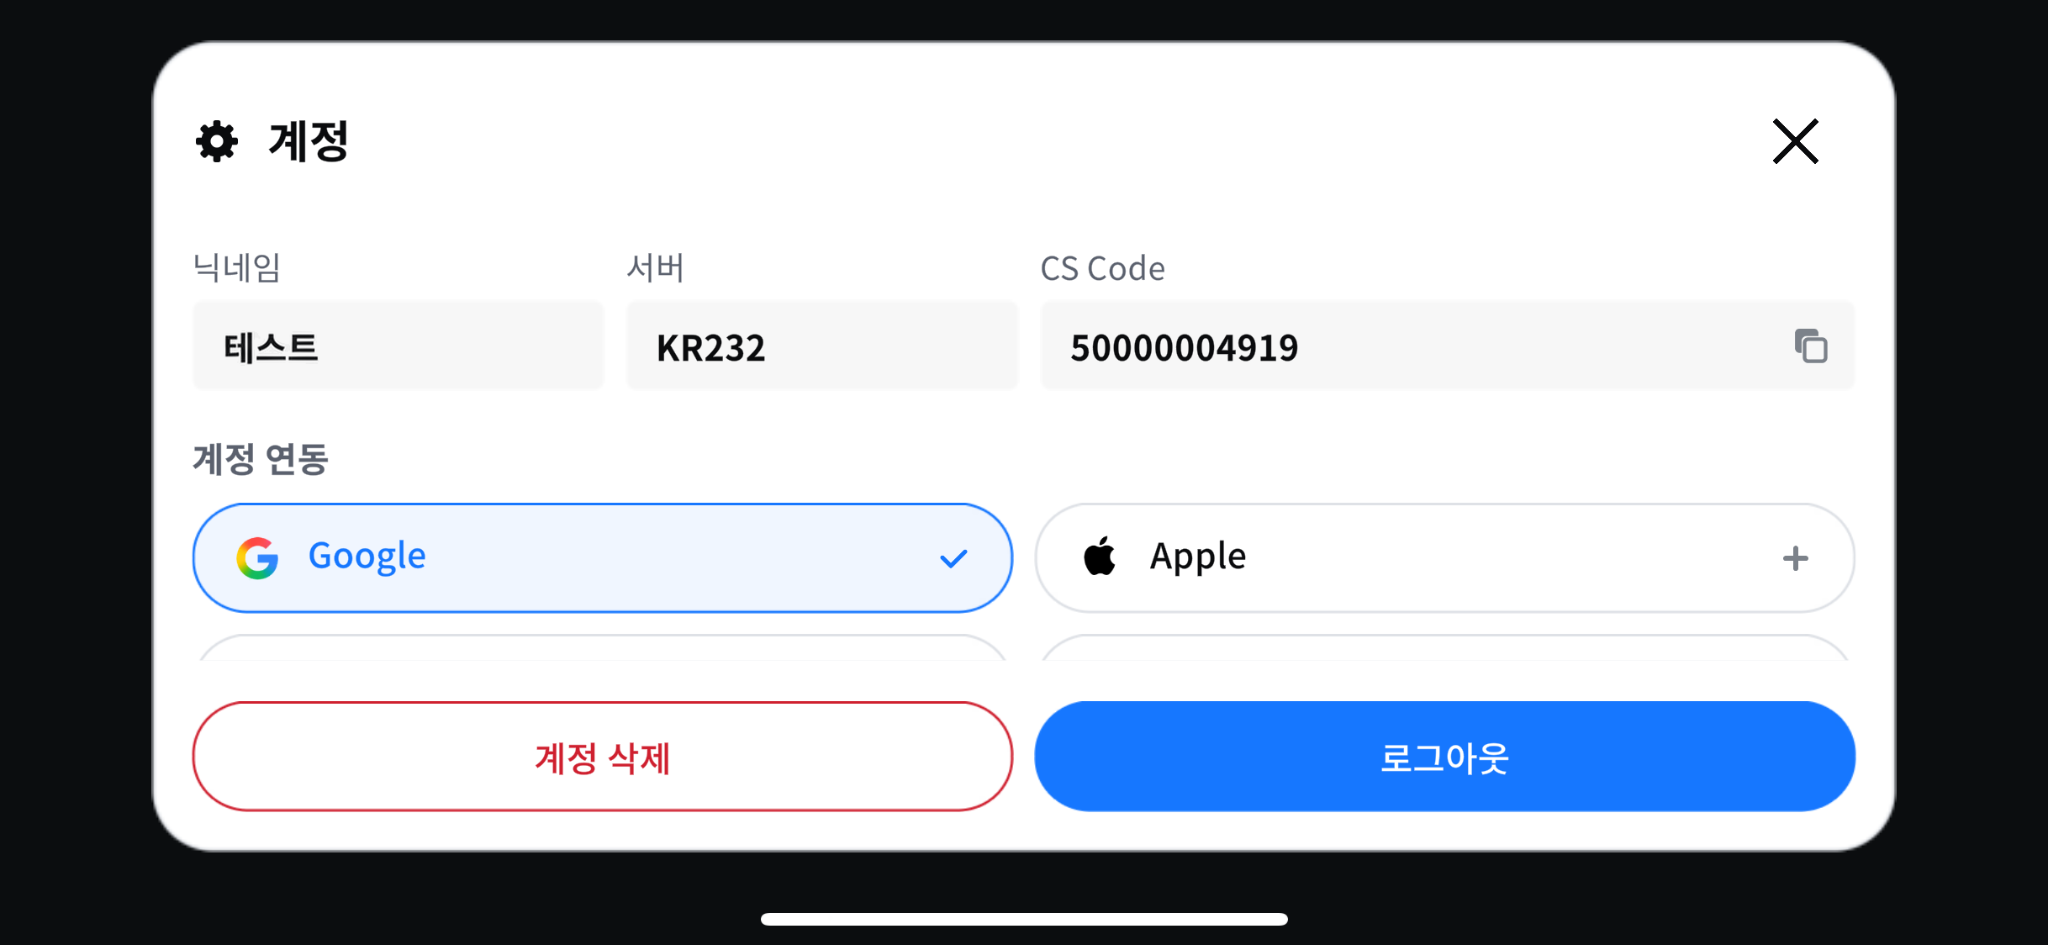
A single screen resource handles both portrait and landscape orientations.
Usage scenarios
Open this screen when a user who has finished logging in checks or changes the login methods linked to the account, or logs out. Because linking, unlinking, and logout are all possible only while the user is logged in, show this screen only to logged-in users.
The screen consists of the account information area, the account linking list, the logout button and the delete account button, and a close button.
Account information area
The account information area at the top of the screen displays the values that the app passes as they are. The nickname, server, and CS Code in the example screen are examples of items the app can fill in. The screen resources do not retrieve these values themselves, so replace them with the items your app shows.
Account linking list
The account linking list displays whether each login method is linked. The app determines which login methods to include in the list and whether each item is linked, and passes them to the screen. When the user selects an item, the screen immediately calls OnProviderSelected without asking again, notifying the app of the selected login method.
When the user selects an item that is already linked, the app decides whether to treat it as unlinking, show a details screen, or get confirmation before unlinking. Because at least one login method other than guest must remain after unlinking, decide which items can be unlinked according to the unlinking policy in Unlink accounts.
Logout button
When the user selects the logout button, the screen first shows a confirmation pop-up, and it calls OnLogout when the user selects the confirm button. The app does not need to show the pop-up itself. Pass the pop-up's message with the LogoutConfirmMessage option, the cancel button text with the LogoutCancelLabel option, and the confirm button text with the LogoutConfirmLabel option.
If the user selects the cancel button or presses Esc while the confirmation pop-up is open, only the pop-up closes and the user returns to the account management screen.
Delete account button
When the user selects the delete account button, the screen immediately calls OnDeleteAccount without a confirmation pop-up. The screen resources do not delete the account themselves, so handle account deletion in OnDeleteAccount. For how to handle it, see Delete an account.
To get the user's confirmation before deletion with a confirmation pop-up that looks the same as the logout one, call ShowConfirm() in OnDeleteAccount. Pass ShowConfirm() the message, the cancel button text, the confirm button text, and the code to run when the user selects the confirm button, in that order. If you also pass destructive: true, the confirm button is displayed in a red tone. The following example shows the OnDeleteAccount part of the options you pass when opening the account management screen. screen in the example is the account management screen that Show() returned.
Related recipes
Of the processing after the user selects a list item or the logout button, recipes handle linking an external authentication provider such as Google or Apple to the account and handling logout. For the user flow and implementation procedure, see the following guides.
- External authentication provider linking practical guide: Recipe that additionally links a login method such as Google or Apple to an account that is already logged in
- Logout practical guide: Recipe that handles the logout request and in-memory session cleanup in a single method
There are no recipes for username linking, custom account linking, or unlinking. You implement this processing by calling Hive Axyl SDK methods directly from the app. For how to call them, see Required SDK features below.
Required SDK features
To fill the linking list and process the item the user selects as linking, unlinking, or logout, you need the following Hive Axyl SDK features.
- Link accounts and get linked login methods: How to link login methods, including username, and how to fill and refresh the linking list on the screen
- Link a custom account: How to link a custom account with the grant key that the app server obtained
- Unlink accounts: How to unlink a linked login method and the policies that apply to unlinking
- Handle account linking conflicts: How to handle the case where the account to link is already linked to another Player ID
- Log out: How to request logout from the server and how to clean up the session and saved tokens based on the result
Required APIs
These are the Hive Axyl SDK methods that the app calls to implement the features above.
- LinkProviderAsync(): Method that links a login method to the account
- LinkCustomProviderAsync(): Method that links a custom account login method to the account with a grant key
- UnlinkProviderAsync(): Method that unlinks a linked login method
- LogoutPlayerAsync(): Method that requests logout from the server
Applying to Unity
Pass the list of login methods linked to the account to the screen to display each item's linking status, and connect the screen so that selecting a list item runs linking or unlinking and selecting the confirm button in the logout confirmation pop-up runs logout. When linking or unlinking succeeds, pass the updated list again to keep the screen up to date. This screen does not lock the list items even while a request is being processed. If you need to prevent an item from being selected multiple times, handle it in the app. For how to close the screen, see Close a screen.
The failure toast to display when processing fails is a shared widget that multiple screens use, and it is in the common folder. The account management screen provides the confirmation pop-up. The pop-up's buttons use the action button, which is a shared widget. When you copy the screen folder, also copy the common folder, the fonts folder, and the UIKit.asmdef file. For how to copy them and what to add to your app's assembly definition file after copying, see Import screen resources.
- Unity GitHub repository: The unity/UI-Kit/Account, unity/UI-Kit/Common, and unity/UI-Kit/Fonts folders and the unity/UI-Kit/UIKit.asmdef file to copy