Release app
If you have completed app inspection in the sandbox environment, deploy the app.
App deployment
To deploy the app, upload the app to the Hive Console production server. After uploading, follow the steps below to deploy.
- In Crossplay Launcher > App Management > Download Settings, search the app list by app name and AppID.
- Find the app to release in the list. If Review Settings is
ON, change it toOFF. - In the Edit/Delete column, click Edit to open the deployment settings window. Specify the deployment date, then click Save deployment date.
- When the configured deployment date arrives, revisit Crossplay Launcher > App Management > Download Settings. Verify that the app status has changed to
Distributing. - Click Launch app on the webpage to confirm that the app installs and runs correctly.
For more details, refer to Download Settings.
Google Play Games app release preparation
Releasing a PC app on Google Play Games involves submitting the app deployed to Hive to Google Play Games. There are two main methods for releasing a PC app on Google Play Games:
- Installer publishing
- Play-managed publishing
This section describes how to prepare for a release using the installer method. The preparation process is summarized below.
- Prepare an installer file and a configuration file for Google Play Games to read
- Generate Game-Installer.exe and play_publishing_config.xml using the Hive app ID
- Generate a WAB file using the Play publishing tool
- Upload the WAB file to the Google Play Games Console
1. Hive Console app deployment
app_id is the value that identifies the app deployed in Hive Console. You use this value when creating the installer and writing the Google Play Games configuration file.
- Complete the app deployment procedure in Hive Console.
- Once the configured deployment date has passed and the app status shows
Distributingin Crossplay Launcher > App Management > Download Settings, note the app IDapp_idfrom the same page.
2. Preparing the code signing environment
Code signing is the process of signing an installer file so that Windows can verify the origin of the executable.
An EV (Extended Validation) certificate is a code signing certificate used to verify the identity of an installer file distributed by an organization.
The Game-Installer.exe submitted to Google Play Games must be signed with the organization's EV certificate. Therefore, first prepare the code signing tools and certificate environment.
If the environment is already set up, skip this step.
Before starting code signing, prepare the EV certificate USB dongle and certificate PIN managed by your organization. If you have not yet received them, contact the Windows code signing certificate administrator in your organization first.
2.1. Inno Setup installation
Inno Setup is a tool for creating installer programs used to generate Game-Installer.exe.
- Download and install the latest version of Inno Setup.
- After installation, launch Inno Setup from the Windows Start menu to confirm it opens correctly.
2.2. Setting up the EV certificate-based code signing environment
This section assumes that your organization has already issued an EV certificate USB dongle and certificate PIN for code signing.
SafeNet Authentication Client is a tool that recognizes the EV certificate USB dongle and prompts for the certificate PIN during code signing.
- Download SafeNet Authentication Client (64-Bit) from DigiCert, install it, and run it. After installation, the SafeNet Authentication Client icon appears in the Windows system tray.
- Connect the EV certificate USB dongle issued by your organization to the PC.
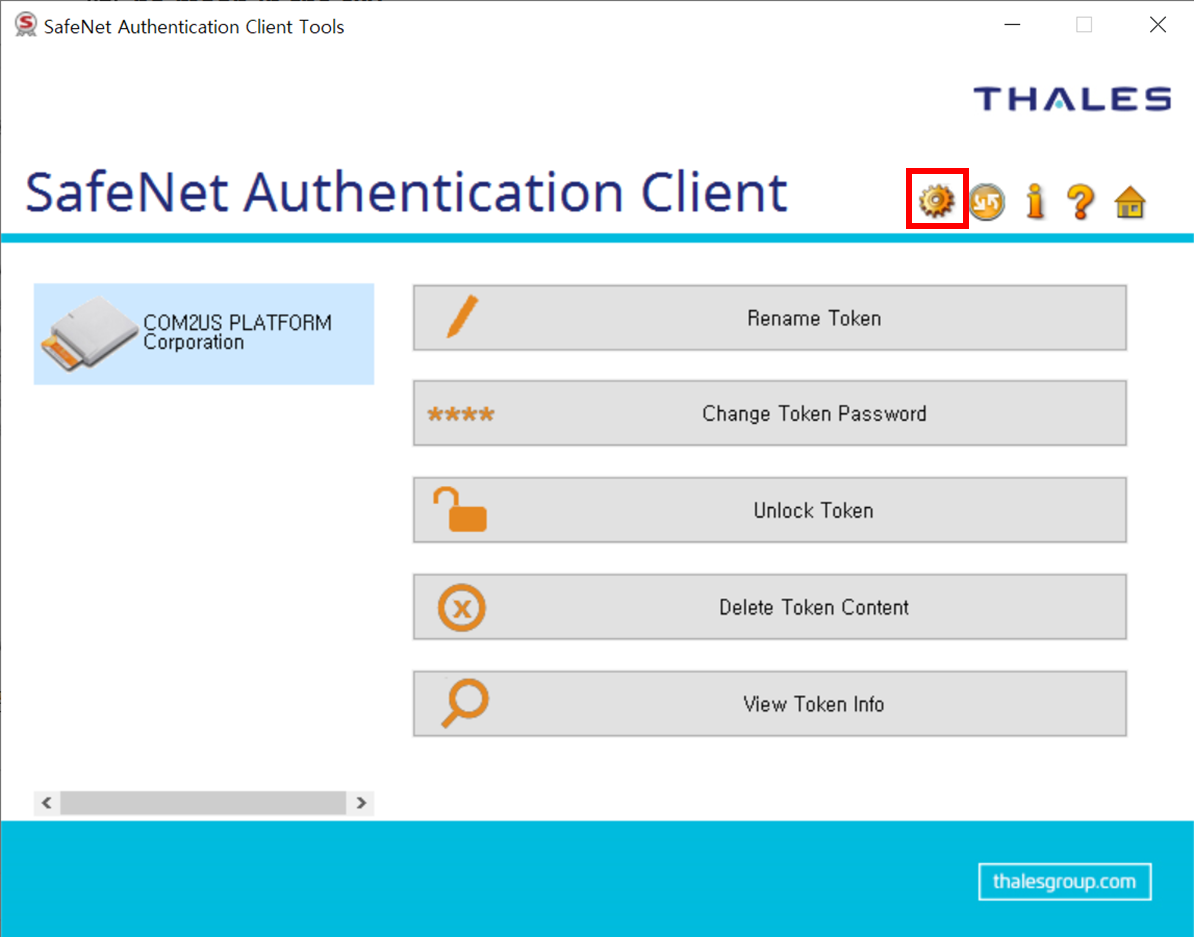
- Right-click the SafeNet Authentication Client icon in the Windows system tray at the bottom right of the screen, then select Menu > Tools.
- In the SafeNet Authentication Client Tools screen, verify that the name of the connected EV certificate dongle appears in the device list. If the name is displayed, the dongle is connected correctly.
3. Creating the app installation package
Game-Installer.exe is the installer file that Google Play Games uses to install the game on a user's PC. This file is also used as an input in the WAB file generation step.
- Download the Google Play Games installer packaging tool.
- In the extracted folder, run packing_game_installer. A command prompt window appears.
-
When the following message appears, enter the Hive app ID
app_idrecorded in the previous step and press Enter.Caution
The
app_identered here is the app ID of the app deployed to Hive. Do not enter the app ID from the Play Console. -
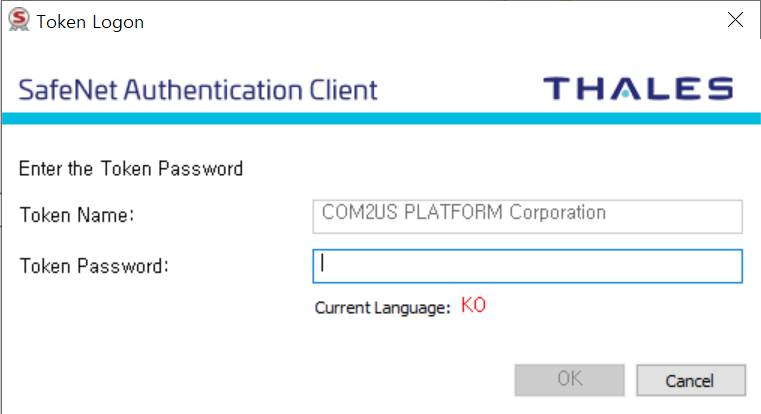
When the Token Logon window appears, enter the certificate PIN provided with the EV certificate USB dongle issued by your organization, then click OK.
-
After the command prompt window closes, verify that Game-Installer.exe has been created in the output folder under the extracted folder.
If the file was not created, recheck the Hive app ID, certificate PIN, and EV certificate USB dongle connection status entered in the previous steps, then run the tool again.
-
Run Game-Installer.exe and confirm that the app corresponding to the entered app ID installs correctly. If the installation proceeds without issues, the package has been created successfully.
4. Writing play_publishing_config.xml
play_publishing_config.xml is the configuration file that Google Play Games reads to locate the app's installer file, executable, and uninstall path. Google Play Games uses this file to install and run the app on a PC.
Refer to Installer publishing and write the XML below.
Fill in the placeholders with the actual values for the deployed app.
| Placeholder | How to determine | Example |
|---|---|---|
{package-name} | The package name of the game build being submitted to Google Play Games. This is the value confirmed in your game project's build settings and must match the package name registered in the Google Play Console. | com.company.game |
{version-name} | The version string of the game build being deployed. This is the value confirmed in your game project's build settings and must match the version shown under Properties > Details when you right-click the actual game executable in Windows Explorer. | 1.2.3 |
{app-id} | The Hive app ID app_id recorded after deploying to Hive Console in the previous step. | com.company.game.windows.googleplay.normal |
Replace the example values according to the following rules.
<path>Game-Installer.exe</path>: Enter the installer file name generated in the previous step exactly as-is.installation-path-registry-location: Enter the registry path where the app to be released records its installation path (InstallLocation). Replace the{app-id}part with the actual App ID value confirmed in the previous step.launch-path-registry-location: Enter the registry path where Crossplay Launcher records its installation location, unchanged.<filename>hive_updater.exe</filename>: Enter the launcher file name (hive_updater.exe) to run after Crossplay Launcher installation. Keep the provided default value unchanged.<arguments><![CDATA[hivelauncher:?app_id={app-id}&start_point=8]]></arguments>: Replace only the{app-id}part with the actual App ID value. Thestart_point=8parameter must remain unchanged.uninstall-path-registry-location: Enter the registry path where the app to be released records its uninstall command (UninstallString). Replace the{app-id}part with the actual App ID value.
Below is an example of play_publishing_config.xml with placeholders replaced by actual values.
<?xml version="1.0" encoding="UTF-8"?>
<play-publishing-config version="1.0">

  <application>
    <package-name>{package-name}</package-name>
    <version-name>{version-name}</version-name>
  </application>

  <installer requiresElevation="true" acceptsCommandLineArguments="true">
    <path>Game-Installer.exe</path>
    <installation-path-registry-location>
      <key-name>SOFTWARE\WOW6432Node\Microsoft\Windows\CurrentVersion\Uninstall\{app-id}</key-name>
      <value-name>InstallLocation</value-name>
    </installation-path-registry-location>
  </installer>

  <launcher requiresElevation="true">
    <launch-path-registry-location>
      <key-name>SOFTWARE\Microsoft\Windows\CurrentVersion\Uninstall\CrossplayLauncher_is1</key-name>
      <value-name>InstallLocation</value-name>
    </launch-path-registry-location>
    <executable-invocation>
      <filename>hive_updater.exe</filename>
      <arguments><![CDATA[hivelauncher:?app_id={app-id}&start_point=8]]></arguments>
    </executable-invocation>
  </launcher>

  <uninstaller requiresElevation="true">
    <uninstall-path-registry-location>
      <key-name>SOFTWARE\WOW6432Node\Microsoft\Windows\CurrentVersion\Uninstall\{app-id}</key-name>
      <value-name>UninstallString</value-name>
    </uninstall-path-registry-location>
  </uninstaller>

</play-publishing-config>
Caution
For app_id, enter the app ID of the app deployed to Hive. Do not enter the app ID from the Play Console.
Specify requiresElevation="true" for all of installer, launcher, and uninstaller. Without it, installation and launch will not work correctly.
5. Generating the WAB file
A WAB (Web App Bundle) file is the distribution package uploaded to the Google Play Games Console. Google Play Games reads this file to locate the submitted installer and launch information.
Download the Play publishing tool provided in Installer publishing. When the tool prompts for input, specify the play_publishing_config.xml and Game-Installer.exe created in the previous steps to generate the WAB file. After the process completes, verify that a WAB file with the wab extension has been created at the output path shown by the Play publishing tool.
6. Uploading to Google Play Games Console and follow-up steps
Select the generated WAB file in the upload step of the Google Play Games Console and submit it. After the upload, Google Play Games proceeds with WAB file validation followed by review and release.
This document covers the process from Hive Console deployment through WAB file preparation. For details on the upload screen, refer to Installer publishing.