Unity
Hercules Unity Package Installation Guide
Hercules can be installed through Unity Package Manager (UPM).
Choose one of the following two methods to add the registry and the Hercules package.
Method 1. Install by Editing manifest.json Directly
Open the following file in your Unity project.
Add the following content at the root of manifest.json, or merge it with the existing configuration.
{
  "scopedRegistries": [
    {
      "name": "Com2uS Platform Security Repo",
      "url": "https://aas-auth.withhive.com/upm",
      "scopes": [
        "com.com2us.security"
      ]
    }
  ],
  "dependencies": {
    "com.com2us.security.hercules": "26.9.8",
    ...
  }
}
Warning
If scopedRegistries or dependencies entries already exist, do not delete or overwrite them. Add the content above to the existing lists.
After saving the configuration, open the Unity project to install the Hercules package automatically.
Change the Version
Change the version specified in dependencies to update Hercules to the desired version.
Remove the Package
Delete the following entry from dependencies to remove the Hercules package.
If you no longer use Hercules, you can also remove the Com2uS Platform Security Repo entry you added to scopedRegistries.
For more information on editing manifest.json, refer to the official Unity documentation.
Method 2. Install in the Unity Editor
1. Add a Scoped Registry
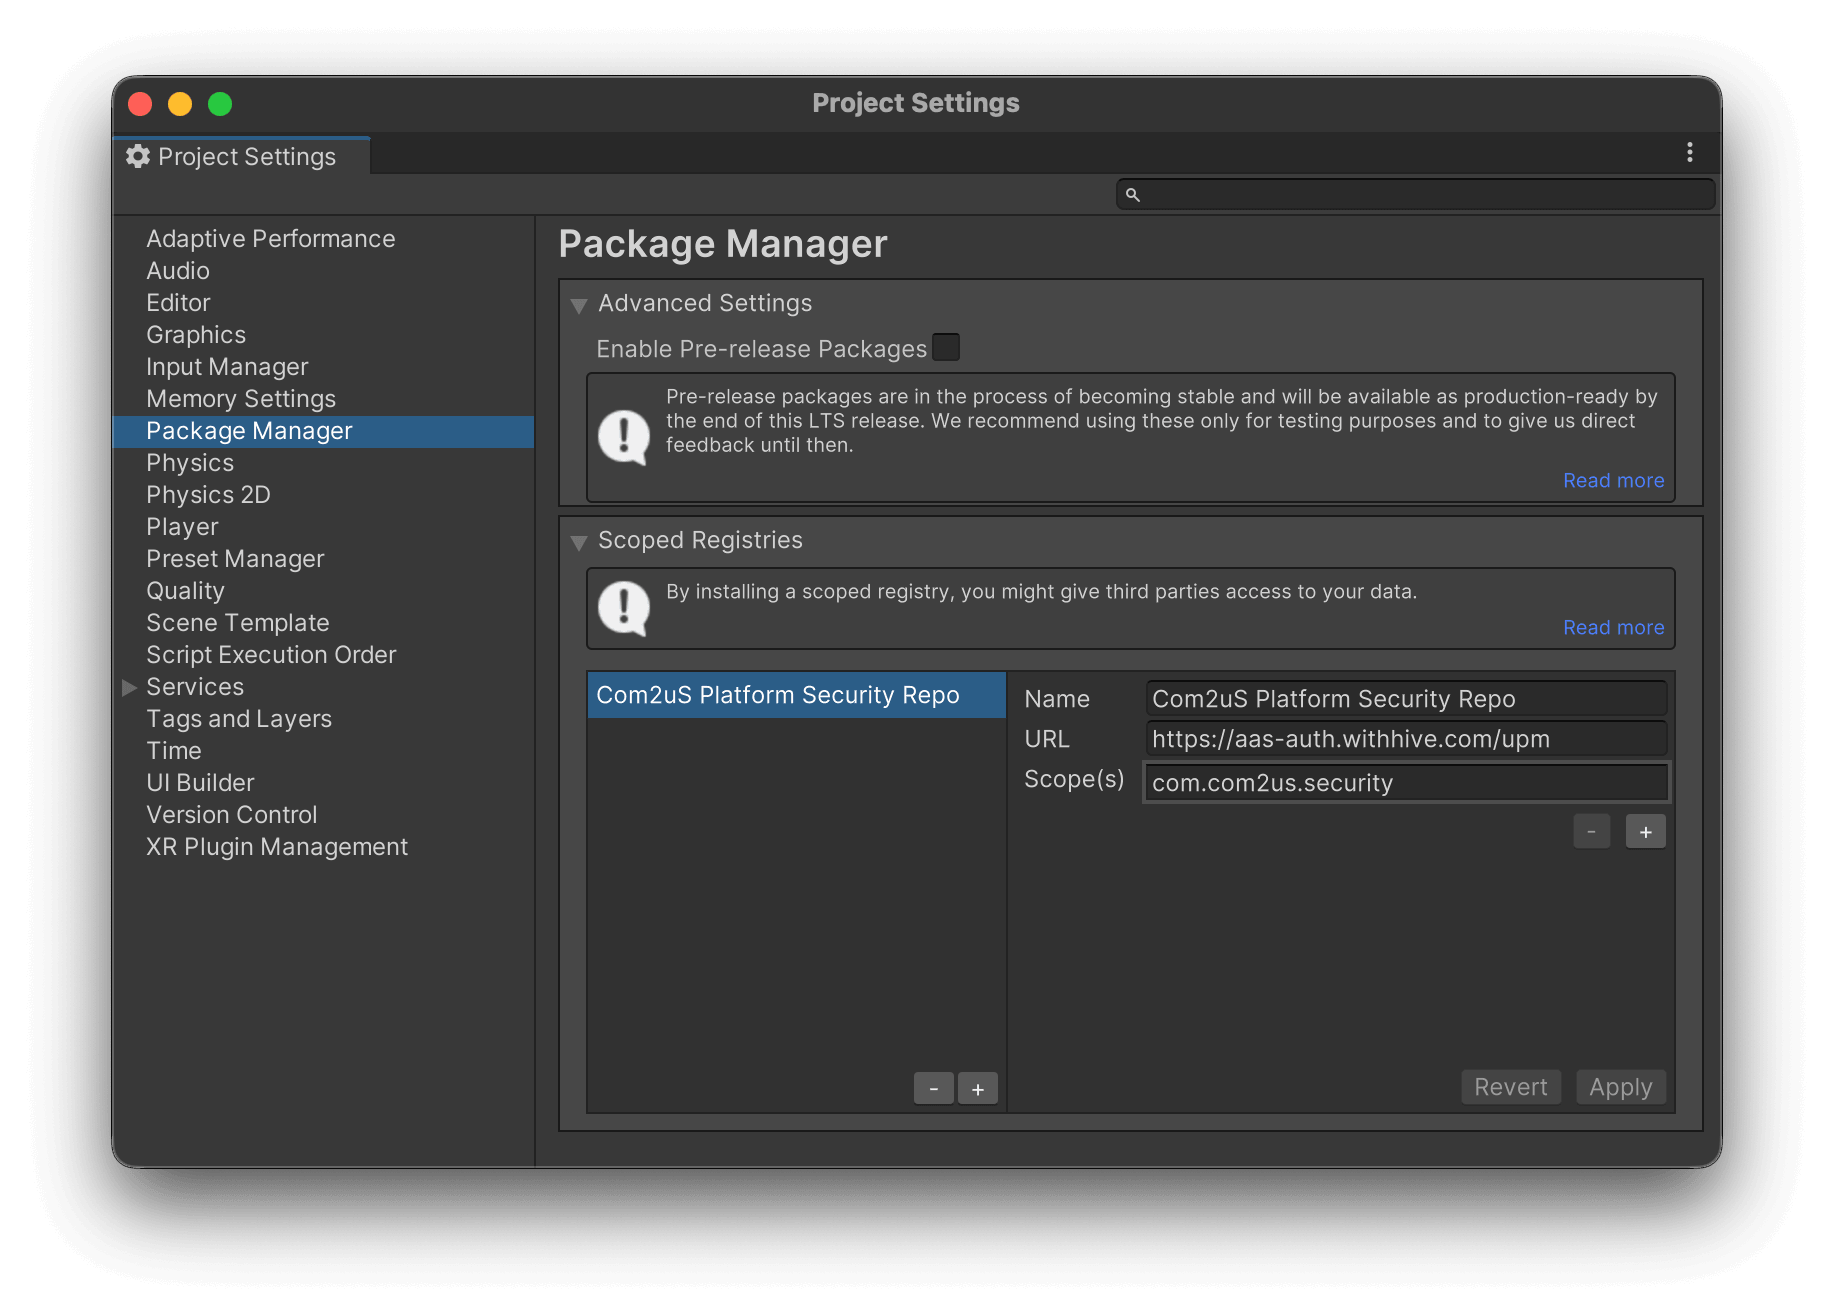
Open the Unity project and go to the following menu.
Add the following registry under Scoped Registries.
| Field | Value |
|---|---|
| Name | Com2uS Platform Security Repo |
| URL | https://aas-auth.withhive.com/upm |
| Scope(s) | com.com2us.security |
2. Add the Hercules Package
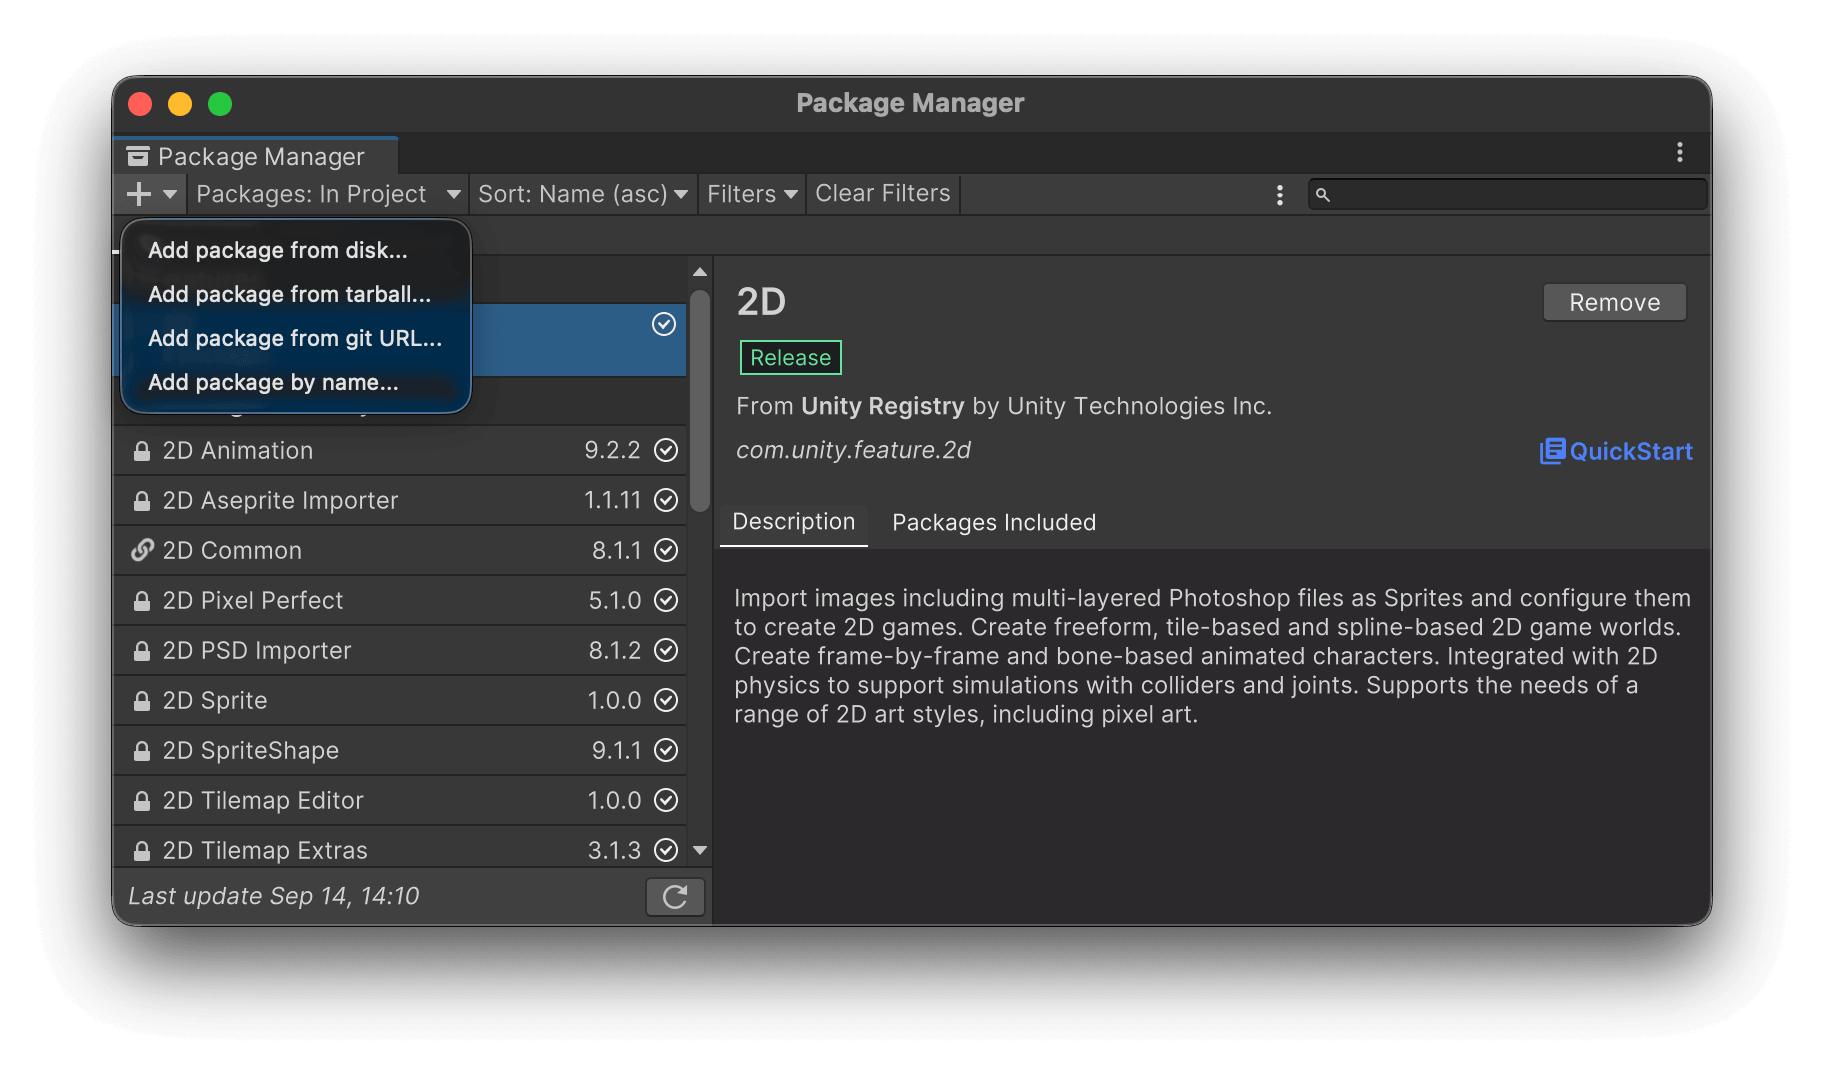
Open the following menu.
Click the + button in the upper-left corner of Package Manager and select Add package by name....
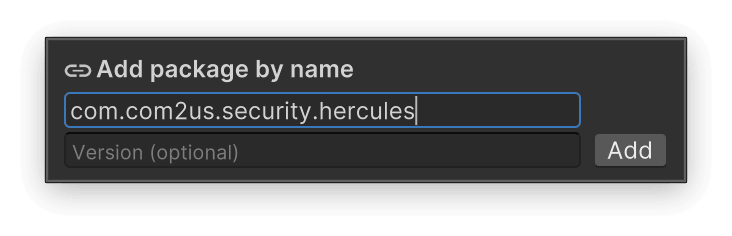
Enter the following information.
| Field | Value |
|---|---|
| Name | com.com2us.security.hercules |
| Version | Hercules version to install (optional) |
If you leave Version empty, the latest version is selected.
Once installation is complete, you can find the Hercules package in Package Manager.
Change the Version or Remove the Package
After installation, you can change the Hercules version or remove the package in Unity Package Manager.
If you remove Hercules and no longer use the registry, also remove the Scoped Registry you added at the following location.
Modify the Hercules Package Directly
To modify the installed Hercules package directly, convert it to an Embedded package.
In the Unity Editor's Project window, right-click the installed Hercules package and select Show in Explorer (Windows) or Reveal in Finder (macOS).
Copy the Hercules package folder that opens to the project's Packages folder, and remove the @<fingerprint> suffix from the folder name.
For example, if the installed package is located at:
Change it to the following structure.
The copied package is recognized as an Embedded package included in the Unity project. You can then directly modify and use the files in the Packages/com.com2us.security.hercules folder.
For more information on Embedded packages, refer to the official Unity documentation.