Prerequisites
To use the billing service, you need to issue an App ID to be used for payment. The billing service manages payment methods and product information based on the App ID. Since the App ID includes OS and store information, you must select and configure the appropriate information for the store you will serve. Check the guide that matches your service plan between store payment and PG payment, and proceed with issuing the App ID.
Store Payment App ID Issuance
Store payment refers to payments made through the in-app purchase system provided by platforms such as Google Play Games or the Apple App Store. If you are providing store payments, please issue an App ID according to the guide below.
Supported Stores
- Google Play Games
- Apple App Store
- ONE store
- HUAWEI
- Amazon Appstore
- Xiaomi
- Galaxy Store
- Steam
➡️ Console path: App Center > App ID Management > [Register New App ID] button
How to Set Up
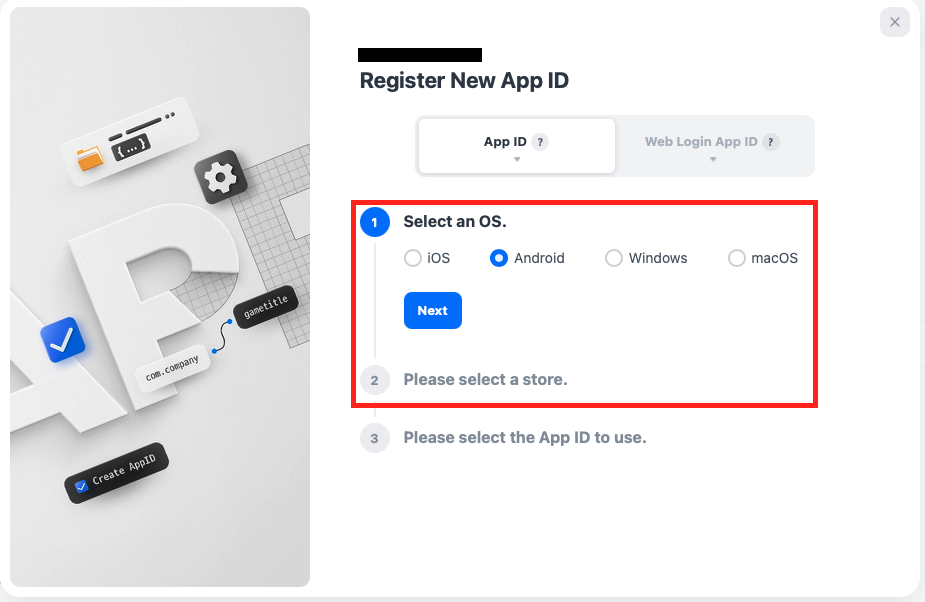
- Select a project and click the [Register New App ID] button.
- Select the ‘App ID’ tab, choose the OS for which the app will be serviced, and click the [Next] button.
- Choose the store where the app will be serviced and click the [Next] button.
- Select the App ID to be used and click the [Next] button, and the issued App ID will be displayed in the list. This App ID serves as a unique identifier to distinguish the app during payment and product information settings.
- If there are multiple stores to launch, repeat steps 1-4 to issue an App ID for each store.
Next Steps
Register the product information to be sold. See more
PG Payment App ID Issuance
PG (Payment Gateway) refers to an electronic payment agency service that processes online payments. If you are providing PG payment services, please issue an App ID according to the guide below.
Supported OS
- Windows
Supported Stores
- Direct distribution: Choose this option if you are providing the service without being listed in the store.
- Microsoft Store
➡️ Console path: App Center > App ID Management > Select Project > [Register New App ID] button
How to Set Up
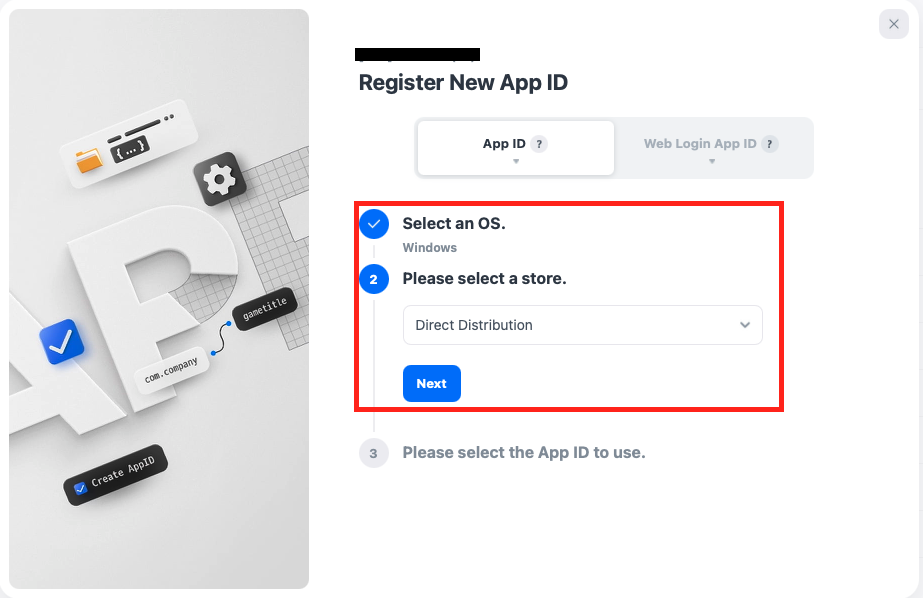
- Select a project and click the [Register New App ID] button.
- Select the ‘App ID’ tab, then choose ‘Windows’ as the OS for which the app will be serviced and click the [Next] button.
- Choose ‘Direct Distribution’ or ‘Microsoft Store’ as the store for servicing the app and click the [Next] button.
- After selecting the App ID to be used, click the [Next] button, and the issued App ID will be displayed in the list. This App ID serves as a unique identifier for distinguishing the app during payment and product information settings.
- If there are multiple stores to launch, repeat steps 1-4 to issue an App ID for each store.
Next Steps
Set the price tiers by currency to be used for the PG payment service. Learn more