Product Registration
Register and manage product information for sale. When registering a product, the product name, price, currency, product type, etc., are retrieved based on the product ID set during registration to proceed with the payment. The product ID is a unique identifier used to distinguish and manage products.
Choose to register mobile payment products or PC payment products depending on the environment in which the app will be serviced.
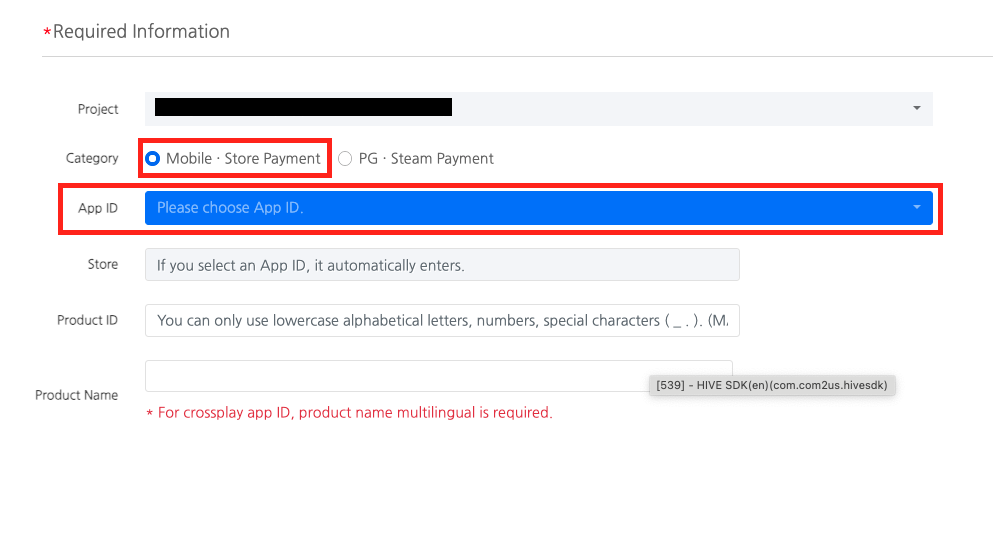
- Mobile Payment Product Registration: Used when providing mobile apps through stores like Google Play Games or the Apple App Store. When registering a product, select 'Mobile · Store Payment' as the classification value.
- PC Payment Product Registration: Used when providing apps in a PC environment, such as PG payment or the Steam store. When registering a product, select 'PG · Steam Payment' as the classification value.
➡️ Console Path: Billing > Product Management > Product Registration
Mobile Store Payment Product Registration
Register product information for each store so that payment systems from stores like Google and Apple can be used.
Preparations
To register a product in the Hive console, you need the product ID created in each store console, such as App Store Connect and Google Play Console.
Actual payments are processed based on the product information registered in each store, and the billing server requests payment from each store through the product ID registered in the Hive console. Prepare the product ID for the store you will be servicing and proceed with product registration according to the guide below.
List of Supported Stores
- Google Play Games
- Apple App Store
- ONE store
- HUAWEI
- Amazon Appstore
- Xiaomi
- Galaxy Store
Product Registration
Product registration supports both individual registration one by one and bulk registration using a CSV file. Please register products according to your operational situation.
Individual Registration
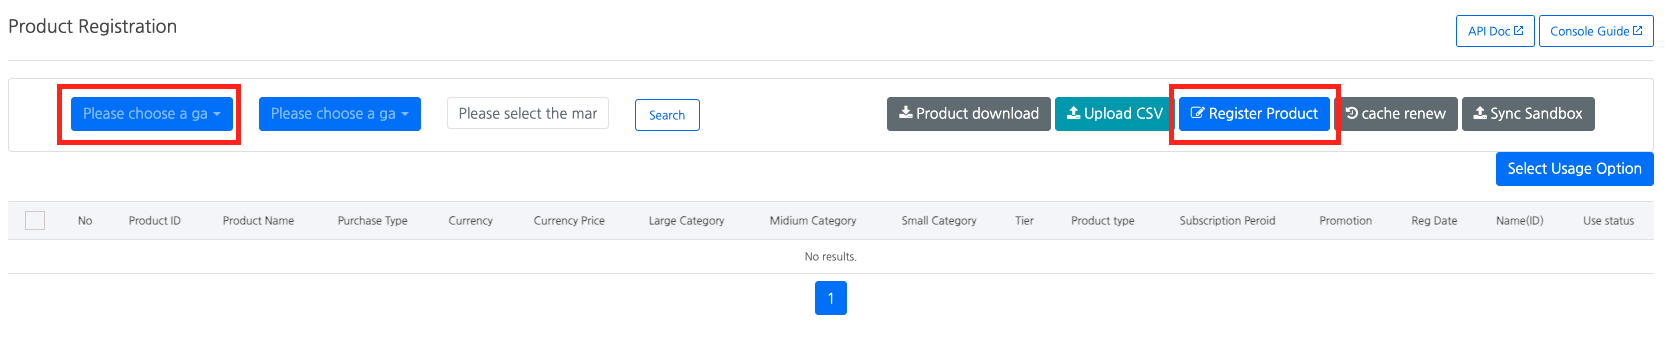
- After selecting the project, click the [Register Product] button.
- Check 'Mobile · Store Payment' and select the App ID.
- Enter the product information
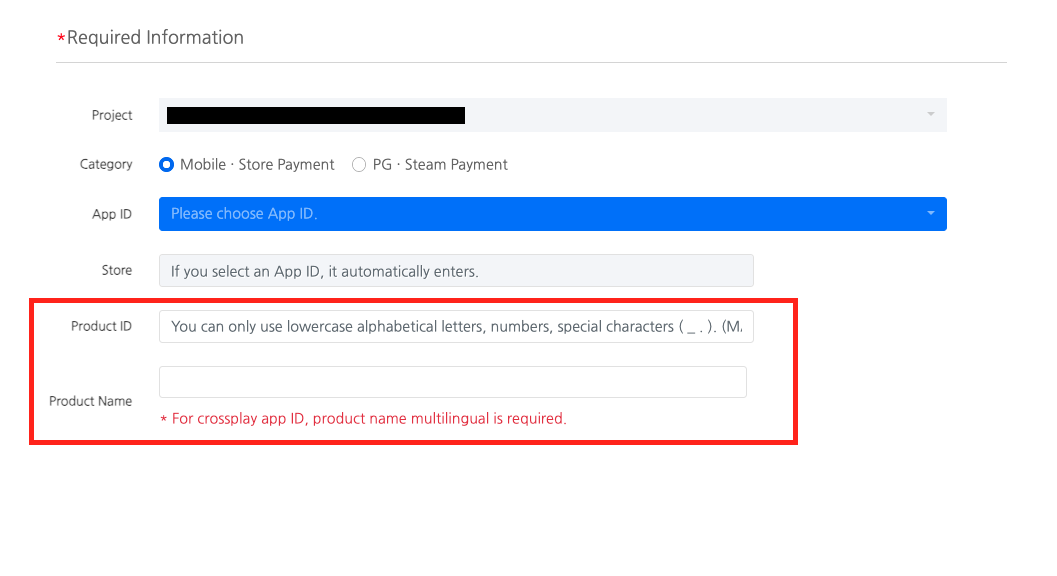
 * Product ID: Please enter the Product ID managed in the App Store Connect, Google Play Console, and other store admin pages.
 * Product Name: This is the product name that is actually displayed to users.
Batch Registration
-
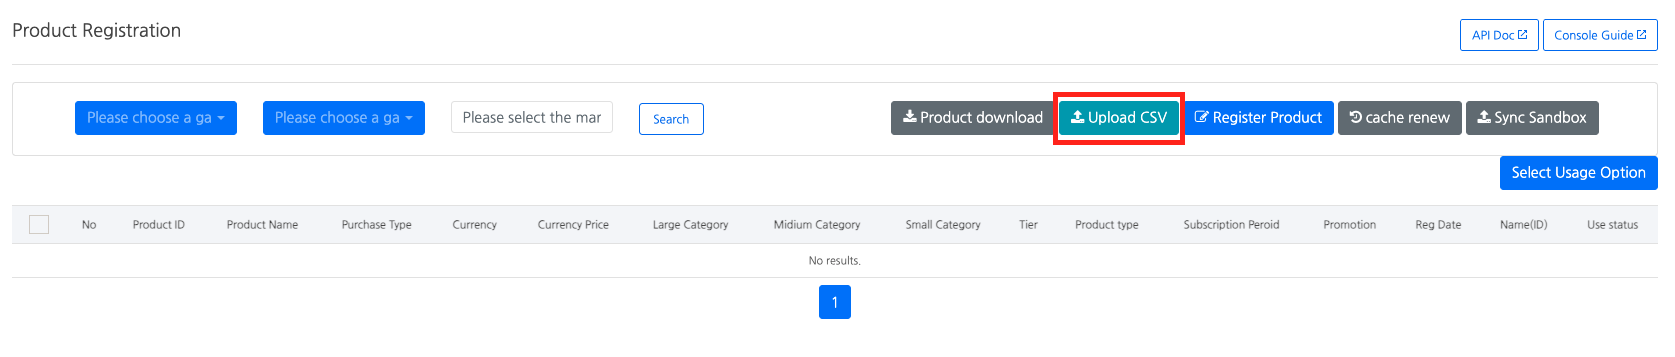
After selecting the project, click the [CSV Upload] button.
-
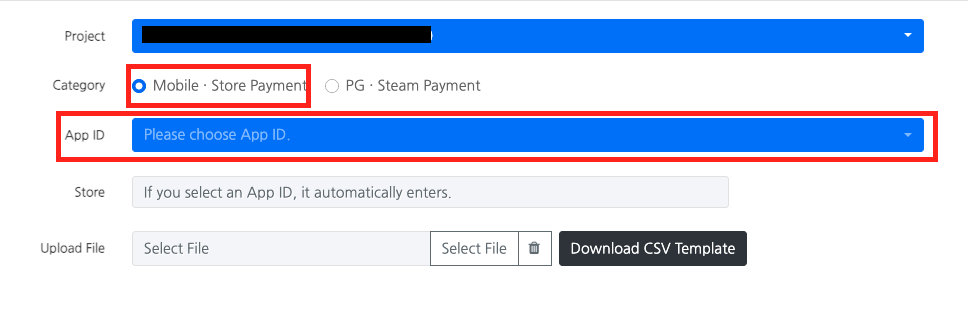
Check 'Mobile · Store Payment' and select the App ID to be serviced.
-
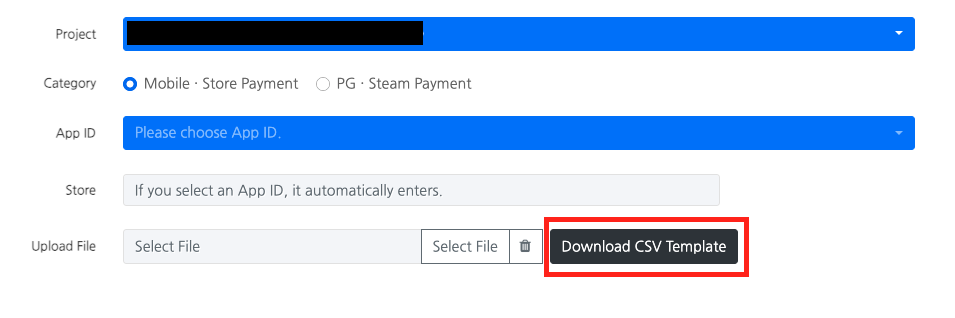
Click the [Download CSV Template] button to download the dedicated template.
-
Enter the product information in the downloaded CSV template.

- Product ID: You can enter a combination of lowercase letters, numbers, and special characters (_ .) up to a maximum of 255 characters.
- Product Name: Enter in the format of language code, product name, product description. (English required, up to 55 characters)
- Currency: Enter if currency differentiation is needed for each product in the console. (Optional)
- Price: Enter if price management is needed for each product in the console. (Optional)
- Major Category: Enter item or currency unit.
- Middle Category, Subcategory: Enter if management classification is needed. (Optional)
- Product Type: For general consumable products, enter consumable; for subscription products, enter subscription.
- Subscription Period: Enter subscription period only for subscription products. (Enter the applicable period among 1 week, 1 month, 3 months, 6 months, annual)
- Promotion Item Status: Check if it is a promotional product. (Enter yes or no) (Optional)
- Usage Status: Enter the usage status of the product.
-
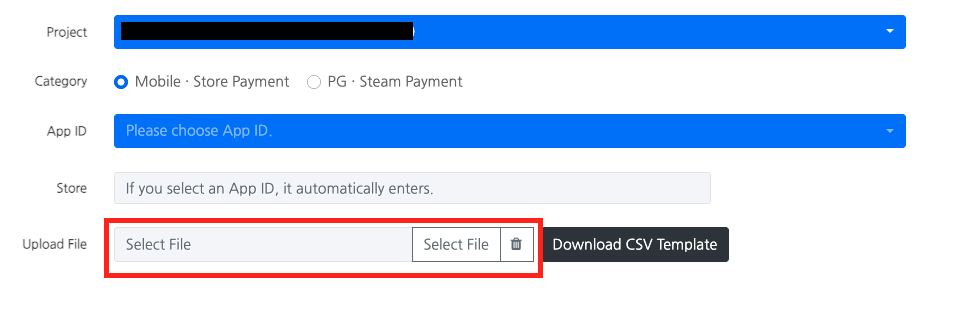
Upload the CSV file you created.
Registering PC Payment Products
Register product information to use the PG and Steam payment systems.
Things to Know
Notes on Registering PG Payment Products
This is a note to be careful only when operating multiple channels that apply PG payments, such as Apple PG and web store PG, and using the refund user re-payment feature.
If you use the same product ID across different channels but set different prices, when the refund user re-payment feature operates, the user will be recharged with the product amount of the newly accessed channel, not the amount they initially paid. To prevent this, if you want to operate the same product at different prices, please create and use different product IDs.
When using PG payment at Apple
To provide both App Store and Apple PG payments in the US region, all products must be registered under a single Apple App ID.
Product Registration
Product registration supports both individual registration one by one and bulk registration using a CSV file. Please register products according to the operational situation.
Individual Registration
-
After selecting the project, click the [Register Product] button.
-
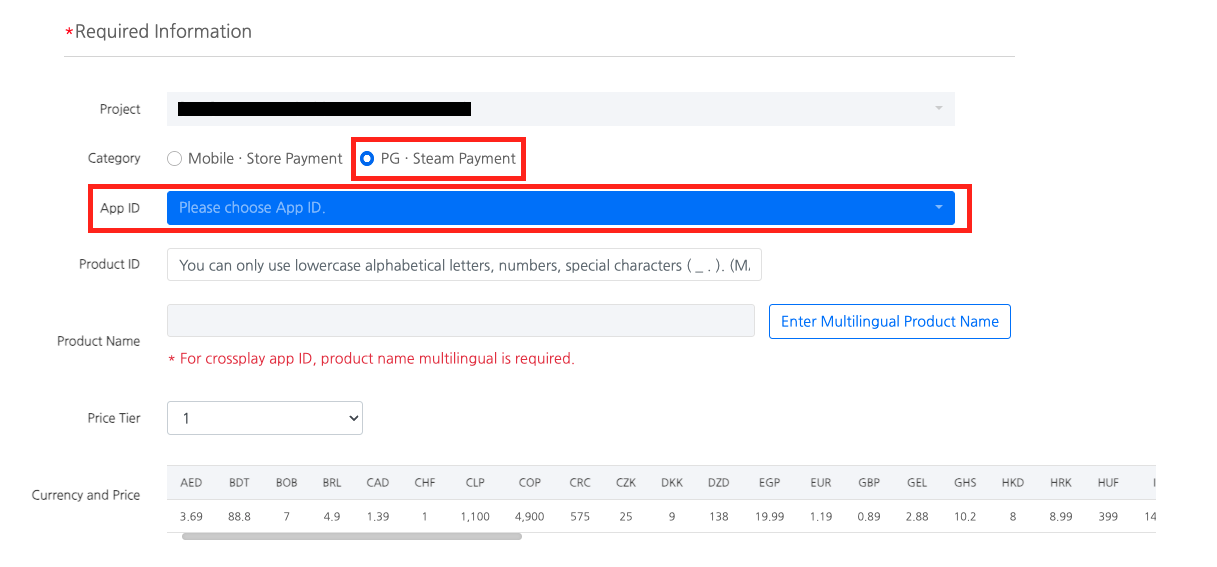
Check 'PG · Steam Payment' and select the App ID to be serviced.
-
Enter the product information
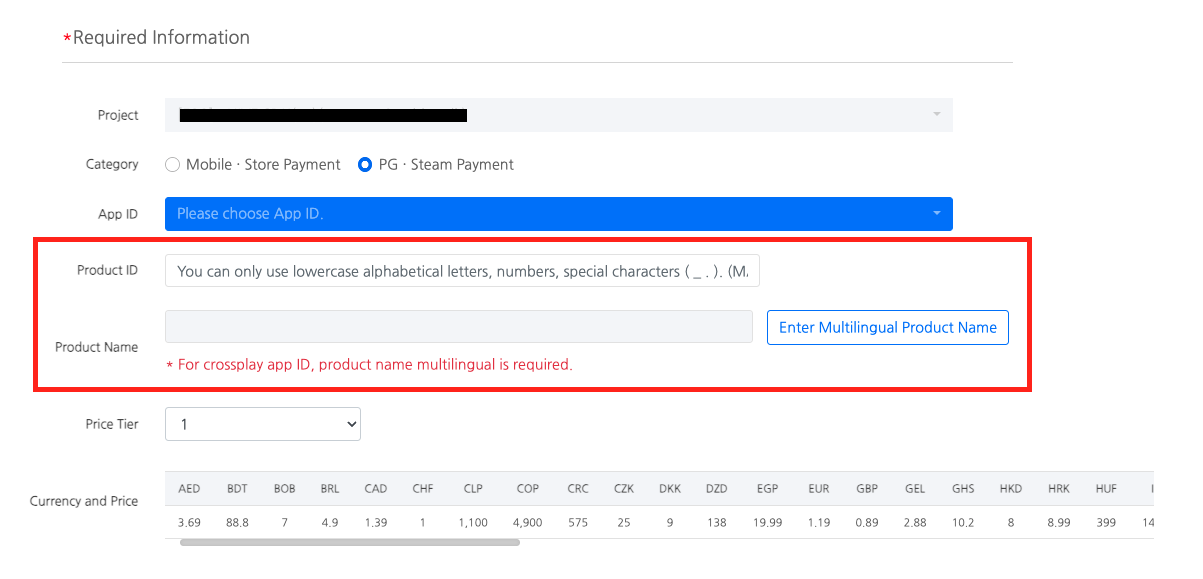
- Product ID: A value created by the app to distinguish products, used as an identifier to check product information during payment. (Lowercase letters, numbers, special characters _ . , up to 255 characters)
- Product Name: Enter the product name that will be displayed to the user. Please click the [Enter Product Name in Multiple Languages] button to enter the English name as required.
-
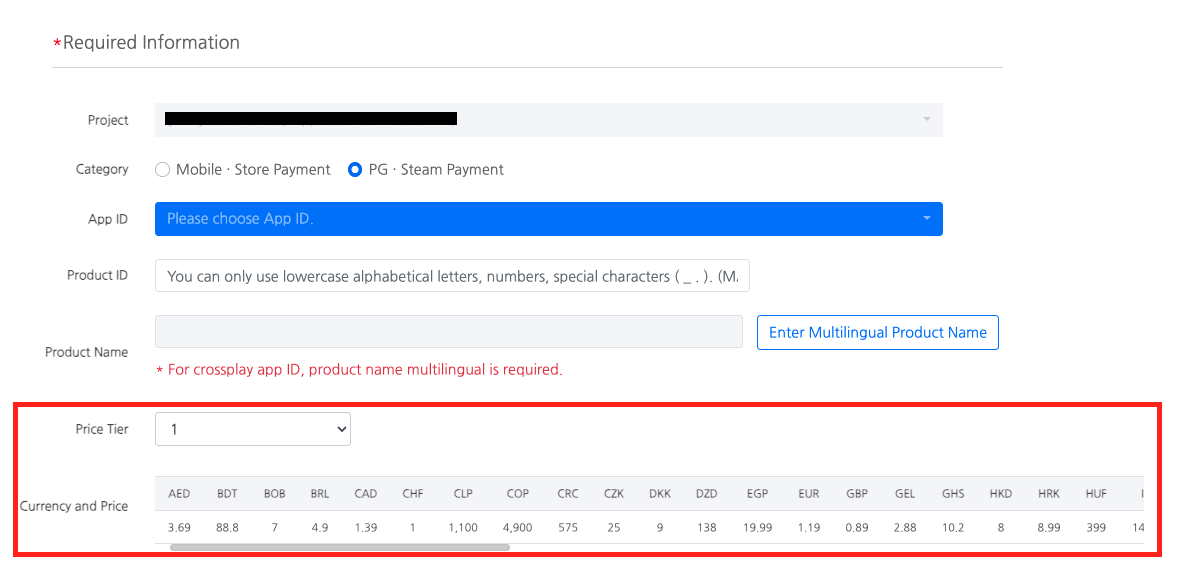
Select the price tier set in step 4 of the price tier setting. The amounts in each currency according to the selected tier will be displayed.
Bulk Registration
-
After selecting the project, click the [CSV Upload] button.
-
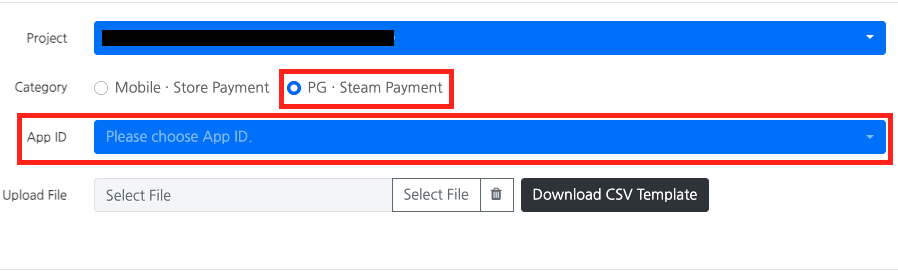
Check ‘PG · Steam payment’ and select the App ID to be serviced.
-
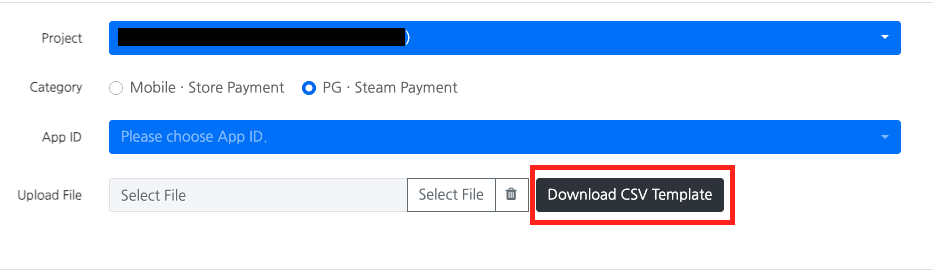
Click the [Download CSV Template] button to download the dedicated template.
-
Enter the product information in the downloaded CSV template.

- Product ID: You can enter a combination of lowercase letters, numbers, and special characters (_ .) up to a maximum of 255 characters.
- Product Name: Enter in the format language code;product name;product description. (English required, maximum 55 characters)
- Price Grade: Enter the grade to be applied to the product.
- Major Category: Enter the applicable item or currency unit.
- Middle Category, Subcategory: Enter if additional classification is needed beyond the major category.
- Usage Status: Enter the usage status of the product.
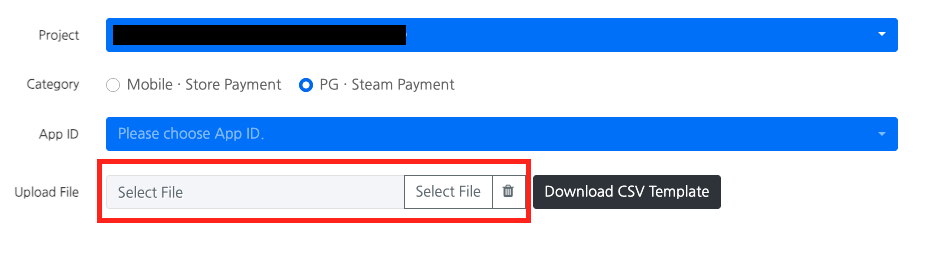
-
Upload the CSV file you created.
Product Management
Product Usage Status
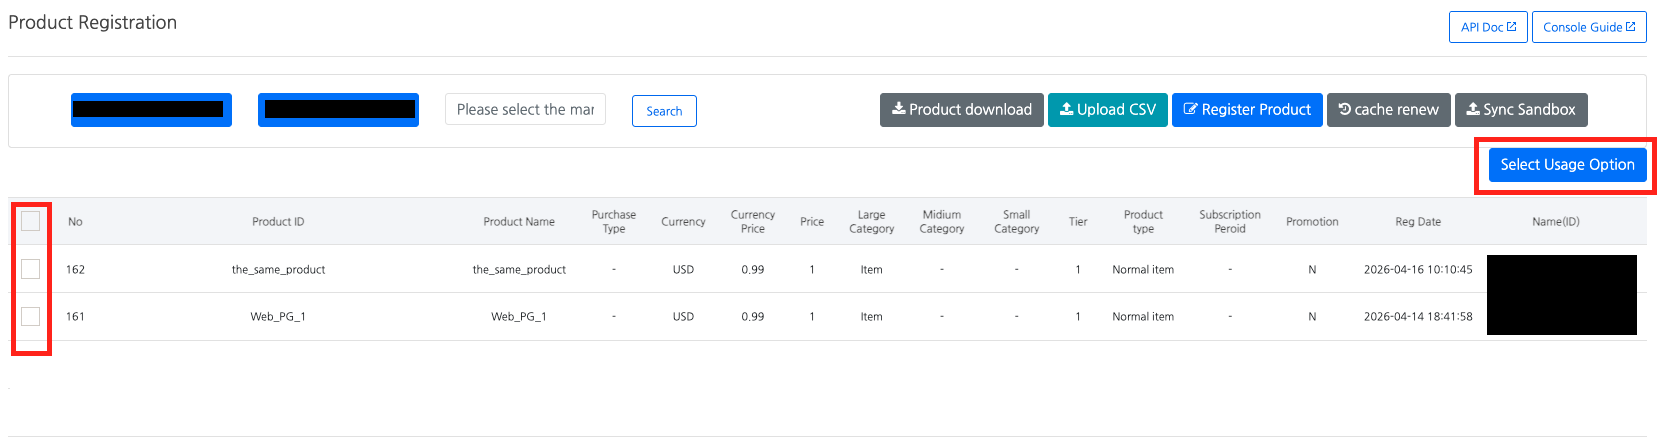
To change the usage status of a product, select the relevant product from the list and click the [Select Usage Status] button. Each time you click, the current status will toggle, so a product that is 'in use' will switch to 'not in use', and a product that is 'not in use' will immediately revert to 'in use'.
Product Synchronization

- Cache Refresh: When you register or modify a product, the cache is automatically refreshed to ensure that changes are immediately reflected in the app. However, if the changes are not reflected in the app due to issues such as server errors, please click the [Refresh Cache] button manually. (Supported only in SDK v4.16.3 and above.)
- Sandbox Synchronization: Clicking the [Sandbox Synchronization] button copies the product information registered in the production console directly to the sandbox environment. There is no need to register the same information separately in the sandbox.
Next Steps
If you are using store payments, set up the payment information for the store you will be servicing. See more
If you are using PG payments, proceed to set up by going to the contracted PG platform from the list below.