Using PG Payments on Websites
We support the implementation of PG payments on websites developed in-house. Since PG payments are processed based on login information, it is also necessary to implement a web login feature on the website. Please follow the setup process below to integrate web login and web PG payments together, providing a payment flow that connects from login to payment.
Step 1. Issuing App ID
Manage login information, PG payment methods, and product information based on the App ID. Create an App ID to connect login and payment information on the website.
➡️ Console Path: App Center > App ID Management > Select Project > [Register New App ID] Button
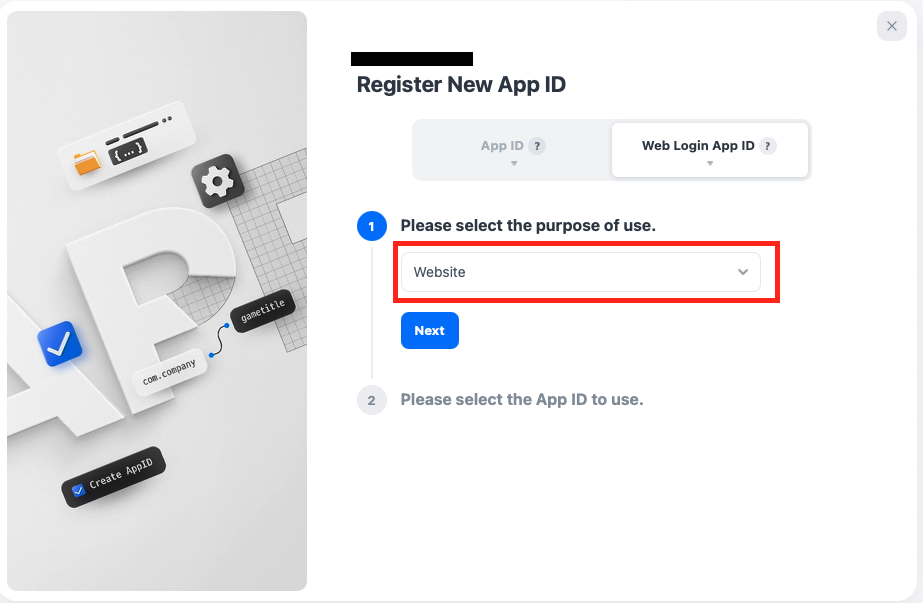
- Select a project and click the [Register New App ID] button.
- Select the ‘Web Login App ID’ tab, choose ‘Website’ for the usage, and click the [Next] button.
- After selecting the App ID to use, click the [Next] button, and the issued App ID will be displayed in the list.
- Check com.companyname.appname.pcweb.website in the App ID list. This App ID will be used as a unique identifier for login, payment, product information, etc.
Step 2. Implementing Web Login
Check the web login API guide below and implement the web login feature on your website. Web Login API Guide
Step 3. Implement Web PG Payment
Check the web PG payment API guide below and implement the PG payment feature on your website. Web PG Payment API Guide