Push campaign registration
'Push Campaign Registration' is a feature that creates push campaigns for each project. Set the campaign name, push type, send time, recipients, multilingual messages, and platform-specific options to register a scheduled or recurring campaign.
➡️ Console path: Push Notification > Push Campaign Registration
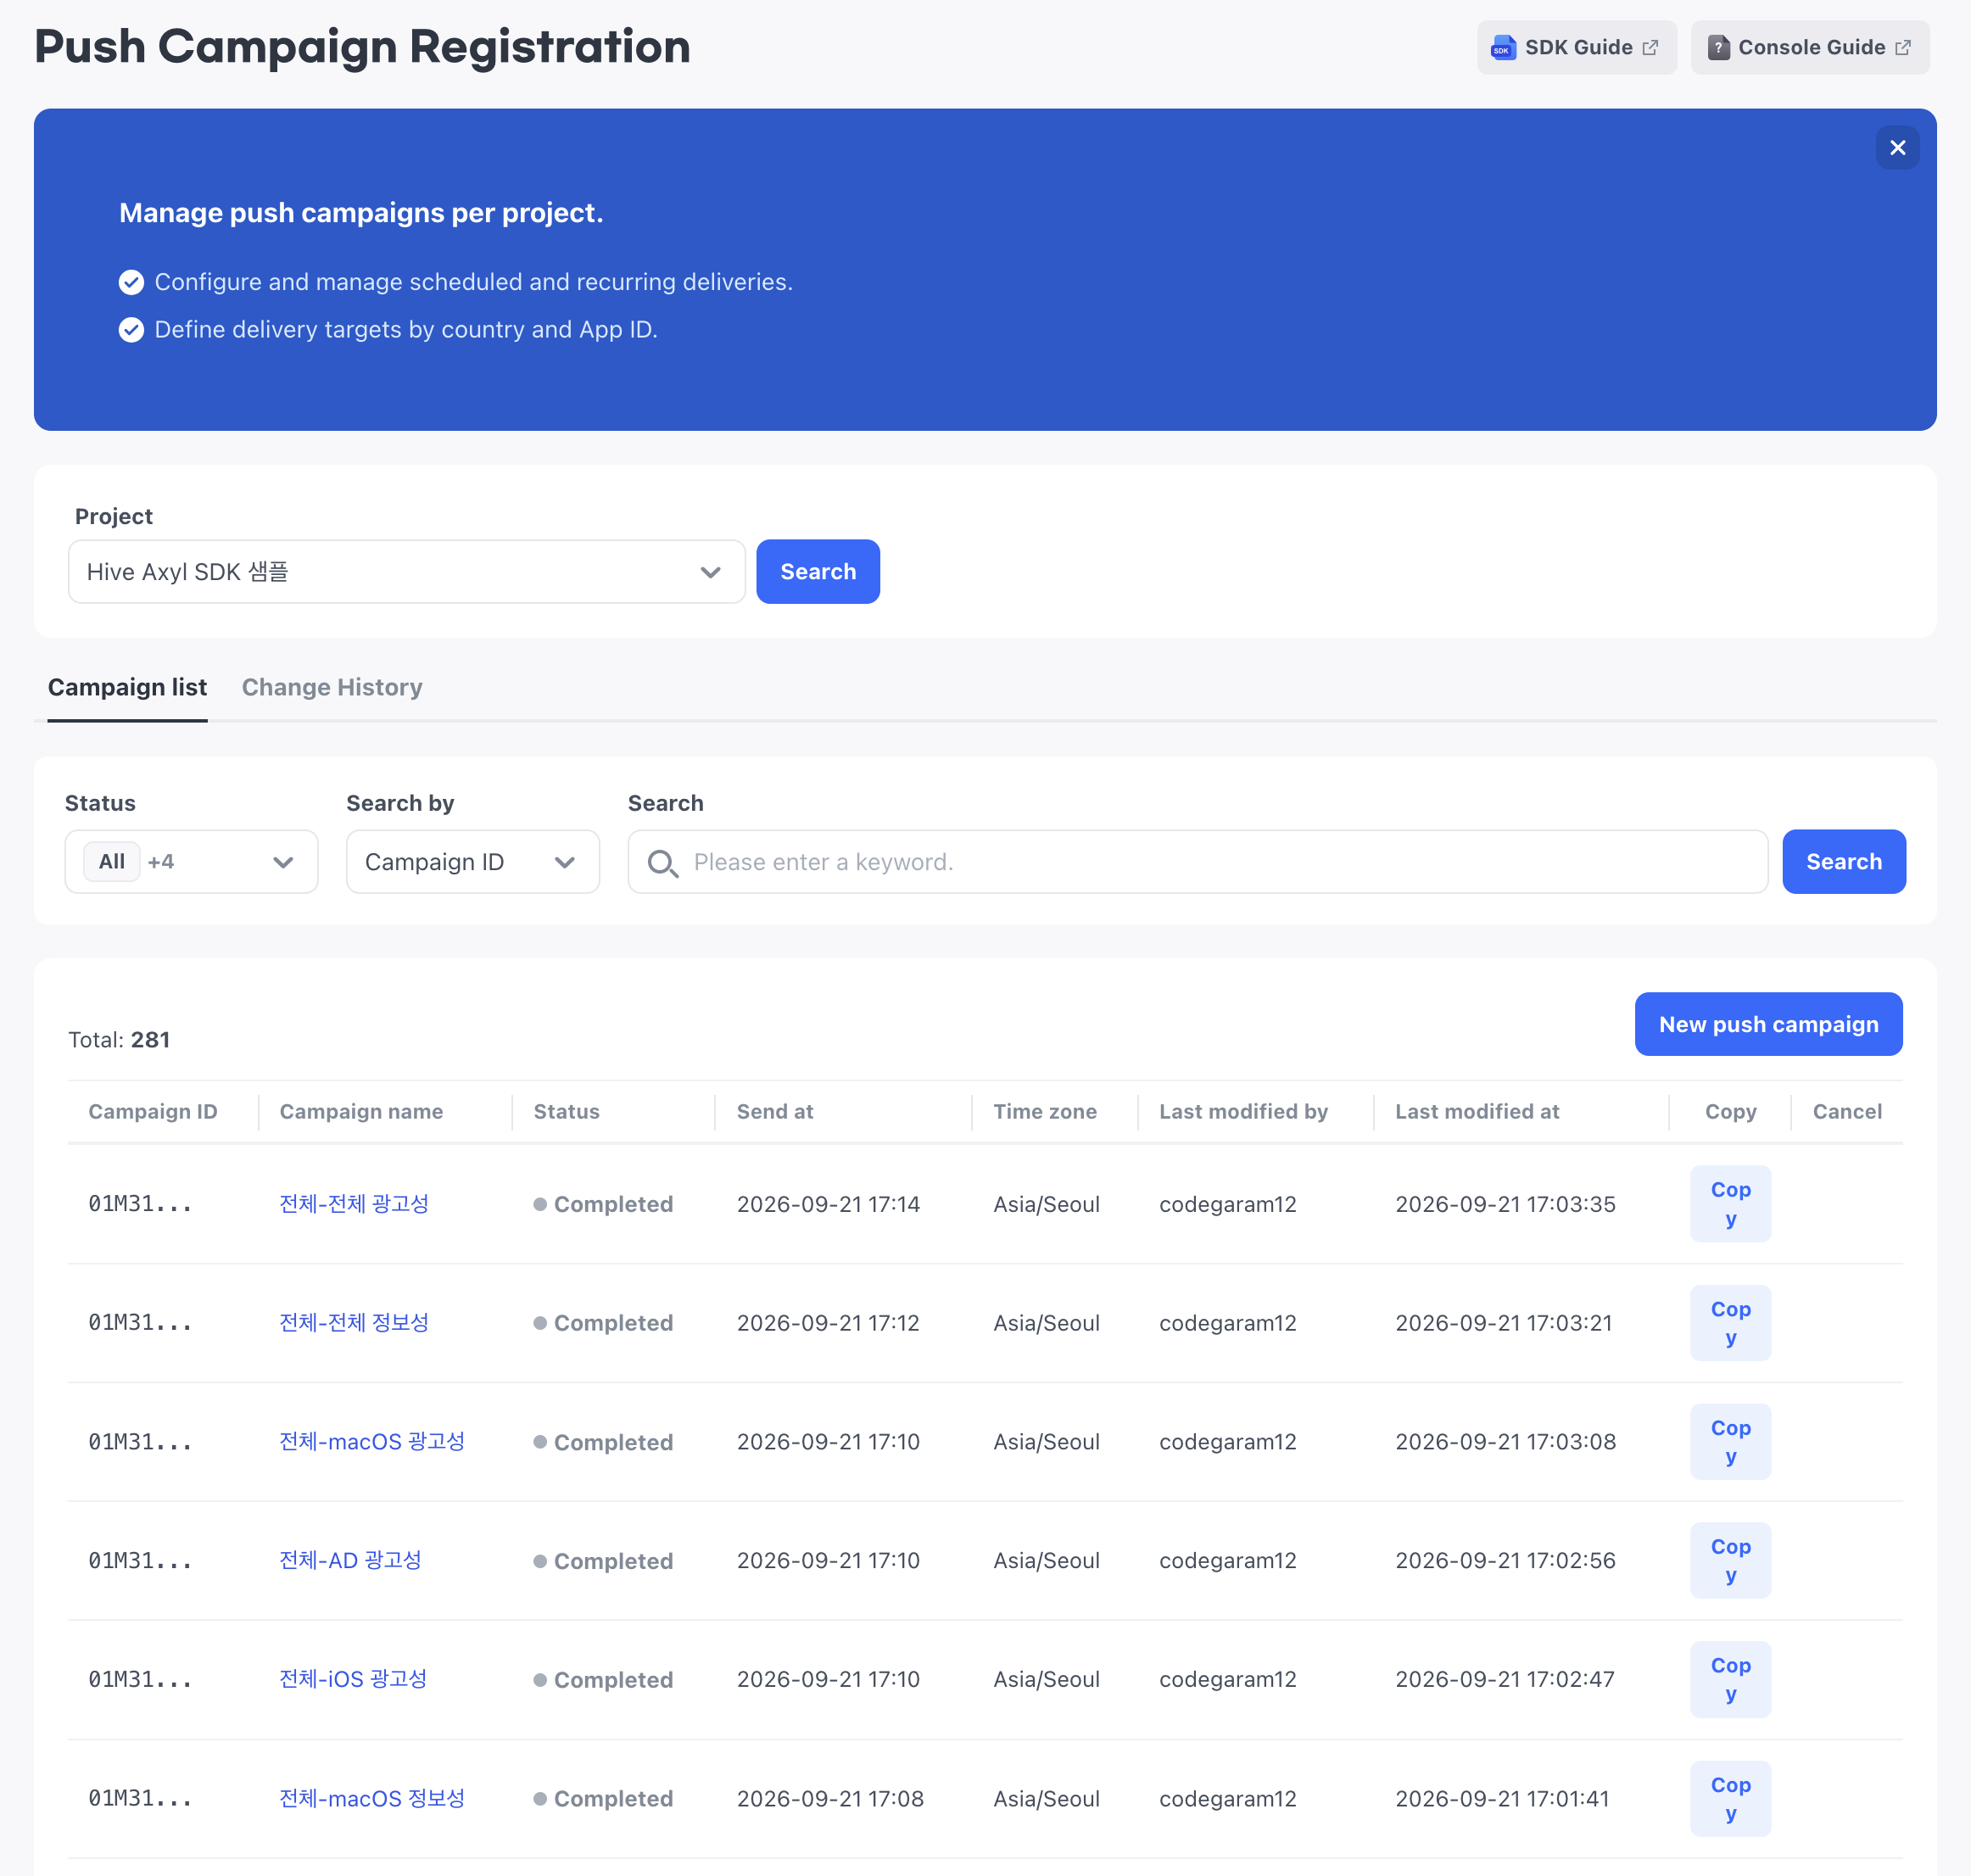
If you have menu permission, you can access the menu and search. To register a New push campaign, you need edit permission.
Set basic information
Set the campaign name and push type. When you register a new campaign, Campaign name is required, and you can enter up to 50 characters.
| Item | Description |
|---|---|
| Campaign name | Enter the campaign name. |
| Push type | The default is Informational. For an advertising push campaign, select Advertising. |
Set the schedule
Set whether to send the campaign only once or repeatedly according to a period and cycle. Time zone, Send date, Send time, and Repeat are required fields.
Repeat > Do not repeat
Do not repeat is the default selection. The campaign is sent once based on the specified Send date, Send time, and Time zone.
Repeat > Repeat
If you select Repeat, set the repeat period and repeat cycle. You set the start and end dates of the repeat period yourself; there are no default values.
For the repeat cycle, select Daily or Weekly. If you select Weekly, select one or more days of the week from Monday to Sunday.
Excluded dates
You can select multiple dates to exclude from recurring sending. Excluded dates take precedence over the repeat settings.
Set the targets
Select the countries and App IDs to send the campaign to. Country and App ID are required fields, and both support multiple selection.
Target countries
Select countries from the dropdown. Selecting All selects every country. Selected countries appear in the selection area, and you can see the items beyond the first five by expanding +N more.
App ID
Select App IDs from the dropdown. Selecting All selects every App ID in the dropdown. You can search for App IDs by keyword and remove selected items individually.
Set the message
Write the push message for each language set in App Meta Info. Title and Body are required fields, and Image URL is optional.
Messages by language
| Item | Description |
|---|---|
| Language tabs | Only the languages set in the App Meta Info menu are shown. |
| Set as default language | You can set only one language as the default language at a time. |
| Title | Enter up to 240 characters. |
| Body | Enter up to 420 characters. |
| Image URL | Optionally enter up to 512 characters. |
You must enter the default language message. For languages with no message, the default language message is sent instead.
AI auto-translate
AI auto-translate automatically fills in the messages for other languages based on the message in the language you have entered.
Set platform-specific options
For each Android, iOS, and macOS App ID, the options supported by that OS are shown. Options you do not set are sent with their default values.
| Category | Item |
|---|---|
| Common options | - |
| FCM options | Sound, Icon, Priority, Overwrite, Click action, Channel ID, Custom data |
| APNs options | Sound, Badge, Category |
For Custom data in FCM options, enter the Key and Value as strings. Keys cannot be duplicated.
How to set up
- Go to Push Campaign Registration.
- Select a project and click Search.
- Click New push campaign.
- Enter or select the basic information, send time, recipients, message, and platform-specific options.
- Click Save.
Look up campaigns
When you select a project, the campaign list is retrieved. The campaign list is sorted by last modified date in descending order.
Status filter and search
| Item | Description |
|---|---|
| Status | Apply one or more of All, Scheduled, In progress, Completed, and Canceled to the status filter. The default is All. |
| Search by | Select Campaign ID or Campaign name. |
| Search | Enter a keyword that matches the selected search condition. |
Campaign status
| Status | Description |
|---|---|
Scheduled | The send time is later than the current time. |
In progress | The campaign is currently being sent. |
Completed | All sending is complete. |
Canceled | Sending has been stopped. |
How to set up
- Go to Push Campaign Registration.
- Select a project and click Search.
- Apply Status to the status filter, select Search by, and enter a keyword in Search to look up campaigns.
- In the campaign list, check the status, send date, time zone, last modifier, and last modified date.
Edit a campaign
You can edit only campaigns in the Scheduled status. Click a Campaign name in the campaign list to go to Campaign details.
(Image to be added: Campaign details screen)
How to set up
- In the campaign list, click the Campaign name of the campaign to edit.
- In Campaign details, change the values you want to edit.
- Click Update.
Copy a campaign
When you copy a campaign, you go to New push campaign with that campaign's settings filled in. Date values are not copied, so enter them again.
How to set up
- In the campaign list, click Copy for the campaign to copy.
- In New push campaign, check the copied settings.
- Enter new date values.
- Edit the values as needed and click Save.
Cancel a campaign
You can cancel sending for campaigns in the Scheduled or In progress status. If you cancel a campaign in the In progress status, only subsequent sending stops, and what has already been sent stays as it is.
How to set up
- In the campaign list, click Cancel for the campaign to cancel.
- In the "Do you want to cancel sending this campaign?" confirmation dialog, click OK.
- When the cancellation is complete, the message "Push campaign sending has been canceled." appears.
Next steps
If you need to send a test, see Token inquiry.