Service access control items
'Service access control items' is the screen where you register and manage service country restriction, server maintenance, and client update items. You can edit registered items, or stop applying them and delete them.
➡️ Console path: Service Access Control
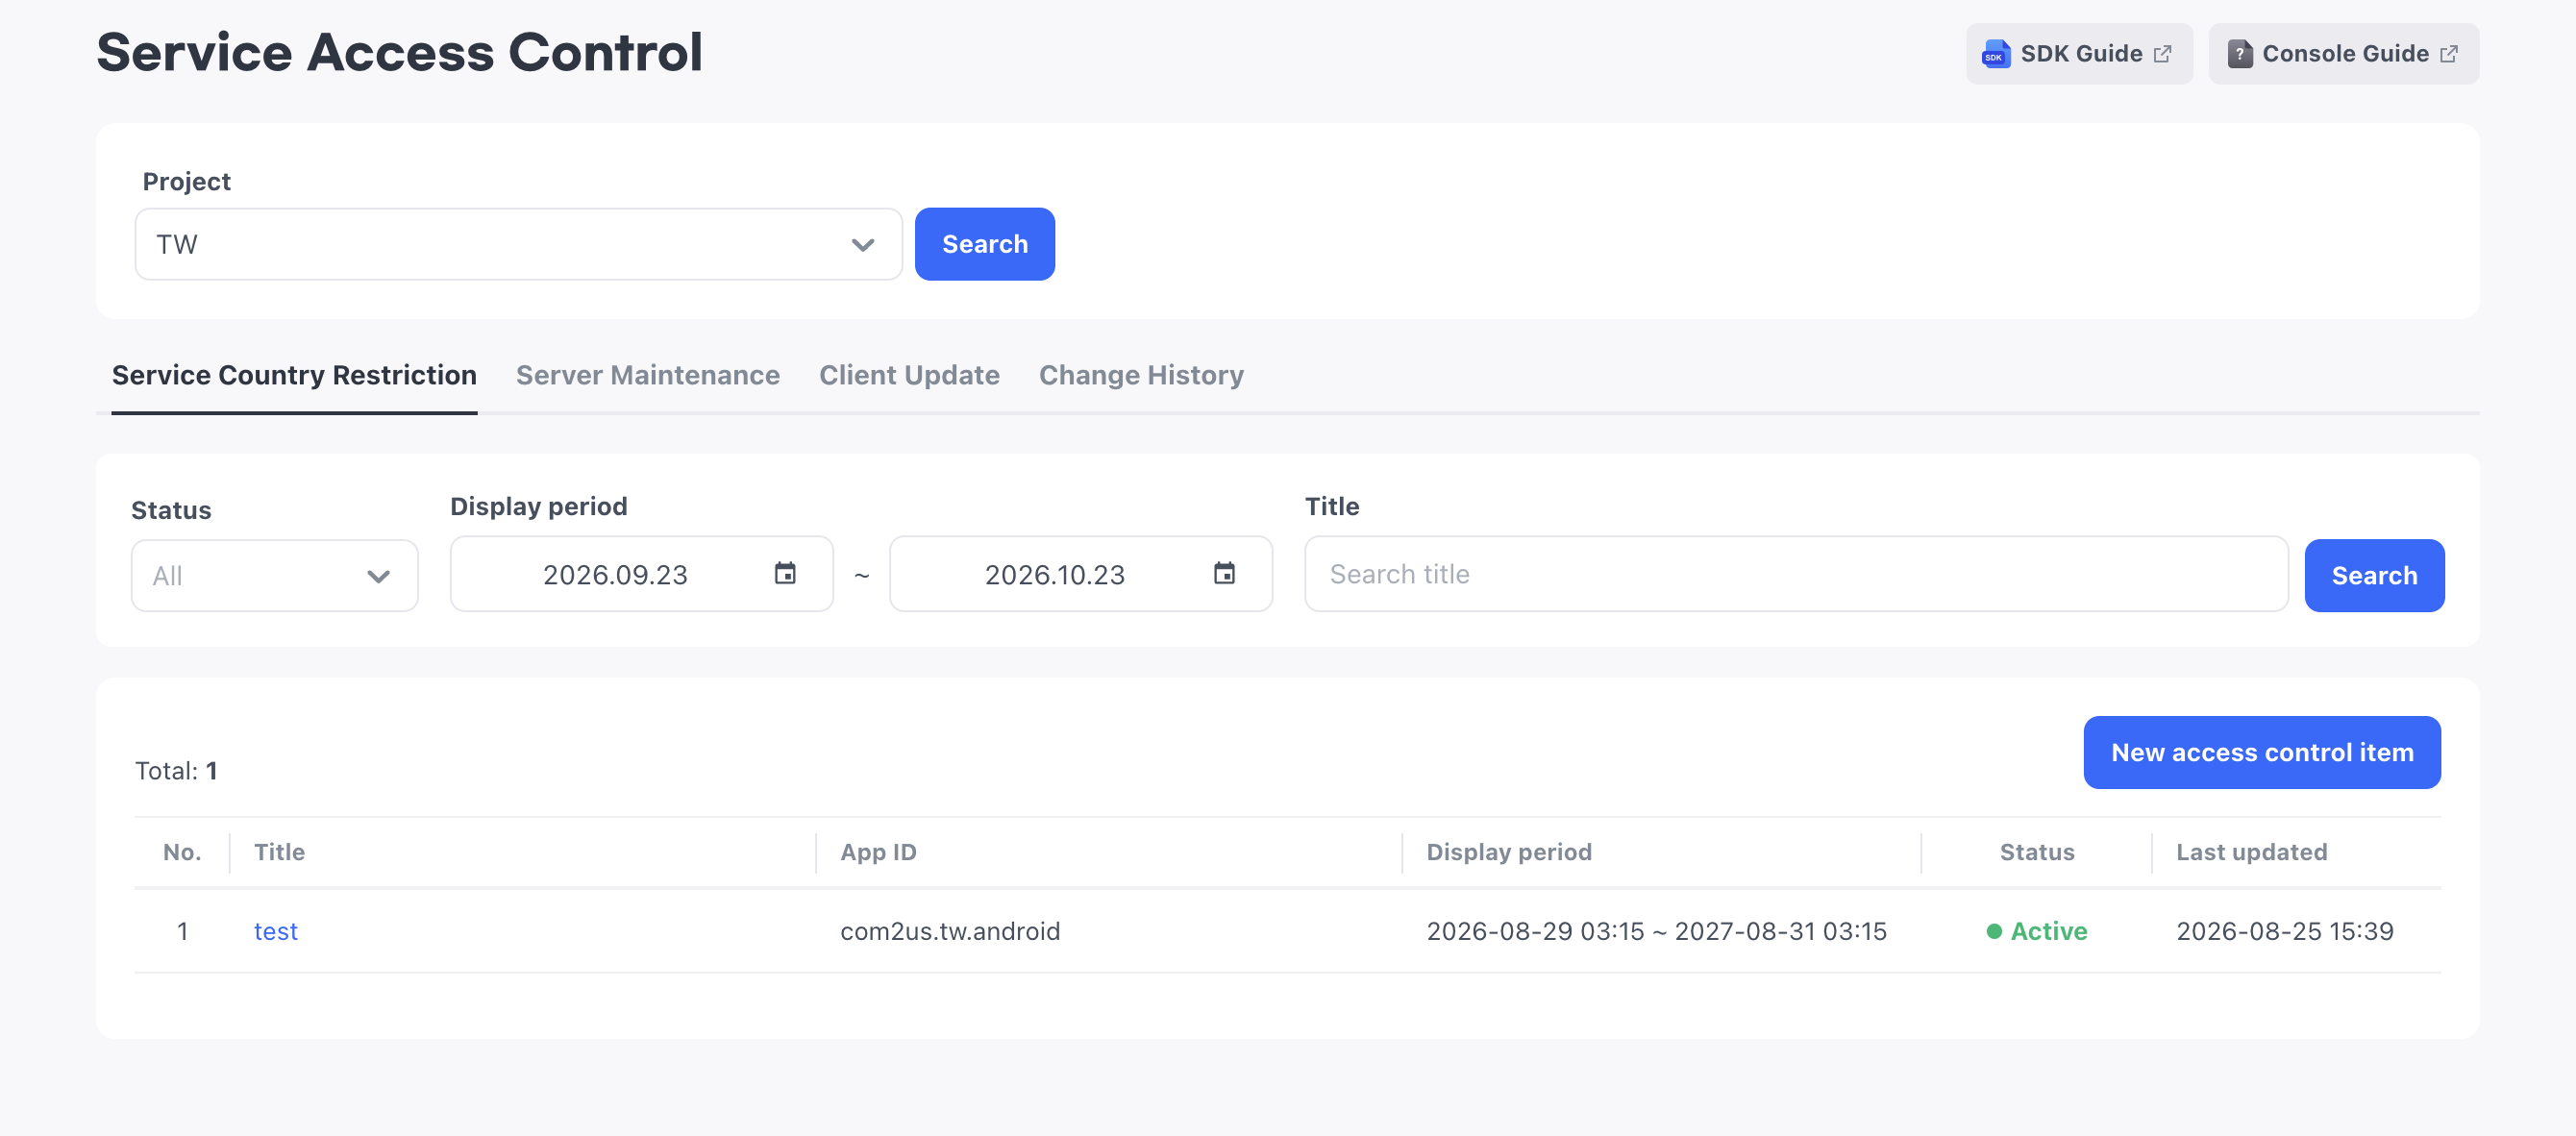
You register all three types on the same registration screen by selecting a type, and registered items are shown on separate tabs by type. You do not need to open the tab of the type you want to register first. Whichever tab you start from, you select the type on the registration screen.
Register an access control item
Select New access control item to open the registration screen.
How to set up:
- Select New access control item.
- Choose a type and enter a management title.
- Specify the targets for the selected type.
- Specify the effective period.
- Enter the user notice messages for each language.
- Select Save.
The following sections explain what you need to know in each step, in order.
Type and management title
For the type, select one of Service Country Restriction, Server Maintenance, or Client Update. Only the input fields for the selected type appear on the screen, and you cannot change the type after registration.
The management title is the name that identifies the item in the console. Both the Title column in the list and the title search are based on this value. Enter a name that is easy to find later, such as China access restriction or Asia-1 regular maintenance. It is separate from the title of the notice message shown to users.
For the Client Update type, set Force update. When it is on, the update is sent to the app as a forced update; when it is off, it is sent as an optional update.
Targets
The targets, additional settings, and results for each type are as follows. The effective period and user notice messages that follow are the same for all three types.
| Type | Target | Additional settings | Result |
|---|---|---|---|
| Service country restriction | Blocked countries for each App ID | Specify an App ID together with one or more blocked countries | The server sends the app the country determined from the access IP and the list of blocked countries, and the app decides whether to block entry |
| Server maintenance | One or more registered servers, or all servers | Specify App IDs and app versions as well if needed | Maintenance is applied per server; if the version is left empty, it applies to all versions that use the server |
| Client update | Target versions for update notices for each App ID | The target version is optional; if it is left empty, the item applies regardless of version | The app compares its current version with the target version conditions and displays the update notice screen |
Check the detailed settings on the tab for the type you want to register.
-
Target: You specify blocked countries for each App ID. Specify one App ID and the countries to block for that App ID as a pair. By adding targets, you can manage the blocked countries of multiple App IDs in one item. You do not need to register a separate item for each App ID.
-
Additional settings: You must select at least one country. If you select the entire country list, access from all over the world is blocked for that App ID. Check before you select.
-
Result: The country is determined from the user's access IP. The server sends the determined access country and the registered list of blocked countries to the app, and the app decides whether to block entry.
-
Target: Select one or more servers to put under maintenance, or select all servers. The list shows the servers registered in App Info > App Server. Hive Axyl does not collect server lists separately, so you can specify only the servers registered in the console as maintenance targets.
-
Additional settings: To apply maintenance only to specific app versions of a specific App ID, specify target versions as well. The target version is an optional field. Specify one App ID and an app version of that App ID, in a format such as
1.2.0, as a pair. Enter multiple versions for one App ID, or add targets to specify different versions for each App ID. -
Result: Maintenance is applied per server. If you leave the target version empty, maintenance applies to all versions that use the server.
-
Target: You specify the target versions for update notices for each App ID. Specify one App ID and an app version of that App ID, in a format such as
1.2.0, as a pair. By adding targets, you can specify different versions for each App ID. -
Additional settings: The target version is an optional field. If you leave it empty, the item applies regardless of version. To show the update notice only to users of specific versions, specify the versions.
-
Result: The app compares its current version with the target version conditions it receives and displays the update notice screen.
Effective period
Specify the item's effective period with a start date and time and an end date and time. The server sends the app only the items within their effective period. The name of the period field differs by type: it appears as Maintenance period for Server Maintenance and as Effective period for the other two types.
Register items that must stay in effect with no end time as Always. When you select Always, the period fields are disabled and the registered item takes effect immediately. It stays in effect with no end time until you change it to Inactive.
Enter the period based on a time zone. The default is the console owner's time zone, and the status of a registered item is calculated based on this effective period. The criteria for each status are as follows.
- Scheduled: The effective period has not started yet
- Active: The current time is within the effective period
- Ended: The effective period has ended
- Inactive: The item is stopped regardless of the effective period
Only Active items are sent to the app.
User notice messages
For each language, write the title and content to show to users whose access is restricted. The language tabs show the supported languages registered in App meta info. You must enter the title and content for the default language among them to save the item.
You do not need to fill in every language. Users of a language with no message receive the default language's message instead.
If it is difficult to translate and enter the message for each language yourself, use AI auto-translate. It translates the messages on the other language tabs based on the message in the language you are currently viewing.
Destination URL
In the destination URL field, enter the URL or deep link to send users to, such as a detailed notice page or a store, for each language. This field is optional, and the console validates its format against URI syntax.
Manage registered items
When registration is complete, you return to the list. For fields with multiple values, such as blocked countries, the list shows only the count. To see the actual values, select the title and check them on the detail screen.
When a registered item does not appear in the list
The period search condition of the list defaults to the last month. If you registered an effective period that starts in the future, the item falls outside the default search range and does not appear in the list. The registration was processed normally, so widen the search period to include the registered period and search again.
The same applies when you look for items that ended long ago. You can also narrow the list by status and management title.
Edit registered content
Select a title in the list to open the detail screen with the content you entered during registration. On this screen, you can edit every field except the type. You cannot change the type after registration.
Stop applying an item
If you need to stop an item immediately even though its effective period has not ended, change it to Inactive. An item changed to Inactive is not sent to the app even within its effective period.
Inactive temporarily stops an item without deleting it. When you turn the active toggle back on, the item returns to its original values and period. Use it to end maintenance early or to lift a block temporarily.
How to set up:
- In the list, select the title of the item to stop.
- Turn off the active toggle in Current status at the top of the detail screen.
- In the confirmation dialog, select Deactivate.
When you select Deactivate in the confirmation dialog, the change takes effect immediately and the detail screen closes. You do not need to select Save separately. To apply the item again, turn on the active toggle in the same place and select Activate in the confirmation dialog.
Delete an item
You can delete items whose status is Inactive, Scheduled, or Ended. To delete an item that is currently in effect, change it to Inactive first. You cannot restore deleted items.
Next steps
If some users need to access the app regardless of access restrictions, register their IPs or Player IDs in the Allowlist.