Admin Post
This is the page where admins write and manage posts to be registered in the community.
➡️ Console Path: Community & Web Shop > Community Post Management > Admin Post
Post List
Inquire about posts written by admins, move, delete, and download data. 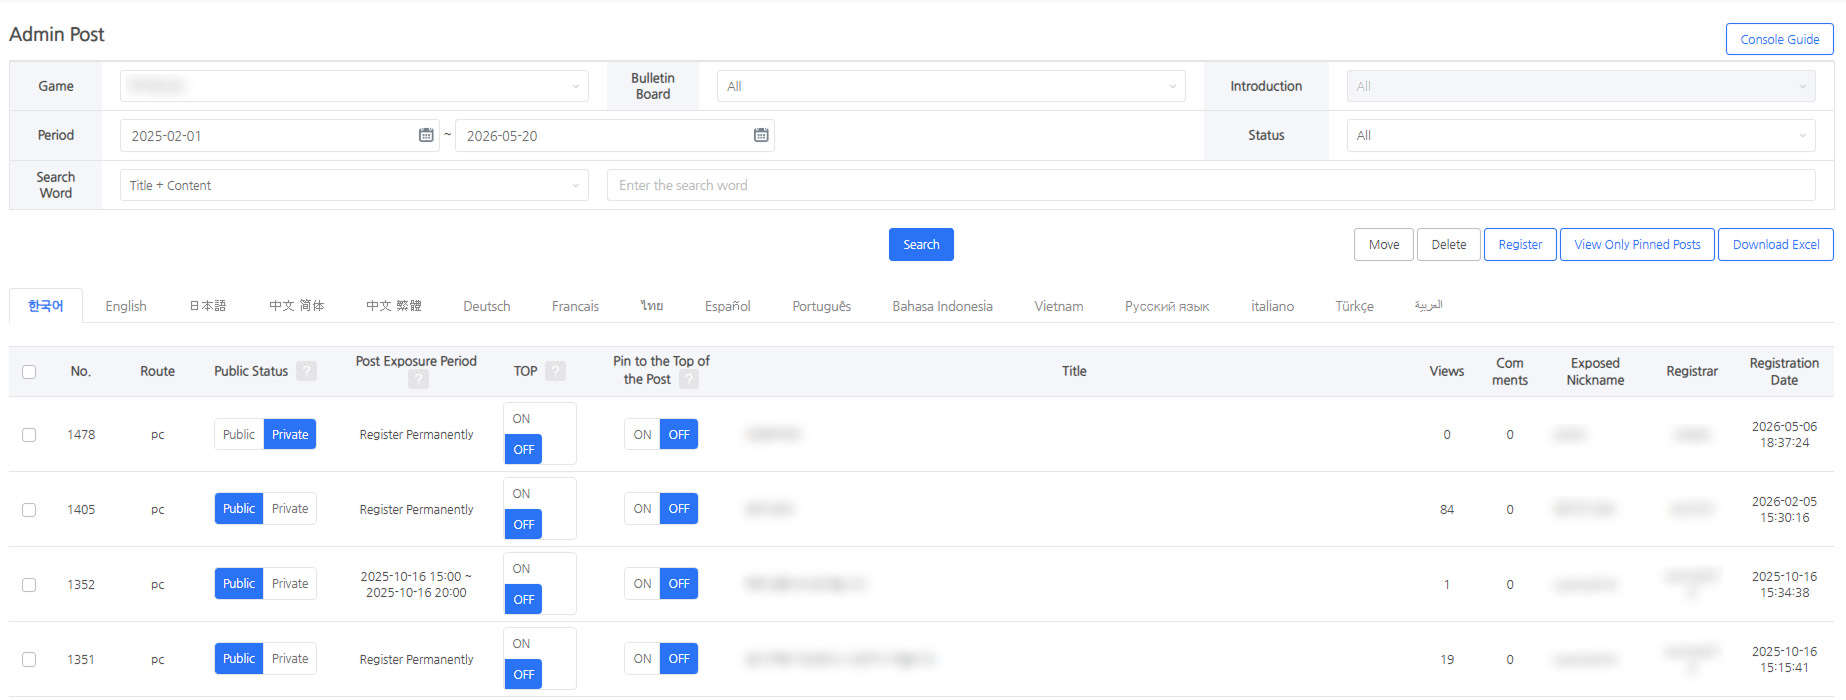
- Inquiry and Filter: Inquire by project, bulletin board, prefix, and language, and filter only posts pinned to the top.
- Post Management: Can be moved to the same type of bulletin board or deleted. Admin posts are permanently deleted when deleted.
- Data Download: Download up to a week's worth of post data in Excel through period filtering.
Post Details
Configure the exposure settings of admin posts, write multilingual content, and manage comments. 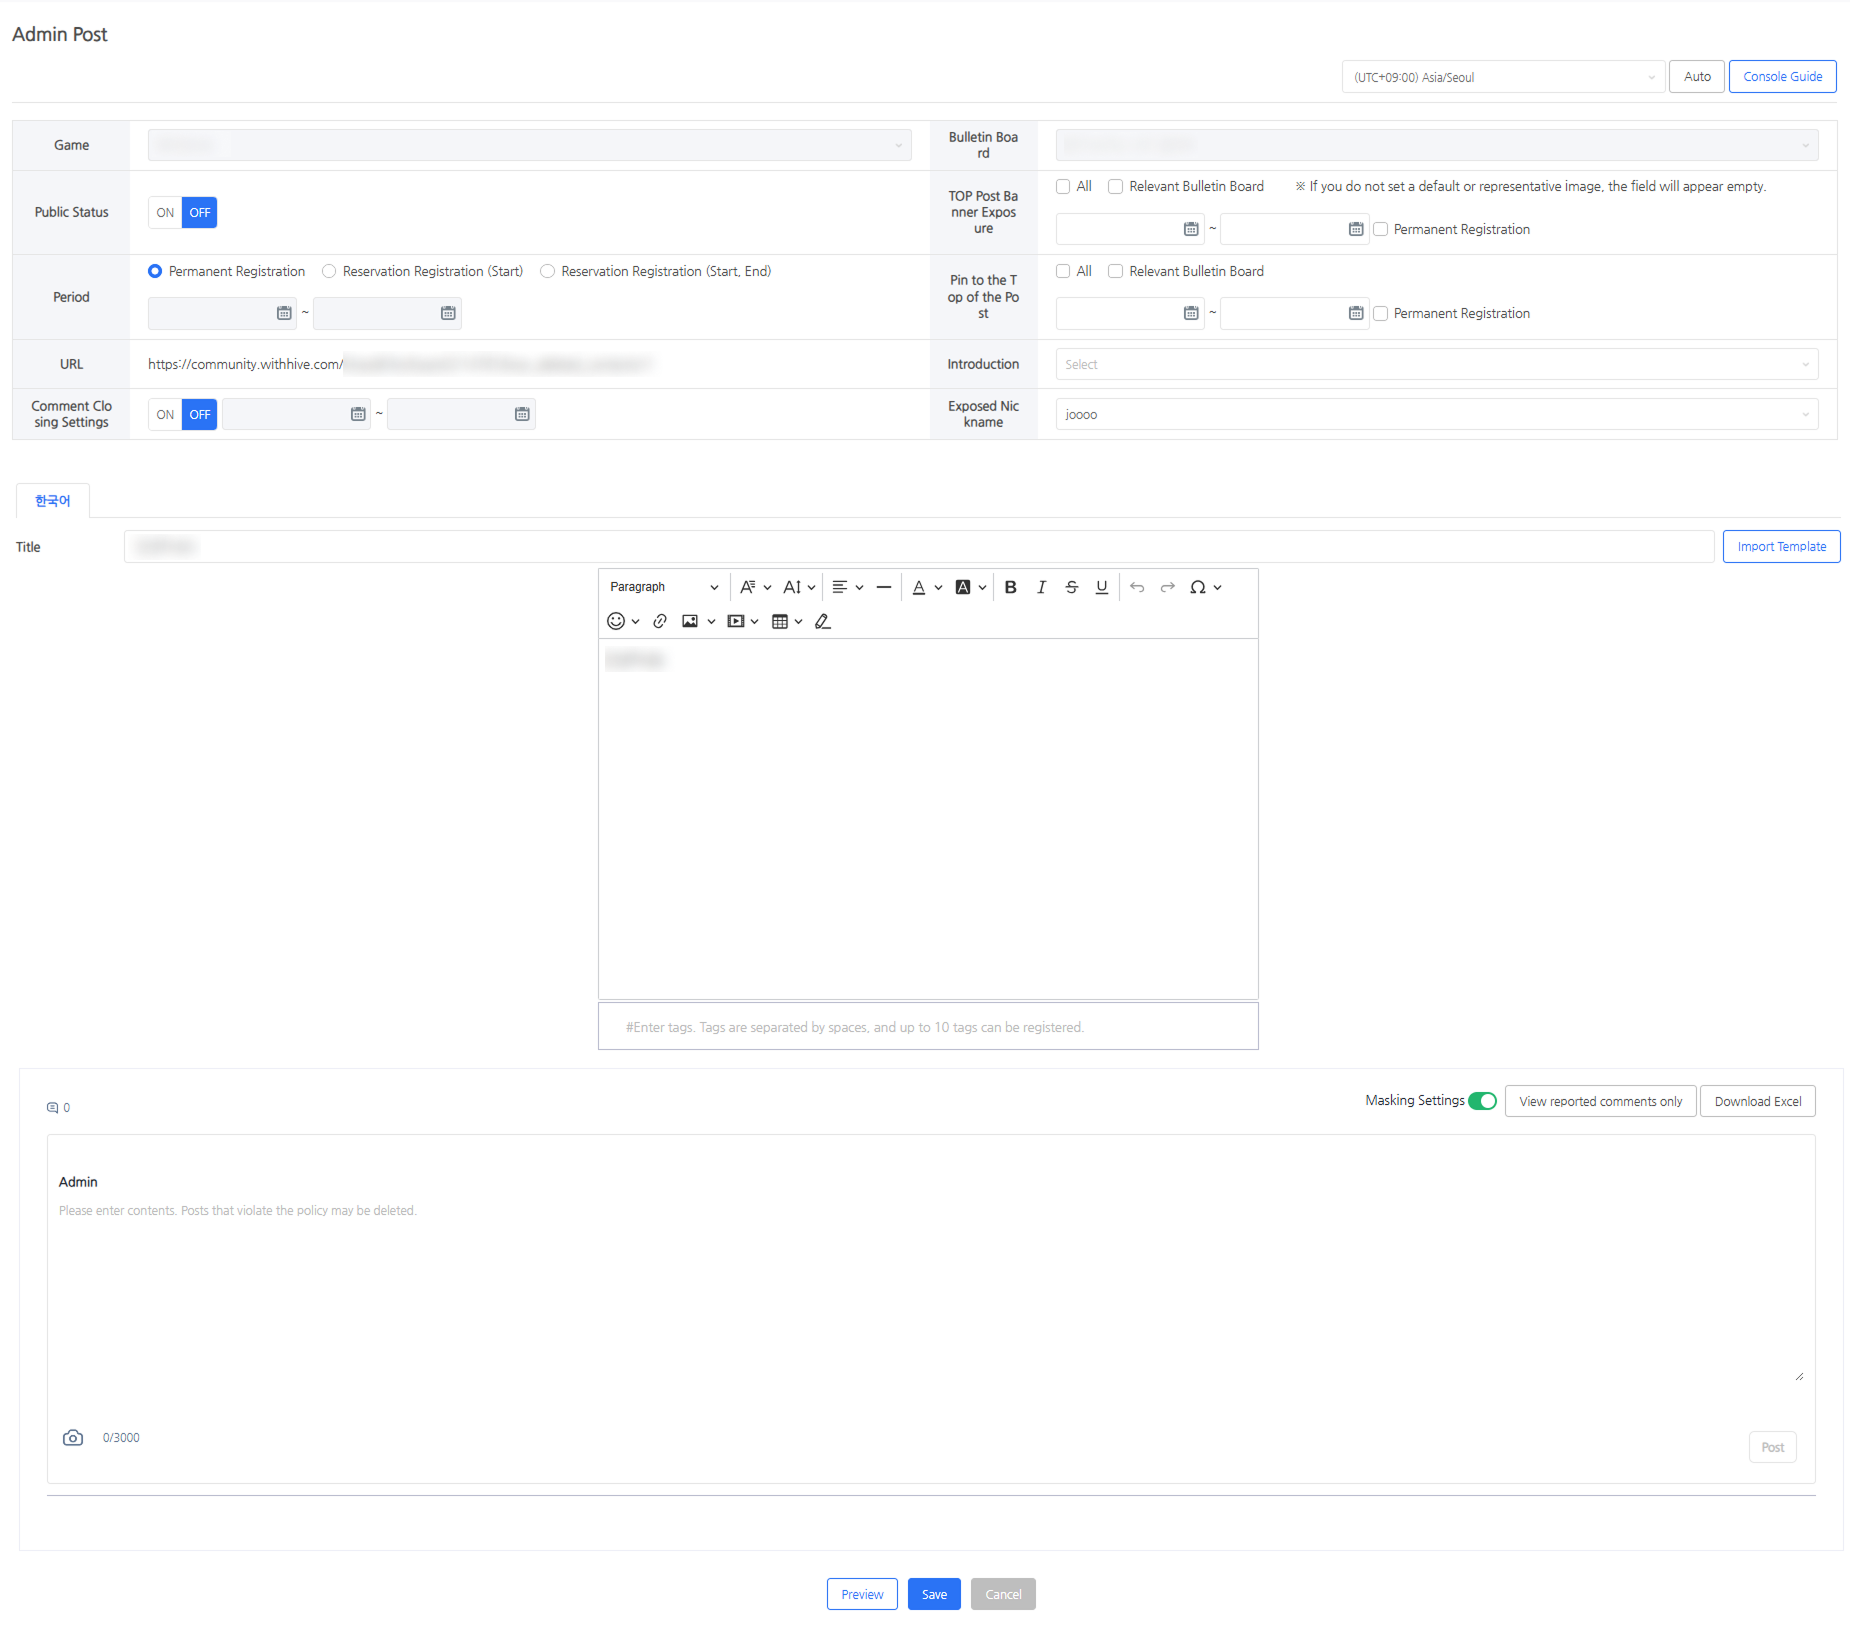
- Post Settings: Set public/private, pin to top, TOP post banner, and exposure period (permanent or scheduled).
- Scheduled posts automatically stop being exposed once the end date passes.
- Write Post: Enter different content for each language, or automatically translate the written content into the remaining languages using the AI auto-translation feature.
- If you leave the post writing screen during auto-translation, you must re-enter the post for the translation completion status to be updated.
- If you access a translated post and leave the screen without saving, only the original language content for which translation was attempted will be kept.
- Comment Management: Write comments, reply, set public/private, delete, and filter only reported comments or download them in Excel.
Post Push Notification
Utilize this when you write an announcement or event notice post and want to deliver it quickly to more users. Send notifications to the URL generated after registering the post.
➡️ Console Path: Notification > Push > Register Push Campaign > Register Campaign
How to configure:
- Copy the URL from the detail page of the registered post.
- Select the game to send the notification to in Notification > Push > Register Push Campaign.
- Click the [Register Campaign] button and configure notification settings.
- Select [UE] in Option > User Engagement, and select [Hive] and [Community].
- Paste the copied URL and click the [Save] button to complete the push notification registration. [Image]
For more detailed setup instructions, refer to the Campaign Registration Guide.